I love to eat so I cook. I cook to preserve a lost art form. I cook to show the people that I love and care about how much they mean to me.
Sunday, September 30, 2007
Coconut & Lime Cupcakes
A big plus of this recipe is that it does not waste any thing. While the cupcakes required egg whites, the yolks could then be used for the frosting! Next time I might soak the coconut for longer but it definitely added texture to the cupcake. The picture is so-so and doesn't do justice to the cupcake at all.
Makes 24 cupcakes
Ingredients -- Coconut Cupcakes
-3/4 cup wide strips unsweetened coconut
-1 1/4 cups unsweetened coconut milk
-1 egg
-3 egg whites
-2 3/4 cup cake flour
-1 T baking powder
-1/2 tsp salt
-8 oz unsalted butter, room temp.
-1 1/2 cups sugar
Preparation
1. Preheat oven to 350%. Prepare muffin pans with nonstick spray. If you want cupcakes to have smooth sides, don't use baking cups.
2. Soak the coconut strips in 1/4 cup of the coconut milk. Set aside.
3. Combine the remaining cup of coconut milk with the egg and egg whites.
4. Sift together the flour, baking powder, and salt.
5. Cream the butter and sugar together until pale and fluffy. Add the soaked coconut flakes.
6. Add egg mixture to the butter mixture in 3 parts, alternating with the flour mixture in 2 parts. Between additions, mix thoroughly and scrape down the sides of the bowl.
7. Pour the batter in those prepared pans, filling approximately halfway. Bake 18 to 20 minutes, until the tops are starting to color.
8. Let the cupcakes rest a few minutes, then turn them out onto a cooling rack and allow them to cool completely before icing.
Ingredients -- Lime Curd
-1 tsp water
-1/2 tsp unflavored gelatin
-1/2 cup sugar
-Juice of 3 limes
-Green food coloring
-Zest of 1 lime
-2 ounces unsalted butter, softened and cut into pieces
Preparation
1. Put the water in a small mixing bowl and sprinkle the gelatin over it to soften.
2. In heavy saucepan, whisk the egg yolks and sugar to blend thoroughly. Whisk in the lime juice.
3. Place the saucepan on medium heat. Stirring constantly (but not vigorously) with a wooden spoon, cook the mixture until begins to steam and then thickens. When you can draw a line with your finger across the curd on the back of the stirring spoon and the line stays without dripping, take it off the heat.
4. Strain the curd into the mixing bowl with the gelatin, and whisk to incorporate.
5. Put a drop of green food coloring in a small dish, and use a tooth pick transfer just a smidgen to the mixture (a full drop might make the mixture too dark). Stir to see the effect. Continue until you reach the desired pale green.
6. Add the zest and butter, and whisk until the butter is melted and everything is an even color.
7. Refrigerate 30 minutes, or until the lime curd has thickened to a spreadable consistency.
I'm ready for some much needed sleep!
Wednesday, September 26, 2007
Mushroom Galette
If you love mushrooms than this recipe is a must try. It's savory, fragrant, tasty, and good to look at. It is rather labor intensive and quite the production so share with friends who can appreciate the effort. On a whim I invited two friends over at the last minute and I was fortunate that they were able to come over since there was no way I could eat this all by myself.
Ingredients
-Galette Dough (see June 2007 recipes)
-2 Cups Quick Mushroom Stock (Deborah makes her own stock; I used store bought vegetable broth)
-2 to 3 tsp Dijon mustard to taste
-Aged red wine vinegar or sherry vinegar (made this so long ago couldn't tell you how much I used; a few T)
-1 large onion, cut into 1/2 inch dice
-2 tsp minced rosemary or 1 tsp dried
-salt and freshly milled pepper
-2 pinches red pepper flakes
-1/2 pound portobello or shiitake mushrooms
-1 lb large white mushrooms
-2 garlic cloves, minced
-3 T tomato paste
-1 T butter
-2 T chopped parsley
-2 T melted butter or beaten egg for glaze
Preparation
Make the dough.
Season the stock with a few tsp mustard and just enough vinegar to sharpen the flavors. Set aside.
Heat 1 T of the oil in a large skillet. Add the onion and rosemary and cook over medium heat until the onion is lightly browned, about 12 minutes. Season 1/2 tsp salt , a little pepper, and the red pepper flakes. Remove to a bowl.
Heat half the remaining oil in the same skillet over high heat. Add half the mushrooms and saute until browned, then season with salt and pepper. Remove to the bowl with the onions. Then repeat with the remaining mushrooms. Return everything to the pan, add the garlic and tomato paste diluted with a few spoonfuls of stock , and a tsp of the vinegar. Add the remaining stock, bring to a boil, then stir in the butter and the parsley. Cook for 5 minutes, then drain, reserving the juices.
Preheat oven to 400 degrees F. Roll out the dough for one large galette. Loosely fold the dough over the filling and brush it with melted butter. Bake until the crust is browned, about40 minutes. Heat any reserved juices and spoon them into the mushrooms.
Saturday, September 22, 2007
Zucchini Frittata with Marjoram
This particular recipe was so delicious, quick and easy, more so if you have a food processor to grate the zucchini. Of course, this recipe comes fromVegetarian Cooking for Everyone. Every recipe turns out very very well. There is zucchini everywhere now and it requires so very little to make it taste amazing. A little oil and a few herbs and you have a wonderful side.
Any vegetable would work for this recipe though zucchini is the only vegetable that would require the 20 minutes of salt sitting, as it draws out the moisture so the frittata is not watery.
Ingredients
-1 1/4 pounds zucchini, coarsely grated
- Salt and freshly milled pepper
-3 T olive oil
-6 eggs
-1 large garlic clove, crushed or minced
-1 T chopped marjoram (used basil instead)
-1/3 cup grated Parmesan
Preparation
Toss the zucchini with 1 tsp salt and set it aside in a colander for 20 to 30 minutes. Rinse briefly, then squeeze dry.
Warm half the oil in a wide skillet over medium-high heat. Add the zucchini and cook, stirring frequently until its' dry and flecked with gold in a few places, about 6 minutes. Transfer the zucchini to a bowl and wipe out the pan.
Beat the eggs with a few pinches of salt and some pepper, the stir in garlic, zucchini, marjoram, and cheese. Add the remaining oil to the pan over medium, and when it's hot, add the eggs. Lower the heat, cook for a minute until bottom is golden. Place a plate over the skillet, secure both plate and skillet with your hands, and invert the entire thing. Slide eggs back in, and finish cooking, another 2 to 3 minutes, and slide back on to a plate.
Eat!
Sunday, September 16, 2007
Raspberry & Chocolate Scones
I'm not writing out the recipe because it can be found at the Joy of Baking (click on title to take you the recipe).
Thursday, September 13, 2007
Cinnamon Rolls
Well, I did it! I made cinnamon rolls and they were awesome! I made them in honor of Carey, a friend who I've known for seven years and hadn't seen in five. These were amazing at 10 AM and again at 2 AM when we were up catching up on life! This recipe, minus the glaze, come from Vegetarian Cooking for Everyone.
Cinnamon rolls are relatively easy to make but the dough requires a bit of time. Since I wanted to focus on my friend, I made the cinnamon rolls one week in advance and froze them before letting them rise the 2nd time. I defrosted over night in the fridge and let them rise at room temperature for 2 hours before baking them.
Classic Sandwich Bread Recipe
-2 1/4 tsp active dry yeast
-1/2 tsp sugar
-1 cup warm milk
-1 T honey
-1/4 cup vegetable oil
- 2 1/2 tsp salt
-2 cups all purpose flour
-3 to 4 bread flour (used all purpose)
In a small bowl, stir 1/2 cup warm water and the yeast together, add the sugar, and set aside until foam, about 10 minutes. In a larger bowl, combine the milk, 1 cup warm water and salt, then stir in the proofed yeast. Using a wooden , work in the flour a cup at a time until you have a shaggy, heavy dough that leaves the sides of the bowl. Turn it out onto a lightly floured counter and gradually kneed in the remaining flour until the dough is smooth and resilient, about 5 minutes. Put it in a deep oiled bowl, turning it so that the top is oiled too. Cover with a damp towel and set in a warm place to rise until doubled in bulk, an hour or longer.
If you use this particular dough recipe, cut the recipe in half or make the full amount and use half for bread.
Filling
-1 T ground cinnamon
-1/2 cup packed brown sugar
- 1/2 cup chopped pecans or walnuts (didn't have any)
-1/2 cup raisins or currants
-2 T melted butter
While dough is rising, mix the cinnamon, brown sugar, nuts, and raisins in a small bowl.
Push the dough down. Roll half the dough into a 12 x 156 inch rectangle. Brush it with the melted butter, sprinkle the sugar mixture over the surface, and tightly roll up lengthwise. Slice into rounds about inch wide and set them in the butter- coated pan, cut side facing up. Don't hesitate to cram them together. Let them rise for 30 minutes.
If you want to freeze, place sliced rounds in the freezer. Don't let them rise the 2nd time.
Preheat oven to 375 degrees. Bake the roll in the center of the oven until well risen and browned, about 30 minutes. I don't know why but all the recipes said to invert them onto a serving plate --the sugar will have caramelized and coated the rolls.
Click here for the glaze recipe -- it may seem a little thick but if you slab it on after the rolls come out of the oven, it just melts and oozes. Very good!
Having never made cinnamon rolls, I found this video super helpful for rolling and cutting up the rolls.
Tuesday, September 11, 2007
Fettuccine with Creamy Red Pepper-Feta Sauce
In any case my friend of 15 years returned to California and to celebrate her return she came down for a weekend visit. I made another Ellie Krieger dish and it was decent. I followed the recipe exactly but we found that the sauce was missing that "umph" again. It was certainly tasty and easy to make but... I'm not sure. We added fresh basil and that helped but still felt that something was missing. Adding grated Parmesan cheese was a nice addition.
The big pluses of this dish are that it is has very few ingredients and comes together so quickly, say the time it takes to get the pasta cooked up. Two pots and a food processor are required, not too bad, especially if you have a dishwasher. Clean up is easy.
Sunday, September 09, 2007
Thai-Style Halibut with Coconut-Curry
The dish looks better than it tastes. I thought the dish was good but it was kind of missing that "umph" I look for in great food. I'm not sure what was missing, but I just didn't feel that satisfied. I definitely preferred the salmon to the rock fish and would suggest a stronger tasting fish. Or perhaps I should have started eating the milder tasting fish and working my way up rather than the other way around!
My Modifications
-Used salmon and rock fish(bought fresh but then frozen)
-Skipped the scallions because I didn't have any
-Used Thai Kitchen Red Curry Paste (which is what Ellie used on the show)
-Used vegetable broth
-Used frozen chopped spinach
I followed the recipe almost exactly as described except that I added an additional 1/2 cup coconut milk after a taste test nearly took my mouth out. It was too spicy! I did not use a low sodium broth so I didn't add salt but it really did need it and I forgot to salt the fish. So add the salt. I also used frozen spinach and rather than cooking it separately and having yet another dish to wash, I just added it to the pot when the fish was nearly finished cooking. You could do this with fresh too, I'm sure! Perhaps using a little less red curry paste would help.
It is quick, easy, and decent.
Monday, September 03, 2007
I've Been Tagged!
- Players must list one fact, word or tidbit that is somehow relevant to their life for each letter of their first or middle name.
- When players are tagged they need to write their own blog-post containing their own first or middle name game facts, word or tidbit.
- At the end of their blog-post choose one person for each letter of your name to tag.
- Don’t forget to leave a comment telling them they’re tagged, and to read your blog.
- If I've tagged YOU, please join in on the fun!
Nancy Drew mysteries were a childhood favorite. Could read one a day. Today, I don't read as many mysteries but am some times draw to Dateline's murder/court room trial shows and the various Law & Orders.
Ina Garten is one my favorite Food Network personalities. Prior to her career in food, she work worked for the federal government which is somewhat similar to the line of work I do now.
Red is one of my favorite colors. So are orange and magenta. Color makes me feel happy and is an expression of my personality. I try to wear color every day though you wouldn't know it by my recent pictures.
Mango sticky rice is one my favorite desserts. Love the sweetness of mangoes mixed with soft sticky sweet rice. Could eat it every day!
Arrogance is a quality a I greatly dislike in people.
Lilies, particularly tiger lilies are a favorite flower. The beauty of the flower is enhanced by the amazing scent. I also adore gladiolas. Flowers bring me joy.
America's Test Kitchen is one of my favorite shows. They love making recipes perfect -- I can get behind that. Their tips and tricks are great too. I am also fond of the all their equipment tests.
You're it!
- Homemade with Love
- Kevin of Closet Cooking
- The Culinary Princess
- Erik of Baking in Oregon
- Andrea of Rookie Cookery
- Judith of Shortcut to Mushrooms: A Vegetarian Foodblog
- Take it or Leave it
- Paul of Cookies, Et Cetera
Thursday, August 30, 2007
Blueberry Pie, Backyard BBQ, and Burgers
go together like bees and honey. Actually, many foods go with backyard BBQs. I was fortunate to make something that started with the letter B so that the title of my entry could be full of them. This past Sunday, Ron and Ursula, he's in the picture above, hosted a backyard BBQ to celebrate summer and the finer things in life. In honor of such an event, I made blueberry pie (see Jan 2007 for filling details; see May 2007 for pie crust). The second time around, this pie was even better.
I found my recipe on cook's illustrated and I disagree with one step which is to wait 15 minutes to roll out the dough if it's been in the fridge. When I have waited, I find that the butter softens before I can roll out the dough so this time I rolled it out straight from the fridge and it was so much easier to work with and I felt that my pastry was even more flaky, light, and crisp. The pie went so fast the hosts and I almost didn't get any!
Question: I did all this fancy crimping of the edges and it clearly does not show. Now, how does one get the crimping to remain crimped for beautiful results, like they do in bakeries?
The other picture is of Ron holding up chicken apple sausages trying to tempt me into submission. I have been mostly vegetarian for years but the past few months I've been tempted by meat and have indulged when eating out with friends. A few weeks ago, I went to Korean BBQ where I had great fish and thought I had reached my meat saturation when I wasn't even tempted by the meat on the grill. The next day I went to a local festival and the craving for meat returned when I saw corn dogs. There's nothing like meat on a stick. Last week I came to the conclusion that I could not make the decision to be vegetarian until I have fried chicken and steak. I sort of had friend chicken last Friday and it was darn tasty. My friends are convinced that if I have steak, I'll never go back. In any case, an hour later, I had a sausage. It was SO good. I compensated by eating lots of fruits and vegetables. Good things do come in small packages!
Yes, there were burgers but I didn't have any. They looked amazing though.
Monday, August 27, 2007
Pizza
Too tired to write much else though I am seriously thinking about making cinnamon rolls now that I know I can deal with yeast!
Sunday, August 19, 2007
Foodie BlogRoll
I must also thank Kevin, of closetcooking, for helping me keep all my entries single spaced! He cooks every day and blogs about it. It's nothing short of amazing.
Friday, August 17, 2007
Tomato-Basil Pesto
Makes about 3/4 cup
Cooking Time: 10 minutes
Ingredients
-2 garlic cloves,
-salt
-1 1/2 cups loosely packed basil leaves
-1/3 cup extra virgin olive oil (use slightly less)
-1/2 cup freshly grated Parmesan
-2 to 3 T tomato paste
Preparation
Pound the garlic with 1/2 teaspoon salt in a mortar until smooth. Chop the basil in a food processor and gradually add the oil to make a coarse puree. Remove and stir into the garlic with the cheese and tomato paste.
Wednesday, August 15, 2007
Chocolate Cupcakes with Chocolate Frosting
I adore home made cupcakes; can't get enough of them; could eat them for every meal. I always love sharing my food with others but there's something about cupcakes that makes me a little selfish. Every tiny morsel brings back grade school memories when all the moms would bring cupcakes to school to celebrate their child's birthday. I greatly disliked my ugly little plaid uniform, knee high socks, and blue velcro tennies that I was forced to wear 5 days a week but lived for those birthdays and other school parties. Those moms, especially my own, were darn good bakers.
I decided to make chocolate. Having recently tasted chocolate cupcakes from the "hot" local bakery, I decided to make my own. I didn't think the ones I tried were all that -- they looked good but didn't taste like chocolate, kind of like a really attractive person with no personality. This recipe is kind of annoying with the whole X cup + Y T bit but you do what you have to do to get a good cupcake. You bring it! This recipe was great. Light, fluffy, moist, and chocolate-y. I loved the use of melted chocolate rather than cocoa powder.
This recipe is by Nancy Kux of Nancy's Fancies which was written up in the SF Chronicle.
Ingredients
-1 1/2 ounces bittersweet chocolate (use Pound Plus from Trader Joe's; inexpensive, high quality)
-1 cup +2 T cake flour
-3/4 tsp baking soda
-1/8 tsp salt
-2 1/2 ounces unsalted butter, at room temp.
-3/4 cup + 2 T sugar
-1/2 tsp vanilla
-1 large egg, at room temp.
-1/2 + 2 T water
-chocolate frosting (see July 2007 entries)
Preparation
Preheat oven to 350°. Line a 12-cup muffin pan with paper cupcake liners.
Melt the chocolate in a double boiler over warm water. Set aside to cool slightly.
Sift together the flour, baking soda and salt.
Using an electric mixer, beat butter with sugar for about 2 minutes, until fluffy. Add vanilla and egg. Beat on high speed for 4-5 minutes, scraping down sides of bowl from time to time. Slowly pour chocolate into butter mixture, beating on medium speed until fully incorporated.
Add the dry ingredients alternating with the water in 3 additions, beginning and ending with the dry ingredients, and scraping down the sides of the bowl after each addition. Mix until fully combined. Spoon the batter into the cupcake liners, filling each about three-quarters full.
Bake for 20-25 minutes, until the top of the muffins springs back when lightly touched in the center, and a wooden toothpick inserted in the cakes comes out free of uncooked batter.
Let the cupcakes cool in the pan for 5 to 10 minutes before transferring them to wire racks to cool completely.
Yields 12 cupcakes.
Monday, August 13, 2007
Red Peppers Stuffed with Corn and Fresh Mozzarella
Bell peppers are naturally abundant in August which inspired me to make this dish which I found in Vegetarian Cooking for Everyone. I went to my local farmer's market where I spent a rather leisurely Saturday morning perusing all the produce twice before making purchases for this dish. It's amazing the little tidbits you learn about produce and the farms they grow on. I love the stories people have to share. I also love all samples; I was stuffed by the time I finished shopping.
When I read the recipe it seemed like a lot of stuffing for just 2 peppers but I used almost every single morsel of stuffing. Those peppers have bottomless pits. There was probably about a half a cup left after stuffing all the peppers. The stuffing alone could be a meal in of itself. Quick, simple, easy, and delicious; this recipe uses some of summers finest ingredients (except the garlic pictured).
My taste tester and I disagreed on the salt level of the dish. When I tasted the filling, I felt that it had enough salt from the cheese so I didn't add any as Madison's book suggests. But after eating one of the peppers in the final stage, I felt that I should have added a bit of salt to enhance the flavor. But the taste tester thought the salt level was perfect. I say add the salt but taste the filling first, after it's cooled a bit.
Makes 2-4 servings
Cooking Time: 30 minutes, Prep is about 15
Ingredients
-2 red bell peppers, halved lengthwise
-2 T butter
-1 bunch scallions, including the firm greens, thinly sliced
-2 1/2 to 3 cups kernels from 5 ears of corn (common on, Deborah! Too much work. I used frozen)
-2 tomatoes, peeled, seeded, and diced (skipped the peeling, etc.)
-1 fresh mozzarella cheese, 4 to 5 ounces, finely diced, or 1 cup grated Cheddar or Jack (used Jack)
-2 T finely sliced basil leaves
-2/3 cup fresh bread crumbs
-Salt and pepper
-Paprika
Preparation
Preheat oven to 375 degrees. Lightly butter a baking dish just large enough to hold the peppers. If the red peppers won't stand upright, slice them lengthwise in half, leaving the stem end intact. Steam them for 5 minutes and set aside.
Melt the butter in a large skillet. Add the scallions, corn, and tomatoes and cook for 3 minutes over medium heat. Turn of heat and stir in the cheese, basil, and half the bread crumbs. Season with salt and pepper. Fill the peppers and top with the remaining bread crumbs. Set them in the prepared dish, add a few tablespoons water to the dish, cover, and bake until the corn is hot and peppers are cooked, about 25 minutes. Uncover and brown the tops under the broiler. Dust with paprika and serve.
Now get out and enjoy your local farmer's market.
KM, you were "by my side" while I shopped. Te pierdo.
Sunday, August 12, 2007
Making Eggs in a Basket
Ingredients
-Eggs (obvious)
-Bread (preferably wheat)
-Butter or oil (butter tastes best)
-Salt and pepper to taste
Preparation
Heat pan on medium heat with butter/oil. Make a hole in the bread using a cookie cutter. The traditional hole is circular but as you can see from the pictures, I made a star to make it more fun! Place bread on pan and then crack egg into the hole. Season with salt and pepper. After a few minutes or so, when the underside of the bread is toasted, flip. They key is to have the eggs and toast cook at the same rate. You don't want the eggs done before the bread is toasted.
I hope these instructions help!
Saturday, August 11, 2007
Eggs in a Basket
are the classic camping food. I was partly inspired by all my friends' camping trips which I sadly could not participate in due to all my end of July work jaunts. There's something very comforting about a piece of warm toast with an egg in the middle. After a few challenging work weeks, I decided that I didn't need to wait for my next camping trip to enjoy such a treat.
Hearing about camping trips and stories, of course, jogged my memory back to the 10th grade. We were on our class bonding trip in Yosemite. I was sharing a tent with at least 4 other girls. Some boys thought it would be humorous to surround our tent with cookies so that the bears would come, and indeed they did! What were they thinking?! Did they not realize that we knew their plan before they did it? We came up with the buddy system to mitigate scary situations. My buddy's time came, we peaked our heads out, saw the glow-in-the-dark bear eyes, and ran for it. The bears were harmless enough. While we didn't bond with the guys in any way they would have liked, we girls certainly did. After a sleepless night and a 4 AM wake up call for the 18 mile hike to Half Dome, we were a lot grouchier than the bears. The cute rugged scruffy older brother of one our teacher's handing us eggs-in-a-basket with a smile slightly lifted our spirits and made our little girl hearts palpitate; re-energized we set out, beating the guys to the top was priceless!
Sunday, August 05, 2007
Peach Galette
Peaches are summer's nectar. Their fragrance nature's perfume. The bright orange yellow blush reminds me of sunsets in polluted cities I lived in and bygone days when I would pass an entire afternoon picking peaches off a friend's tree, the juices dripping down my face while we stuffed ourselves silly, to the point of illness. I was deliriously high on sugar.
To show my gratitude to a book club member for helping me out a few months ago, I decided to make peach galette to share while we discussed Middlesex this evening. I actually wanted to make apricot galette but their season ended in July, and the taste test at Whole Foods quickly convinced me that I needed to move on to better fruit. After a discussion with a friendly shopper, the produce guy, and three taste tests, I ended up with more peaches than I knew what to do with. Much to my surprise, the best tasting peaches at Whole Foods were the conventionally grown ones; they were also $2 a pound more expensive than the organic ones! It was so worth it.
The galette was delicious. I thought it would be super sweet because the peaches were so very sweet, plus I added a few tablespoons of sugar but it was simply scrumptious if I do say so myself. I bet this would be great with nectarines. It's their peak season too. Eat fruit, be happy! At the very least, buy lots of fruit, cut and freeze to make summer treats in the dead of winter when such luxurious fruit is not available!
Ingredients
-Galette Dough (see June 2007 entries)
-1/3 cup dry bread crumbs (used about a 1/2 cup; see previous entry on prep)
-3 to 4 ripe peaches, sliced thinly
-3 T butter, melted
-3 T sugar or more to taste
Preparation
Preheat oven to 425 degrees F. Roll the dough into a 14 inch circle (do this on top of parchment paper). Leaving a 2 inch border, cover the center of the dough with bread crumbs (necessary to keep crust crispy with all the juices). Arrange peaches over the crumbs, making a single layer. Fold the edges of the dough over the fruit, overlapping to make wide pleats. Brush the dough with butter and drizzle any remaining butter over the fruit. Sprinkle both the crust and peaches with sugar. Bake for 15 minutes at 425, then reduce heat to 375 and continue baking until fruit is tender and crust is browned, 20 to 25 minutes more. Remove and let cool to lukewarm before serving.
So I skipped the butter step which I don't recommend. It really does help the crust brown more easily. Seriously, after 1 1/2 sticks, what's another 3 T. Don't skimp on the butter!
If using apricots, select 12 large, ripe, fragrant ones.
Saturday, August 04, 2007
Dry Bread Crumbs
Homemade dry bread crumbs are to die for. The lack of uniformity, scent, rough texture, and taste made me a convert today. They are so easy to make. Not as easy as buying them but it's worth the extra effort.
Ingredients
-Any type of bread (used La Brea French bread)
Preparation
Slice bread bread and place on a sheet pan. Set in oven at 200 degrees F until they're dry, crisp, and golden brown, 30 to 45 minutes. Let cool, and the grind in a food processor until fine. They will keep for weeks in an airtight container. Two slices bread yields about 1/2 cup bread crumbs.
So having a renter's oven, after 45 minutes the bread was crispy and not brown, so I increased the temperature to 350 or so, and left them in there until they were quite brown, probably another 20 minutes or so. I lost track of the time because I was singing to some rather cheesy 80s songs. Once I get going, I kind of can't stop.
Anyhow, homemade leave store bought crumbs in the dust!
Friday, August 03, 2007
Susie's Cookin'
I have to say it is quite the treat and such a luxury when any one cooks for me. Among my friends, I cook the most. So generally when I have people over I cook, otherwise we go out. And while I definitely love to cook and share food with friends, it is so nice to eat meals prepared by others. They taste better when you haven't slaved away! At Susie's, there was nothing to be done. I walked in and dinner was served. No prep, no dishes, nothing. It was just what I needed.
Being with Susie made me think about my other cooking friends and influences. Certainly my mom. She always prepares great food. Among friends, I can count all my cooking friends on one hand: Susie, Sam, Dustin, and Roneil. Come to think of it, all them live in the Midwest, except for me. All but one attended the U of C. I'm the outlier. What does that say?
All my cooking friends have been doing so since at least college, if not before. I was the late bloomer. Dustin knows more about Indian cooking than I do though he can't tell the difference between 2 T and 2 tsp to save his life! In our final two years of college, he lived one block away which was great for me. Once, he came over with two pots in hand because he was in the middle of cooking, and his stove quit working, could he use mine. Then there's Sam, the baker extraordinaire. I remember when her folks sent her a pumpkin they had grown in Maine for our Thanksgiving meal. She baked it and used the puree to make pumpkin muffins which I promptly stuffed myself with. Roneil was the king of vegetarian cooking and he never ever looked at a recipe, not once! He fed me happily and regularly when we lived in DC. He just threw things together and the food always tasted good!
I cook fairly regularly now, and when I reflect on how it is that I got to here, I look at my family and friends. It's not like any of them sat me down and said that I had to cook more. They did what they always did with passion, flare, humor, and style. They shared; it rubbed off and completely inspired me to do the same. I tip my hat to all of you.
Thursday, August 02, 2007
Capitol City Brewing Company - Capitol Hill
So we ordered a round of beers which was great. My colleague and I had the pale ale, which we liked, while one friend had the raspberry wheat, which had a rather enticing magenta tint to it. There's something about the color of a drink...Over drinks, the Peace Corp stories from Paraguay started to flow like Niagara falls in the spring. There was talk of eating poisonous foods, creatures burying themselves under skin, and shaving heads. While the stories were totally engrossing and funny, I was glad we weren't eating just yet because some of them made my stomach churn just a little. There were lots of references to looking up things on Wikipedia which I will once I finish writing this up. The company was so fine. It's amazing how good company can make you over look the food you're eating.
Dinner came. I'm really careful about what I order. While I was attracted to the crab cake sandwich, I didn't think it would be their speciality so I went with what I thought could not be messed up, fish tacos. The tortillas were dry, actually I think stale was more like it. The fish was fried. I love fried fish even though it's so bad for you but this fish didn't taste like anything. The lettuce was skimpy and the cheese, cakey. It was rather bland. Don't order the fish tacos.
Monday, July 30, 2007
The Nest Lounge: Red Robin Bar
The sandwich was awesome. The chef split the sandwich for us and put it on two plates so that we wouldn't have to fuss and make a mess, which I did plenty of while eating. The tuna refused to stay between the bun. It was thoughtful of them to do so particularly since we didn't specifically request it. The tuna was thick and cooked to perfection. A very good sized sandwich. I'm glad we shared. The wait staff, very nice. The sandwich was $15 without tip. I would eat here again, for sure.
Sunday, July 29, 2007
Tea -- Drake Hotel
If I haven't already made it clear, me encanta Chicago. Chicago is a fantabulous city, enhanced by my amazing friends. Chicago is home to a laundry list of greats: food, hot dogs, people, neighborhoods, baseball, restaurants, architecture, history, art, live music, comedy, culture, museums, weather (yes, even the weather), and tea-time.
At 10 AM, I'm on the phone with Camish.
Me: Susie's made reservations for us to have tea at the Drake?
C: What?! Imagine the "Wha'choo talkin' 'bout, Willis?" tone with her right eyebrow raised, eyes looking down her nose, and one hand on her hip. The classic Camisha move was in full force. You mean like what the Brits do? Skeptical but game she inquired, What do I wear?
Me: The classic tea outfit, of course. Jeans, t-shirt, flip flops. I laughed.
We arrived for our 1 PM seating, the lobby infused with the scent of tiger lilies, my favorite flower. The menu is fixed except for the tea. I had Darjeeling, while the troublesome two had wild blackberry and ginger peach. Once again, I set aside my vegetarian ways to fully experience tea-time.
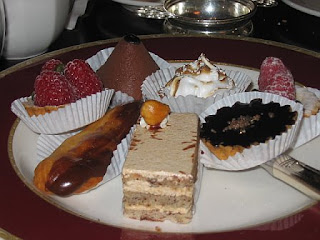
We gave those trays a once over and were skeptical. How could those dinky little sandwiches with no crusts (top plate) and three slices of banana nut bread and currant scones (2nd plate) possibly fill up the 3 biggest eaters in Chicago-land. We dug in, all the while being regal and refined.
I started with the tomato and cheese on white bread. It was good, very good, in fact. Then I went for the ham and asparagus sandwich, which actually looked like sushi because it was rolled. It was better than the tomato/cheese. My favorite, hands down, was the roast beef on wheat, which had very tasty mayo. In between the savories, I dipped down to try the scones, which were excellent. Personally though, I just loved the savory and would have preferred to have more it than the sweet, which says a lot considering how much I adore sweets and butter. Much to our surprise, we were stuffed before the dessert plate came out but that did not prevent us from chowing down even more! The flavors are so wholesome, so satisfying, and so rich that you become incredibly full though everything is rather small.
We ate, chatted away, laughed, took a break, ate some more, made fun of the woman seated next to the fountain who took her tea a little too seriously by wearing pearls and a big ol' hat (think Queen of England), and bemoaned the fact, and I mean bemoaned, that our group was incomplete without Sam, the fourth friend in our circle. We raised our glasses to her.
Camisha was so smitten with our activity she couldn't stop talking about it; she's a convert and has developed a whole theme for her daughter's birthday. As she said, "If this doesn't put a little bourge in Morgan, I don't know what will!" It was such a memorable and fun way to spend the afternoon. Every time I think about tea, I can't help but smile. We''ll alway have this memory.
Tea at the Drake is about $35/person, including tip. While the tea was great, Susie swears by the one at the Peninsula Hotel, which is also slightly less expensive. On Sunday tea (at the Peninsula) commences at 4 PM, a little late. Try Saturday! Reservations are not necessary.
cr, sb, y sg vosotros amo.
Saturday, July 28, 2007
White Castle -- Chicago
Dare I say it? I ate White Castle at 3 AM on Saturday morning and it was so good. You see all that food? A mere $8. We had a mini burger, chicken rings, and onion rings. White Castle is a Chicago institution, like In 'N Out Burger is to California. The little burgers are a perfect size. They're even smaller than the McDonald's burger. Perfect for little tots.
I keep eating meat. It's a phase, I think. It's kind of like the rebellious teenage phase. I just need to get it out of my system. I think White Castle did me in.
Wednesday, July 25, 2007
Adesso -- Chicago
On Saturday afternoon, I met a friend that I hadn't seen in seven years for lunch. Funny how life works. While we lived and worked in the same city for 2 years, we never ran into the other. In any case, we met at a small but very cute restaurant in the Lakeview District of Chicago, just south of Wrigley Field. It's a cute hip area.
We sat outside because the weather was a fabulous 75 degrees with no humidity. Truthfully, I really wanted humidity. I kind of miss it. Over lunch we caught up on our lives and what each had done. He had a chicken arugula salad with Parmesan cheese and I had the mushroom and goat cheese frittata with a salad, which was one of the specials for the day. I enjoyed my frittata but I don't think it was better than the frittatas I've made. In fact, I would argue that it was probably too egg-y, and didn't have enough mushrooms. But over all it was good.
For dessert, we shared tiramisu made at the restaurant. Of course, after ordering it, I remembered my lactose intolerance. The tiramisu was excellent. We had tried to order wine but the restaurant was located across the street from a church and there is an old city ordinance that doesn't allow restaurants to sell alcohol if that's the case. However, you are allowed to BYOB, which is true of the other restaurants in the vicinity. After 4 cups of decaf, I was completely caffeinated.
We probably spent 2+ hours and I never once felt rushed. I would definitely eat here again.
Tuesday, July 24, 2007
West Indian Food -- Brooklyn
After getting a play-by-play on all the dishes, I got a little salad (not West Indian), sweet potatoes, goat curry, and beans and rice. It was amazing. Deliciosa. Then I noticed the salmon on my client's plate and was bummed, but he kindly shared a piece so my momentary anxiety on having missed out on some thing special dissipated rather quickly. In total, my lunch with a bottled water was under $6! The amount is determined by weight.
I'm Indian but didn't know what West Indian food was. Actually, I still really don't. I'm much more familiar with the North/South distinction which I could write a dissertation on. But I know that in Trinidad, Guyana, and the Caribbean in general, there are lots of Indians. In fact, I learned that Guyana's population is 50% Indian. So West Indian food seems to be a combination of classic Indian dishes like curries mixed with traditional Caribbean food like sweet potatoes, plantains, etc. I know I'm not describing all the nuances so I dare not go further.
It was so worth it to set aside my mostly vegetarian ways to eat well.
Sunday, July 22, 2007
Morimoto -- Manhattan
I decided to opt for the pre-fixed sushi lunch (which isn't terribly creative at all). The lunch which usually goes for $35 was $25 and very generous. The meal started with a mixed green salad and miso soup followed by the 6 pieces of spicy tuna roll and 8 pieces of nigiri, including eel, salmon, tuna, yellow tail, tuna, shrimp, and two other pieces of nigiri I can't remember. All of it was delicious.
Our brownie dessert was pretty good though I think I could make better brownies. But it was nice to have something sweet after all the salt.
While it was all very very good I have to say it wasn't anything that I hadn't experience before, in terms of quality, which was excellent. The ambiance was, of course, very New York. At our 2 PM seating the place was hopping. The bathrooms were unlike anything I've experienced before, with heated and adjustable seats. There were so many buttons, I didn't know what they were for. And the downstairs bar was something reminiscent out of Star Wars IV: A New Hope. Or at least, I could imagine it being that way.
I was happy to have done it, and would do it again, even if I had to pay more.
Food & Travel
In any case, after 2 7 AM mornings, and no breakfast or lunch on Tuesday before my flight, I was ravenous when I arrived at SFO. I was determined to eat well. I walked by Klein's deli (though I later picked up a garden salad for the flight) and Guava Java (a definite no), and found Sankaku in the United Terminal. I recently read that sushi is one of the most healthful things you can eat while traveling but was reluctant to try sushi at the airport. Instead, I opted for a salmon bowl which came with a nice piece of salmon over a bowl of rice. Very simple and tasty. At $9.50, a good deal compared to other less tasty options.
Saturday, July 21, 2007
Rae, Philadelphia's 30th Street Station
On Wed. afternoon we met clients at Rae at Philadelphia's 30th Street Station. Rae is this cute uber modern restaurant attached to the station itself so if you're waiting for your train; it's a good place to have drinks, meals, or snacks. The sides of this restaurant are large sheets of glass from which you can people and car watch. It was poring out so it was nice not to have to step out of the station to get to the restaurant.
We arrived a t 3:30PM. A little too early for dinner so we shared a Caesar salad, had coffee and iced tea, and munched on this hor dourves table that was available to patrons. It was AWESOME! A variety of cheeses, fondue, breads, crackers, fruit, marinated figs, and salamis were served. The marinated figs, I hadn't tasted anything like them. They were amazing. The service was friendly. I recommend this place if you're taking the train to/from Philly. The dinner menu looked a little pricey but the food I saw other people eating did look delicious.
It was a good thing my colleague and I ate those snacks. While we returned to Manhattan at 7 PM we didn't get back to our hotel until 9 PM because of the steam pipe incident at Grand Central Station. Our hotel was only a few blocks away and since every street was blocked off we had to walk around in a rather large circle to go the mere 5 blocks we would have otherwise!
Sunday, July 15, 2007
Blueberry Scones
I just adore scones but don't love that they don't taste so good when I've purchased them in stores, restaurants, and coffee shops. They're dry, too sweet, hard as rocks, and not fluffy. Having wanted to make scones forever, I decided to forge ahead after a friend shared her recipe. Plus, Sunday mornings scream scones with a nice cup of coffee or tea. The recipe, like my friend, is kick-ass, and I think I hit a grand slam in preparing them. They were perfect -- slightly crispy on the outside, soft and moist on the inside, and just perfectly sweet. The home was filled with the smell of butter and blueberries. What a way to wake up!
I've made low-fat scones and lived to blog about them. I shouldn't have. They weren't nearly as good. Not even close. The fat is what makes a scone successful. And if you use good fats, then a scone isn't nearly as unhealthy as one would think.
Ingredients
-3 cups flour
-4 tsp baking powder
-1/2 tsp baking soda
-1/2 tsp salt
-8 T butter
Cut butter into the dry ingredients listed above (until coarse, you want little chunks of butter the size of peas). Stir in wet ingredients listed below:
-1/2 cup sugar
-1 large egg, beaten
-2/3 cup buttermilk (I used low fat only because that was the smallest container available, otherwise I would have gone full fat)
-1 cup fresh or frozen blueberries
Stir until just mixed. Divide dough into two parts, and pat each into a circle. Cut each circle into 6 wedges. Bake at 375 degrees for 20-25 minutes until brown.
The dough is very sticky so I would flour your hands when you pat down otherwise you'll end up with a lot of dough on your hand, like I did. Don't be tempted to add any more liquid even if you think the batter is dry. It will come together, especially if you use frozen blueberries and they start to thaw a bit. Adding more liquid will just make the dough that much more sticky.
Enjoy!
Monday, July 09, 2007
My Babies
Wednesday, July 04, 2007
Vanilla Cupcakes and Chocolate Frosting
For our reunion, I decided to take it up a notch and make cupcakes from scratch because anything from a box no longer makes the grade, unless you're in elementary school.
I made vanilla cupcakes and frosting previously (December 2006 recipes) but given our predilection for chocolate, I decided to go for a vanilla cupcake with chocolate frosting. The frosting was amazing. Not too sweet, not too stiff, and tasted like true chocolate. Home made frosting is the opposite of anything Duncan Hines produces.
While I thought the frosting I made in December was good, it is even better now. Partly, it was the addition of chocolate, but mostly I think it was the weather. In December, though I whipped the heck out of the frosting, and I mean beat it for a solid 7 minutes, I just could not get it to be lightly and fluffy. And while I live in a relatively mild climate, it makes a big difference. Today, in the middle of a heat wave, the frosting came together so quickly. I couldn't believe butter could be so airy!
Ingredients for Frosting
-1/2 cup unsalted butter, at room temperature (let sit on counter over night)
-1 and 3/4 cups powdered sugar
-1/4 cup cocoa powder (use unsweetened)
-2 T milk
-1 tsp vanilla
Preparation
Beat butter until creamy, about 30 seconds. Add powdered sugar, cocoa, milk and vanilla, and beat on high until light and fluffy, about 5 minutes, if not longer.
Yields enough frosting for 12 cupcakes very very generously. Leftovers can be kept in the fridge for a week or frozen indefinitely.
These cupcakes were really very good, made even more sweet by sharing with a friend who knows you so well that no words are necessary to feel understood.
Monday, July 02, 2007
Fettuccine with Sauteed Peppers and Parsley
So I came home to take the offensive taste out of my mouth. Really, I made this dish because a friend was coming over for dinner, and as usual, I decided to make a guinea pig out of her. This dish was really good, has few simple ingredients that you would most likely have in your fridge, and takes fewer than 3o minutes to bring together. I just love love love dishes that come together so quickly. It's also colorful, healthy, and so pretty to boot!
The parsley is key because it really brings the dish together, and it's a good recipe for using a lot of parsley so you don't have to feel about letting any go to waste because most likely, you won't! You really cannot have enough parsley in this dish.
Once again, this recipe comes from Vegetarian Cooking for Everyone.
Serves 4
Cooking Time: 30 minutes or less
Ingredients
-4 large bell peppers (red, yellow, and orange, or all one color)
-4 T olive oil
-Salt and freshly milled pepper
-1 pound fettuccine
-2/3 cup chopped parsley
-Freshly grated Parmesan, optional
Preparation
Heat large pot of water for the pasta. Meanwhile, cut peppers into strips about as wide as the fettuccine. heat the oil in a large skillet over high heat, then add the peppers; give a stir, let them sit for a few minutes, and stir again. Continue cooking this way for about 10 minutes. The peppers should caramelize along the edges, soften , and yield their juices but not lose their sins. They will smell sweet. Season well with salt and pepper, add a ladle of pasta water, and turn the heat low.
Add salt to the boiling water and cook pasta until al dente. Scoop past out and add it to peppers, allowing some water to drip into the pan. Raise the heat and toss the pasta and peppers with the parsley. Plate dish and add cheese.
Sunday, July 01, 2007
Open Open Open
You see things that are subconsciously understood but then you're confronted with it. I was waiting for my mint tea to cool down when I noticed that staff were stocking up on muffins, etc. and they were coming out of an ugly brown cardboard box covered with plastic. Where else are their treats supposed to come from. I know that Starbucks doesn't make these items from scratch and they're probably manufactured at some plant in some unknown location that I've never been to yet their website claims to buy their baked goods from local suppliers. But then why does every Starbucks more or less have the same set of baked goods? Perhaps there's a new definition of local that I missed!?
Thursday, June 28, 2007
Chocolate Dipped Strawberries (CDS)
Before the dipping started, we narrowed the pool of strawberries down looking for size (large, of course!), shape (not too deformed), color (bright red not dark red), blemishes (not terribly bruised) etc. After all of that, I came to the conclusion that none of it would even really matter because the chocolate would hide most of the flaws. Probably the most important quality was the bruising because that affects taste.
Then there was the dipping technique. I took to dipping the strawberries straight in to the chocolate when I started out and when the chocolate became less, I tried dipping it side ways, and twirling it around in a circle like a ballerina in the 2nd grade who's trying to say in her circle but some how manages to pop out of it. The long of the short is that no technique or skill is required. The results are fool proof.
Unlike commercially made chocolate dipped strawberries, mine were delicious. The strawberries were flavorful and the chocolate adhered to the strawberries so that every single red-liscious bite had equal parts chocolate and strawberry.
Have you ever noticed that the chocolate on store bought strawberries is too brittle and chunks of it come off when you bite in to the strawberry? Now, that's a waste of perfectly fine chocolate. Commercially made CDS' use dark chocolate which tends to be really quite hard at room temperature, more so if it's been chilled.
In high school I made chocolate covered bananas and I found the dark chocolate really difficult to work with, and quite frankly, the bananas didn't taste very good. It was utterly disappointing. A few months ago, I saw Ina Garten make these treats on her show, Barefoot Contessa, on the Food Network Channel, and was inspired to make them again. The thing that caught my attention was her use of cream and how it made the chocolate stay liquid-like even after the chocolate is removed from the heat.
Try this recipe -- I think you'll be super happy with the results.
Serves as many people as you want
Cooking Time: 5 minutes to melt chocolate
Ingredients
-1/2 cup semi-sweet chocolate chips
-3 T heavy cream
-Strawberries (long stemmed if you can get them)
Preparation
Melt the chocolate and cream together in a bowl set over simmering water until just melted. Stir and remove from the heat. Dip each strawberry in the chocolate and set aside on waxed or parchment paper to dry.
Notes
I made the mistake of storing them in containers. While they tasted fine, they looked like they were sweating so the strawberries will not be as attractive. I don't know why but the 'sweating' kind of made me think of when you first hold hands with the person you're interested in, your heart's kind of racing, and your hand starts to sweat. It's kind of like that.
Anyway, I digress. Store uncovered and eat within the next day or two. Using hand picked strawberries especially means that the shelf life is short.
I quadrupled this recipe and there was enough chocolate to cover 110 small to medium sized strawberries, and there was still chocolate left over. Now, that's a problem I can deal with!
Wednesday, June 27, 2007
Strawberry Jam
I searched online for several jam recipes when I came across this one that hails from Santa Maria, CA which is known for producing high quality strawberries so I decided to go with it. Jam is so easy to make. It's a one pot process and requires very little effort. I don't know why more people don't make jam themselves. It tastes much much better than commercial brands and is better for you. Actually, it's probably not better for you but the use of real sugar is a plus.
Time: 1 hour
Ingredients
-8 cups hulled strawberries
-8 cups sugar (used 4.5 cups)
-Juice of 2 lemons (used 1 lime since I didn't have lemon)
Preparation
1. Clean and hull enough strawberries to make up eight cups of cut strawberries. Throw into a large pot and stir in sugar and the lemon juice. Consider the pot too small if more than half the pot is full of strawberries.
2. Bring the mixture to a boil. Turn down the heat to keep the mixture boiling but watch it carefully as it will bubble up and, if the heat is too high, boil over. You do not want this to happen because the jam is extremely sticky. Hence the need for a large pot.
3. Boil the strawberry mixture for between 30 and 60 minutes (for me, this was about 45 minutes). Skim the bubbles off the top if enough form to cause problems. What you are looking for is the liquid to come off the spoon slowly instead of draining off quickly. It will be obvious when this happens. My jam became quite thick.
Notes
I don't think it matters so much if you use lemon or another citrus. It's not for the flavor but to help preserve the color, otherwise the strawberries may become very dark. So while the taste will still be excellent, its appearance may be slightly off putting. I only had 1 lime which was not enough for the quantity I made. I bet orange juice would be really nice.
Watch the sugar. This recipe, as most others do, calls for 1 cup of sugar for every cup of fruit. Really, I think it depends on how sweet the fruit is. In my case, the strawberries were really sweet so I only needed to use half the sugar. Like when adding salt, it's better to start with less and add more until it's just right. Start with half the suggested amount and increase with 1/2 cup increments. With 4 cups of sugar it was sweet but still slightly tart. The additional 1/2 cup made it perfect.
As the jam maker and perpetual taste tester, I actually didn't like the taste of the jam. Perhaps I had tasted and looked at one too many strawberries in a short period of time. I was kind of disappointed. The jam just didn't taste the way I thought it should but that's the fun part of cooking. Food can taste good even if it's not what you expected. The lesson learned is not to have ideas of grandeur...well, actually it is to have reasonable expectations of the food tasting good but not to be so set in your ways as to know what it should taste like before you've tried your food, if that makes sense. Having made this connection about my thought process, I had two pieces of toast and spread my jam on it, and I have to say it was really quite amazing, especially since I spread butter on my toast too!