Monday, May 22, 2006

Roasted Broccoli Revisited


Well, here's a picture of the roasted broccoli I wrote about a week ago or so. This time, I peeled it in the hope that this would make the stems a little less tough. Sadly, the extra effort did not help as much as I thought it would. Nevertheless, still tasty! The first time I made this (without peeling the stems), the stems didn't really turn brown, only the florets. This time the stems turned a bit brown. The brown parts are more flavorful. You can see that the florets are bit a brown though they do not taste burned at all.

Though I used slimmer florets, the broccoli still needed the full 20 minutes to soften. I didn't have to extend the cooking time to 25-30 minutes like the first time. So I guess the general rule of thumb is that the thicker the stem, the more cooking time is needed.

I should have mentioned this in my first entry but didn't. Roasted broccoli does not taste anything like steamed broccoli at all. Roasting broccoli brings out its sweetness (quite a surprise) which is a flavor you don't get when it's steamed. For those that don't care for steamed broccoli, may want to try it this way!

Sunday, May 21, 2006

White Bean Dip


I was cruising the Food network website when I came across this 5 minute bean dip by Ellie Krieger. I think she's great. She's makes tasty, healthy food. When I saw a video clip of this, I thought this would be such a great snack to make.

Makes 6 to 8 servings
Time: 5 minutes

Ingredients
-2 14 oz cans of white cannelini beans (rinsed and drained)
-2 tbsp roasted garlic
-3 tbsp extra virgin olive oil
-3 tbsp fresh squeezed lemon juice
-salt and pepper to taste
-1/4 c parsley leaves

In a food processor, combine all ingredients (except parsley). Process until smooth. Season to taste with salt and pepper. Garnish with parsley. Serve with your favorite chips, crackers, and/or veggies.

This stuff is so good. Once you eat this, you will find that any store bought dip is salty, or so I've been told.

Friday, May 19, 2006

Italian Rice and Chard Soup


So about a week ago, my cooking buddy and I signed up for home delivery of organic, seasonal fruits, vegetables and greens from Farm Fresh to You (FFtY) here in Northern California. We did this for a number of reasons but the primary reasons are to: 1) sustain local small farms and 2) learn more about vegetables and fruits that we would not otherwise select when we're at the grocery store. We did this to shake things up a bit.

Personally, I always seem to return to the same vegetables I know and love. And I really want to broaden my cooking and vegetable knowledge base. So I found chard in our box, a vegetable that I would never buy because I wouldn't know what to do with it. Our box came on Wednesday 5/17. We were at the grocery store at 5/15 trying to decide what to buy to supplement our box. I suggested sauteeing the chard with a little garlic and olive oil (like you do with spinach) which met with the following, "We're really not going to think of anything to do with the chard standing around here without a cookbook." Loosely and dramatically translated, "I don't like that idea at all." So here it is Friday....after a few gorgeous days, it's a bit cooler and rainy. I'm happily at home without a car. What am I to make?

The first thing I come across, Polenta Cakes. They sound delicious but I don't have enough Parmesan or any Ricotta. Then I come across Risotto with Chard but I don't have enough Parmesan or arborio rice. Finally I came across this recipe. I barely had the 1/2 c arborio rice but I had everything else so I gave it whirl.

This is a super easy recipe that could probably be made in 30 minutes if it's not your first time.

Makes 3 servings
Time: 40 minutes

Ingredients
-1-2 bunches green or red chard
-1/4 c olive oil (I used 1/8 c)
-1/4 c chopped onions
-3 c vegetable stock
-1/2 c arborio rice
-1/3 c fresh basil leaves for garnish (I left out because I didn't have any)
-grated fresh Parmesan for garnish

Preparation
Get some water boiling with salt to blanch the chard leaves and stems.

Separate chard leaves from stems. Cut chard stems into small pieces. When water is boiling, add chard leaves to water and blanch for 15 seconds. Remove leaves with slotted spoon, dump into ice water to stop the cooking. Blanch the stems in the same boiling water, and dump into ice water. Drain and dry everything. Coarsely chop the leaves.

Heat oil in a large non-stick pan over medium heat. Add onions and saute until translucent about 3-5 minutes. Add chard stems and rice. Stir until coated with oil. Add stock to rice. Cover and lightly simmer for 15 minutes until rice is just cooked. Add chopped chard and heat through gently. If rice has absorbed most of the stock, add a little more. Soup should be thick. Mine came out almost risotto like.

Serve and garnish with basil and/or Parmesan cheese.

To give you some perspective, before this evening, I had never prepared or eaten chard. It has an earthy taste that is nicely complemented with arborio rice.

Thursday, May 18, 2006

Cauliflower and Peas


I love recipe books that have indexes where you can look up recipes by ingredient! So I took a look the classic 1000 indian recipes to figure out what the heck I was going to do with a head of cauliflower.

Cauliflower is one of those vegetables that is eaten raw with some sort of dip to mask the raw cauli taste or lack there of one but not often eaten cooked in American cuisine. It's kind of like brussell sprouts... they sort of get the shaft, don't they? Cauliflower, in some ways, is like eggplant and tofu in that it absorbs flavoring and spice, which is why it's so great for Indian cooking.

I am not providing the recipe as it appears in 1000 Indian recipes because I made many modifications...everything from how much oil to use to cooking time.

Makes 4 servings
Time: 40 minutes

Ingredients
-2 tbsp oil
-1 tsp mustard seeds
-1 inch ginger root, chopped finely
-1 medium cauliflower, cut into small florets
-2 tsp ground coriander
-1 tsp garam masala
-1 1/2 tsp ground cumin
-1/2 tsp red chili powder (I used 1/4 because I have the really hot stuff)
-1/2 tsp ground turmeric
-9 ounces peas (I used frozen)
-salt to taste
-1 cup water

Preparation
Heat the oil in a large non-stick skillet, over medium heat. Add mustard seeds, cover with lid. Let them crackle. Add the ginger and cauliflower and saute for 10 minutes until lightly browned. Stir in coriander, garam masala, cumin, chili, turmeric, salt, and water, bring to a boil, then cover and simmer gently for 10 minutes or until tender, which ever comes first. Stir in the peas (straight from freezer) and simmer for 5 minutes until tender.

You're done! Serve with corn tortillas or your favorite Indian bread or rice.

I didn't go too crazy with modifications. The original recipe called for 6 tbsp oil which I think is just ridiculous. Many a good dish gets ruined with excess oil. Also, the recipe said to simmer the cauliflower for 40 minutes. I was a bit suspicious about this, so I set the timer for 20 minutes and checked after 10 minutes. It was perfect after 10 so I can only imagine the mush that would have been after 40!

This recipe is pretty easy for a beginner. The most challenging part is cutting the cauliflower into florets -- it's about a 10 minute effort. It's a bit crumbly too. But this is a definitely a 1-pot dish so clean up is minimal!

Wednesday, May 17, 2006

Rant of the Week: Flax Seeds!

So, I haven't written one of these in two weeks! I meant to and then Wed. would slip by.....any way, I want to write about a new addition to my diet. I've been reading two great books on how to help our bodies promote health and wellness from within. I highly recommend Andrew Weil's Spontaneous Healing and Natural Health, Natural Medicine. Reading these books inspired me to make some really easy and beneficial changes to my diet, including adding flax meal.

I started eating 2 tbsp of flax meal per day beginning on 5.1.2006 I added these seeds to my diet because they are great source of omega-3 fatty acids that may protect against heart attacks by thinning the blood. I'm sure we've all heard about the omega-3s many wonderful properties, mainly promoting heart health. But they also have many other qualities including anti-inflammatory properties, which may benefit people who suffer from arthritis.

An often talked about source of omega-3s is salmon but eating fish 2-3 times per week can be pricey and if you're vegetarian, not an option at all. At a $1.59 a pound (at my local Whole Foods), flax seeds are a much cheaper and vegetarian alternative. I keep a bag of whole seeds in the fridge and grind what I need for a week. I toss 2 tbsp into my oatmeal, yogurt, cereal, every morning. They have a nutty taste and have the additional bonus of being a great source of fiber! In stores, you may see golden and/or brown flax seeds. Both contain equal amounts of omega-3s.

For those interested in getting omega-3s from fish, farm raised salmon generally has less omega-3's than wild salmon. Another good source of omega-3s is mackerel which I love to eat when I have sushi.

Tuesday, May 16, 2006

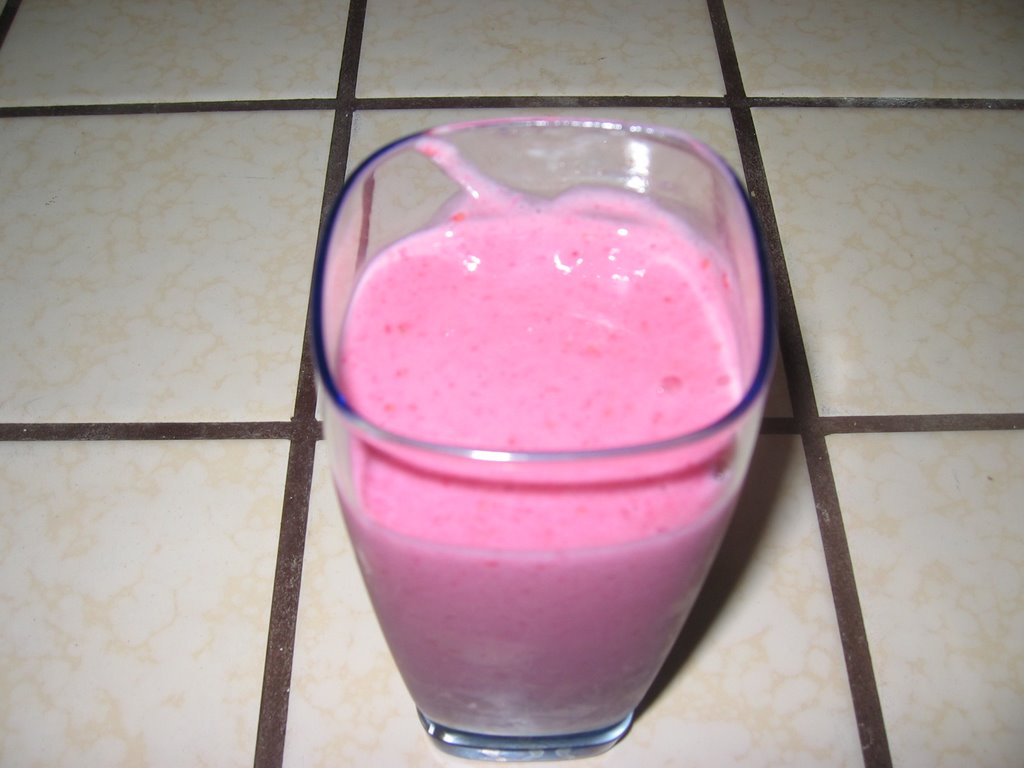
Raspberry Banana Smoothie


No, it is not Pepto Bismol. It's breakfast in a blender. The inspiration came Eating for IBS where I found a recipe for Strawberry Banana Smoothie. The first time, I made this recipe, I followed this recipe to a T (substituting the frozen strawberries with frozen blueberries). It was a bit sweet with the added honey so the next time, I made it without the honey and it was perfection. For this entry, I decided to try raspberries. Leaving out the honey, I found it to be a bit tart. I used a banana that I had placed in the fridge after it had ripened so that it could not ripen further. However, I believe doing this made the banana lose it's sweetness. So don't use bananas from the fridge.

Makes 2 servings
Time: 5 minutes, if that

Ingredients
-1.5 c frozen fruit of your choice, very slightly thawed
-2/3 c vanilla soy milk
-1 tbsp honey
-1 large ripe but firm banana

My modifications
I changed everything. I used 1 cup of frozen fruit because I was making this for one person, namely me! Skipped the honey depending on ripeness of banana and fruit used. 1 medium sized banana. I don't like soy milk products so I used the real stuff in the same amount since I don't like my smoothies to be so thick that I have to use a spoon to eat it.

I find that this makes one very large serving or 2 smaller servings.

I actually have been drinking these for lunch with the warmer weather we've been having and it's really refreshing and filling without being heavy.

Monday, May 15, 2006

Roasted broccoli

I always eat steamed broccoli so when I saw this recipe on Rachel Ray's 30 minute meals, I had to try it for myself. I would have never thought to roast broccoli but it totally works and the flavor is just incredible! First things first, she uses way to much oil in all of her recipes. To be fair, most chefs call for much more oil than necessary, including Martha Stewart, so as a general rule of thumb start with less because you can always add more later!

The original recipe can be found on the Food network website.

Makes 2 servings
Time: 30 minutes, most of which is oven time

Ingredients
-2 tbsp olive oil
-2 cloves of garlic, finely chopped
-1 bunch of broccoli, cut into thin long spears
-salt to taste

Preparation
Preheat oven to 425 degrees.

First, when I say bunch, I mean bunch, not a head, if that makes sense. Trim the end of the broccoli a bit because it tends to be tough....cut about 1 inch to 1.5 inches off. Cut broccoli in half, length wise, and half again, such that you have 4 spears. Hope that makes sense.

In a bowl, toss olive oil, garlic, and salt together. Toss in broccoli and coat event. Place broccoli on non-stick baking sheet, and put sheet on top rack of oven. Roast the broccoli for 25 minutes until ends are crisp, brown, and stalks are tender.

Rachel's recipe calls for 17 to 20 minute minutes of oven time but I found that at that time, the fork test indicated more time. At 25 minutes it was much better. However, when it came time to eat it, I found that the outer skin (on the stems, not the floret part) was a bit tough, and hard to chew and swallow. The inner part of the broccoli was fine. I think next time, I will peel the stem a bit which I think will help with the toughness and reduce the oven time.

The flavor of this broccoli was incredible. The florets were crispy and so flavorful. The olive oil and garlic really enhance the flavor of this veggie so much. I will definitely make this recipe again.

No pictures. Half way through eating the broccoli I realized that I had not taken pictures. I was so excited to eat it that I didn't see the camera on the table.

Saturday, May 13, 2006

Corn Bread Revisted


Remember the corn bread I made a weeks back? Well, I decided to try it again but wanted it more moist. So I added another egg to the recipe (for a total of 2, as opposed to 1) and it was definitely more moist and less crumbly. It was a tad less sweet. Overall, I think I actually prefer it the original way. I can't put my finger on it but there is what I consider a very slight odd taste to the bread. It's not horrible or anything but it's distracting to me. It still turned out a beautiful, don't you think? And the flavor is still good. Next time, I'm going to soak the corn meal in milk for 15 minutes and see what happens then.

Friday, May 12, 2006

Basic Stir Fry


If you want a quick and easy way to load up on veggies, a stir fry is definitely the way to go. This recipe is my own creation though I have been inspired by many a chef so I tip my hat to you. I like my recipe because it's simply seasoned so that the flavors of the vegetables are unmasked and shine through.

Makes 2 servings
Cooking time: 30 minutes

Ingredients
-8 oz mushrooms, sliced
-1 c (be generous) frozen multi-colored peppers
-1 c onion, chopped
-1 broccoli bunch, cut into florets
-1 tbsp canola oil
-1 tbsp soy sauce (or to taste)
-3 inch piece of ginger, chopped

Preparation
Get the rice going.

Heat oil on medium heat in large non-stick skillet. Add onions and ginger, saute until onions are translucent, about 5-6 minutes. Cooking the onions well enhances the flavor of the onions. If you're concerned that the ginger is too much, rest assured that it is not. The flavor is just right. Add the frozen green peppers, saute for 2-3 minutes more. Add broccoli florets and mushrooms. Cover for 3 minutes. Check broccoli with knife to ensure that it is crisp-tender. Remove from heat and add soy sauce. Serve with rice.

If I had thought of it, I would have added a 1 tsp of red chili pepper flakes to the oil to give this recipe some kick. I forgot. Even without this ingredient, this stir-fry was full of flavor. The nice thing about this recipe is that you can modify it in whatever way you want. You can substitute for your favorite veggies or add more according to your own taste and preferences. I've also added tofu for a protein kick.

Our diets are very protein rich. We worry about not getting in enough when in fact we should be worried about getting too much. I recently learned that we only need 4 oz of protein per day so we're probably consuming too much of it. The general rule of thumb is that if you have protein in one of your meals, you won't need it in any other meal. Did you know that if you eat a lot of vegetables you're probably getting enough protein? Who knew? I didn't.

Tuesday, May 09, 2006

Carrot Orange Salad


I went cooking crazy today having not done anything for the past six days. I've been reading a lot about the importance about beta-caratene in the diet and when I ran across this recipe it spoke to me. Plus, it falls into the 'cool, refreshing' category for warmer weather.

This recipe is so simple and easy. It comes from the Moosewood Restaurant's Low Fat Favorites.

Makes 4-6 servings
Time:15 minutes

Ingredients
-2 or 3 large carrots, peeled and grated (about 4 c)
-2 navel oranges
-2 tbsp fresh lemon juice
-1 tbsp honey
-1/4 tsp ground cinnamon

Preparation
Grate carrots and set aside.

I skipped the instructions on how to section the orange because I really didn't understand what they were talking about. I'm very visual when it comes to technique. Just peel and get as much of the pith off the orange as you can and toss in with carrots.

In a small bowl, combine lemon juice, honey, and cinnamon. Pour over the carrot/orange mixture and toss. Before serving, allow salad to sit for at least 10 minutes so the flavors mix. For best results, chill for 3 to 4 hours.

What a nice treat on a hot summer day!

p.s. -- The picture doesn't do it justice.

Middle Eastern Chickpeas with Spinach


It's been six days since my last post. I've been a bit lazy and I hadn't been to the grocery store which makes it hard to cook. Doesn't this remind you of another recipe I made a few weeks back? It has a number of the same ingredients including chickpeas and spinach but tastes better than the aforementioned dish and isn't Indian.

I am going through an elimination diet currently and for the next two weeks I am not eating tomatoes. I can't tell you how many dishes call for tomatoes -- so many! This is one reason why this dish spoke to me. With the weather getting warmer and warmer, it's my goal to spend as little time as possible in the kitchen and eat 'cooler' foods. The dish calls for a yogurt and mint sauce which was so delightful and enhanced the flavor of the chickpeas and spinach.

Makes 4 servings
Time: 35 minutes

Sauce Ingredients
-2/3 c plain nonfat yogurt
-1 small garlic glove, minced or pressed
-1 tsp chopped fresh mint
-dash of salt

Beans
-1 c onion, chopped
-2 tsp olive oil
-1 red bell pepper, seeded and cubed
-2 tsp ground coriander
-1 tsp ground cumin
-pinch of saffron
-16 oz can chickpeas (unsalted), with liquid reserve
-10 oz spinach, rinsed, stemmed, and coarsely chopped
-2 tbsp fresh lemon juice
-salt and ground black pepper to taste

My modifications
I used 3/4 c frozen multi-colored peppers because it was enough to chop the fresh spinach. I skipped the saffron. I used 15 oz of chickpeas and 9 oz of spinach -- it's what I could find.

Preparation
Combine the yogurt, garlic, mint, and salt in a bowl and send aside to get the flavors working.

In a skillet, saute the onions in the oil on medium heat until softened, about 5 minutes. Add the fresh/frozen bell peppers, coriander, cumin, and saffron and continue to saute for another 2 to 3 minutes. Add the chickpeas and 1/4 c of their liquid and simmer for about 5 minutes, until the peppers are tender, adding more of the reserved chickpea liquid if needed. Add the spinach, cover, and cook, stirring often, for 2 or 3 minutes until the spinach is bright and wilted. Stir in lemon juice and add salt and pepper.

This can be served with a variety of items including pita, couscous, orzo or rice. I served this with brown rice topped with the yogurt sauce.

The dish is low maintenance except for the chopping of fresh spinach. You could probably avoid this step altogether using frozen chopped spinach. Doing this will halve the time of the recipe though I have to say that the fresh spinach was amazing.

Deliciosa!

Wednesday, May 03, 2006

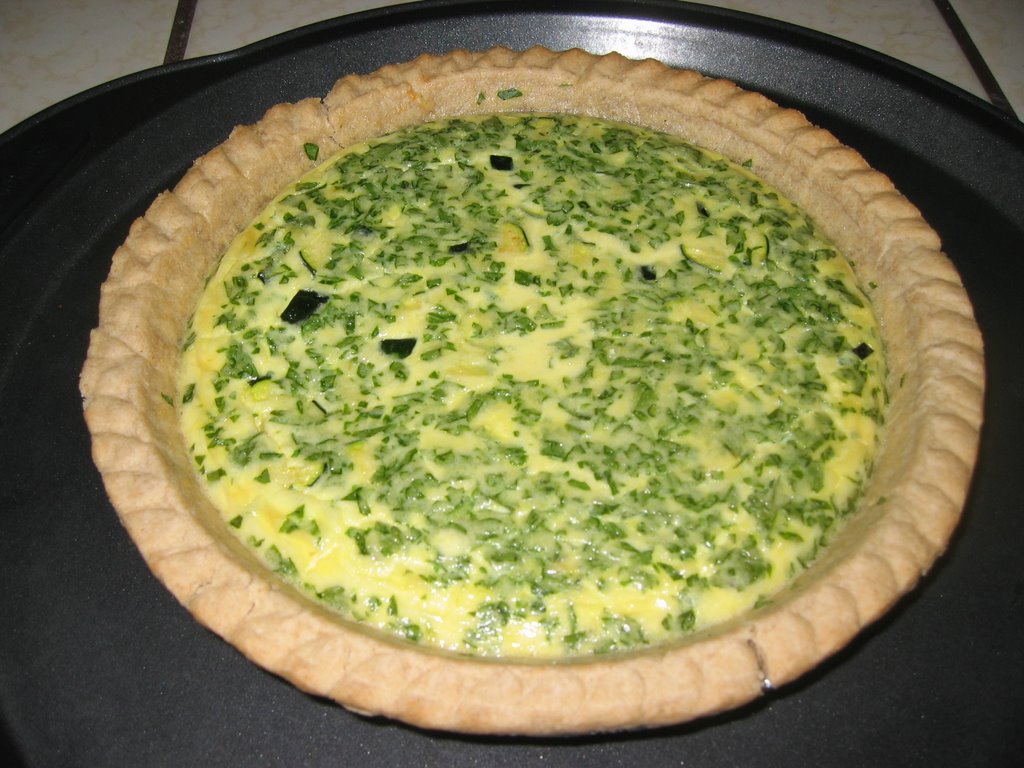
Pancetta and Parmesan Torte


I caught Everyday Italian with Giada De Laurentiis on the Food Network last week and this so excited me. I'm sure you know who Giada is..... the hot brunette that wears tight clothing to emphasize her chest and has perfectly manicured nails as a cook. Hmm. I digress....It is so simple with only 10 minutes of prep and 25 minutes of low maintenance oven time. It looks beautiful but the taste is only so-so. The torte was on the bland side and it was missing something. Perhaps it is because I substituted zucchini for the pancetta. I'm not sure. It wasn't bad. It was definitely edible but it wasn't great either. I was disappointed.

Serves 6
Time: 35 minutes

Ingredients
-1 refrigerated pie crust (half of 15-ounce package), room temperature
-1 teaspoon olive oil
-4 ounces thinly sliced pancetta, chopped
-2/3 c whipping cream
-1/2 c whole milk
-3 large eggs
-3 tbsp finely chopped fresh Italian parsley leaves
-1/4 tsp salt
-1/4 tsp freshly ground black pepper
-2/3 c shredded Parmesan

My modifications
First, I could not for the life of me find a store that carried refrigerated pie crust and I went to 3 stores. To be fair, I did find Pillsbury Pie Crust but it had lard in it and really toxic preservatives in it so there was no way I could purchase it. I ended up buying a good quality frozen pie crust. I don't eat meat so I substituted the pancetta with 4 oz of zucchini which I sauteed lightly and cooled before putting into the egg mixture. I did not add any salt. The salt would have been over kill, especially if you end up using pancetta. The salt from the cheese alone should be enough.

Preparation
Position the rack on the bottom third of the oven and preheat the oven to 400 degrees F.

Press the crust into a 9-inch-diameter tart pan with a removable bottom. Trim the edges; set aside.

Heat the oil in a heavy medium skillet over medium heat. Add the pancetta (in my case zucchini) and saute until crisp, about 7 minutes. Using a slotted spoon, transfer the pancetta (zucchini) to paper towels and drain. Beat the cream, milk, eggs, parsley, salt, and pepper in a medium bowl to blend. Stir in the cheese and pancetta. Pour the cream mixture into the crust.
Bake the torte until the filling puffs and is golden brown on top, about 25 minutes. Let the torte cool for 15 minutes.

Admittedly, I should have probably used 4 eggs because the eggs I had were on the medium side. And as you can see from the picture above, it did not exactly fill out the pie crust. I placed the pie in the bottom third of my oven and after 25 minutes, I found that it was runny and not golden brown. I know that at this point that I was supposed to take it out to set but I'm not sure that it would have. So I moved it to the top rack for 3.5 minutes and it firmed up.

I am an egg person. I am a quiche person. Reviewers of this recipe gave it 5 stars (even people who substituted the pancetta with veggies). I am giving it a two. I'm glad that I had the opportunity to make it but I wouldn't make it again.

Looks are deceiving.

Tuesday, May 02, 2006

Funghi Trifolata


Funghi trifolata is Italian for mushroom sauce. First things first. The camera is back! Yeah! It was indeed the memory card so a huge sigh of relief on my part.

The weather has been getting warmer which means I like to eat lighter foods and spend even less time in the kitchen! I enjoy some of the shows on the Food Network Channel and I visit their website regularly for ideas and inspiration! I found a very simple but healthy pasta dish that isn't tomato based by Mario Batali. It has ingredients that you most likely have in your kitchen and takes no more than 30 minutes!

This recipe was rated 'easy' though the recipe calls for making the pasta from scratch. The recipe and ingredients are simple but I imagine it would take longer than the suggested 10 minutes of prep and 20 minutes of cook time for a first timer.

Serves 3-4
Time: 30 minutes

Ingredients
-5 tbsp extra-virgin olive oil
-1 medium (1 c) Spanish onion, diced
-2 cloves garlic, thinly sliced
-8 ounces fresh porcini or cremini mushrooms, thinly sliced, plus 4 mushrooms thinly sliced
-salt to taste
-Pasta
-1/4 c freshly grated Parmesan
-1/4 c chopped Italian parsley

My modifications
This recipe actually calls for home made pasta but since there are so many quality pastas available in the grocery store, I didn't bother. I used 4 tbsp olive oil rather than 5 and found that this was just right for 14 oz. Of pasta. I used Tinkyada Brown Rice Fettucini (14 oz). I also minced the garlic as opposed to slice because I wasn't careful about reading the directions! And I used cremini because they are cheaper than porcini.

Preparation
Get the pasta going. Heat oil on medium heat in a good sized non-stick saute pan. Add garlic, onions, mushrooms, and saute for about 5 minutes. Add salt to taste and pasta, along with 1/2 c pasta cooking water, and toss quickly. Add remaining 4 sliced mushrooms and toss again, off heat. Serve immediately, with grated cheese and chopped parsley.

It is really important that you add enough salt because the salt really enhances to flavor of this dish. In fact, I think next time I make this dish, I will cook the pasta with salt as the package suggested. I didn't like the flavor of the 4 mushrooms that were added later. They didn't cook enough in the heat and were a bit a firm which I didn't care for.

Overall though, this was a great dish. So simple, so tasty, so light! A great warm weather dish.

As an aside, I've been reading about cool characteristics of various ingredients that I thought I would pass along.

-Extra virgin olive oil reduces bad cholesterol and maintains good cholesterol while various vegetable oils reduce both.

-Mushrooms contain substantial amounts of B vitamins, selenium, copper and other trace minerals. They also contain antibacterial and other medicinal substances such as triterpenoids, which is an anti-tumor compound.

Friday, April 28, 2006

Tostadas

Now tostadas are simply terrific because they can be made in 15 minutes or less and they are so tasty. The mixture of crispy crunchy tostada with beans, cheese, and other condiments is delightful, like a taco only better because your shell is less likely to split in half and dump everything on to the plate below. After a long day at work, I prepared and ate these a lot. The most basic recipe calls for ingredients that you're likely to just have around in the back of some cabinet or can be purchased ready to go with so very little preparation.

Serves 2
Time: 15 minutes

Ingredients
-Tostadas
-A can of your favorite beans
-Baby spinach, chopped
-A juicy tomato (skip if not in season)
-A bit of grated cheese
-Fresh salsa
-Sour cream (optional)
-Avocado (optional)

If I'm super busy or just plain lazy, I use low-fat refried beans that are spiced with green chilies (7 g of fiber per 1/2 c serving) this way I don't have to use any brain cells thinking about what spices to add to my beans. If I'm feeling a bit more creative than I'll use pinto or black beans, add a bit of cumin, chili powder, etc. or dump some salsa into them while heating them up or nothing at all because I think they taste good as is.

I prefer spinach over lettuce because it has much more nutritional value such as beta-carotene and lutein, and quercetin which has antioxidant properties. It's also rich in vitamins and minerals such as folate, vitamin K, and magnesium. Cooking spinach makes it easier for our bodies to absorb. For tostadas, do not cook the spinach. Have you ever noticed that in the days and week after eating green vegetables, your skin looks better? It's because of all their great properties.

Preparation
Heat toaster oven to 350 degrees and bake tostadas until you hear them sizzle a bit. In microwave or stove top, heat beans. Chop up spinach, tomatoes, and grate cheese. Layer tostada with beans, cheese, spinach, tomatoes, and salsa.

Now how easy is that?

If you want a little fancier preparation (aka you have more time), saute some frozen green peppers, and fresh mushrooms and onions together in a bit of olive oil. Add small amount to top of bean layer.

Thursday, April 27, 2006

Where are the Pictures?

Folks have been wondering if I stopped with the pictures. I have not but the camera is still down and out for the count. I'm a bit concered because the memory card functions in the memory card reader but not in the camera which may mean the camera is broken?! I don't know. I would be really upset if that were the case. On Sunday, I'm meeting up with my cooking buddy's sister who has the same camera so I hope to get to the bottom of this problem. Let's just hope that it is the memory card and not the camera!

I miss taking pictures especially since I've had such success in the kitchen. Isn't funny how that happens?

Wednesday, April 26, 2006

Rant of the Week: Haig's Middle Eastern Specialty Foods

I love hummus and baba ghannouge but it's sometimes hard to find quality brands, even in the Bay Area. I thought I found a good one a few weeks back when I purchased Raquel's Middle Eastern All-Natural Baba Ghannouj. It met my requirement of having natural ingredients I could read but it really wasn't anything special. In fact, it had a funny taste. Perhaps because they added olive oil to their recipe? In any case, it's not a product I would purchase again or recommend. And stay away from the Athenos brand... they use high fructose corn syrup.

In any case, my cooking buddy introduced me to Haig's Delicacies. Among his many talents, he just has a knack for finding great snacks. Haig's is amazing. Their products not only taste so fresh but they also are cholesterol free and have no added oil!! I have tried their Baba Ghannouge and Hummus with Fire Roasted Red Peppers and they are deliciosa. On a good week, we can make them last 3-4 days but on bad day or if the A's aren't doing so well, it can be gone in a sitting. The flavor is just right -- not one ingredient is too strong -- it melds perfectly in the mouth. These products taste good with everything -- tortilla chips, carrots, and crackers. I've been known to just dip a spoon in. I would definitely consider using it as a sandwich spread in place of mayo (though I do like mayo).

I believe Haig's is currently only available in the Bay Area. If you know of any good middle eastern and Mediterranean products do let me know.

Monday, April 24, 2006

Corn bread

Growing up, my mom made corn bread from scratch. She used real corn in her recipe and there would be little chunks of kernels. The bread was amazing -- so moist, tender, and golden. It didn't need butter but of course I would put on a pat. The bread would fall apart before it made it into my mouth. It was delicious and it was not like anything I tasted before.

Since then I've been on the quest for a corn bread recipe and about a year and half ago, I found one on cakerecipe.com. I've made this recipe a dozen times if not more all with various degrees of success. It's always been good but some times it's 'pretty' good and at others, 'really' good. Last night, it hit the all time high of 'amazing.'

This bread is good for breakfast and dessert, and as an afternoon snack. It's a bit on the crumbly side but I'm not sure how to reduce this. I was reading that adding another egg may help? This recipe is so good and so effortless. It's not as good as the way my mom makes it but for an effortless recipe it's great.

Serves 12
Total time: 35 minutes

Ingredients
-1 c all purpose flour
-1 c corn meal
-2/3 sugar
-1 tsp salt
-3.5 tsp baking powder
-1 egg
-1 c milk
-1/3 c vegetable oil

My suggestions and modifications
I use 1 cup of brown rice flour. As I mentioned earlier, this came out amazing last night. It was beautifully golden and rose so nicely that it filled out the entire pan. I thought about what I did last night differently and the only thing that came to my mind was that I was sure to add the salt. I generally leave it out but it actually really enhances the flavor. I also was using a fresh container of baking powder which is why I think it rose as nicely as it did. In the past, I have generally only put in the 3 tsp baking powder but added the extra 1/2 tsp the recipe suggests.

Preparation
Preheat oven to 400 degrees F. Lightly grease a 9-inch round cake pan. In a large bowl, combine flour, cornmeal, sugar, salt and baking powder. Stir in egg, milk and oil until well combined. Pour batter into pan. Bake in preheated oven for 20-25 minutes, or until a toothpick inserted into the center of the loaf comes out clean.

Sunday, April 23, 2006

Chili Burgers

As a pescatarian, I do miss meat. I especially miss hamburgers, salami, and bacon, not often, but when I see an In 'N Out, I get a little pouty. Going through the Moosewood Low-Fat Favorites Cookbook last night, I decided to give the chili burgers ago for the second time but substituting kidney beans with pinto.

If you're craving meat, it's texture, juices and fat, this is probably not the recipe for you. It's full of protein, flavor, and so tasty but it does not resemble or taste like meat in any way whatsoever. The recipe claims to be crispy on the outside and juicy on the inside. It does get crispy but not juicy! So those are the warnings.

This recipe caught my eye because I am constantly hungry and I'm always on the look out for good sources of low-fat protein. According to this recipe, "beans and oats together create a perfect protein." I don't know how or why but I was really full after eating this meal.

Serves 6
Total time: 45 minutes

Ingredients
-1 c chopped onions
-4 garlic cloves, minced
-2 tsp olive oil
-1/2 c peeled and grated carrots
-1 1/2 tsp chili powder
-1 tsp ground cumin
-3 c cooked pinto or kidney beans (two 15 oz. cans with salt, drained)
-2 tbsp Dijon mustard
-2 tbsp soy sauce
-2 tbsp ketchup or 1 tbsp tomato paste
-1 1/2 c rolled oats
-salt and ground pepper to taste

My suggestions
The first time I made this recipe, I used kidney beans because that's what I happened to have. I followed the recipe and drained them of the 'sludge.' I found that this did not suffice and the overall bean mixture was a bit on the soupy side. The burgers came out fine but because of the soupiness the burger size was on the smaller side. This time, I rinsed the beans with water and drained and the texture was much more firm and I could make bigger burgers. I like this recipe with the kidney beans but I enjoyed it better with pinto beans. Because of their mild flavor, I think they take to the spices better.

Preparation
First, rinse and drain beans. Set aside. Saute onions and garlic in the oil for about 5 minutes until the onions begin to soften. Add the carrots, chili powder, and cumin and cook on low heat for 5 minutes. Set aside.

Mash the beans in a large bowl with a potato masher. Add the mustard, soy sauce, ketchup/tomato paste (I used ketchup), and sauteed onion mixture. Mix in the oats. Add salt and pepper to taste.

Moisten your hands and form the burger mixture into six 3 to 4-inch patties. Lightly spray or oil a non-stick skillet and cook the burgers on medium-low heat for 5 to 8 minutes on each side. To save time, use 2 skillets to cook burgers at once.

The first time, I used soft dinner rolls and made typical burgers with lettuce, tomatoes, etc. This time, I skipped the bread and served them on a bed of baby spinach leaves, sliced tomatoes, and salsa. They were mm mm good.

Saturday, April 22, 2006

Caribbean Stew

I had another fabulous meal last night! I've never cooked Caribbean food but I love it. Caribbean food is full of flavor and I love that a lot of dishes call for allspice. This recipe had caught my eye before but I was previously turned off by the 1 hour cooking time and the chopping of vegetables. But my cooking buddy was in charge of the evening meal, so I was able to kick back, observe, and help out on an as needed basis. This recipe comes from the Moosewood Restaurant Low-Fat Favorites Cookbook which is so great because it has recipes from all over the world!

This recipe introduced me to kale. I've heard and seen kale but have never prepared it or eaten it, knowingly that is. I have since learned that kale is a form of cabbage. It is a good source of vitamin C, and is rich in beta-carotene and phytochemicals such as indoles and sulforaphane. Kale is available year round but its seasonal peak is between January and April. Apparently we got it just in time!

Serves 4
Time: 1 hour

Ingredients
-1 large onion, chopped (about 2 cups)
-1/2 tsp salt
-2 tsp vegetable oil
-1/2 tsp dried thyme
-1/2 tsp ground allspice
-1 minced fresh chile, seeds removed for a milder 'hot'
-1 large sweet potato, cut into medium chunks (about 2 cups)
-2 c water or vegetable stock
-2 small zucchini, cut into 1-inch chunks (about 2 cups)
-1 1/2 c undrained canned tomatoes, coarsely chopped
-4 c loosely packed shredded kale
-1 tbsp fresh lemon or lime juice
-2 to 4 tbsp finely chopped fresh cilantro
-salt to taste

My cooking buddy used water not vegetable broth. With regard to the zucchini, I was instructed to cut the zucchini in half length wise, and each half into half again. I chopped these into 1/2 inch chunks. In previous cooking experiences we found that large chunks of zucchini don't do very well. We forgot the cilantro so we skipped it.

Preparation
Sprinkle onions with the salt. In a covered pot, saute the onions in the oil for 7 minutes, stirring occasionally. My cooking buddy tossed the onions into the pot and then sprinkled them with salt (it's easier this way). Add thyme, allspice, and chile and continue to cook for another minute or two. Stir in sweet potatoes and the water/stock and simmer, covered, for about 5 minutes. Add the zucchini and the tomatoes with their juice and simmer 10 to 15 minutes more, until all of the vegetables are barely tender. Add the kale and cook another 5 to 10 minutes. Stir in the lemon or lime juice, cilantro, and salt to taste.

Serve with brown rice and jerk tofu. The jerk tofu was amazing but as it is the most high maintenance dish to make that I'm not going to write about it unless I get requests to do so.

I had this dish for dinner this evening and I'm still thinking about it 5 hours later.

Have fun!

Friday, April 21, 2006

Portabella Mushroom Burgers

Tonight's meal was just amazing for so many reasons: 1) I didn't cook the meal; 2) it was fun, creative, and spontaneous; 3) the meal was so tasty yet so simple; 4) it got the taste buds going.... think fireworks, and 4) the meal taught me about pairing foods that I would not have otherwise thought to put together in the first place!

My cooking buddy thought of this while he was at work. He was searching through recipes online and nothing was catching his eye. He's a creative person that works best without recipes and cookbooks. This is a quality I lack being a bit on the structured side but I just love, admire, and appreciate that much more in my partner.

I would have never thought to put Brie or any other cheese on a mushroom... never. I love mushrooms and cheese but not together. The thought actually makes my stomach turn a bit especially if using some sort of American made cheese that solidifies when cooling. Ugh. But when he said Brie I was super excited.

Makes 4 Servings
Time: 25 minutes

Ingredients
-4 portabella mushrooms
-some basil, chopped finely
-2-3 cloves of garlic, minced
-2-3 tbsp olive oil
-freshly ground pepper
-Brie
-Dijon mustard
-1 onion, sliced such that it makes O-rings
-1 tomato
-Baby spinach
-Loaf of ciabatta bread

Preparation
Have the Brie out so that it comes to room temperature.

In a bowl, whisk together olive oil, garlic, and basil. De-stem mushrooms and rinse them. Drizzle olive oil mixture on gill side of mushroom (side that the stem was on). This is also something new for me.... I generally marinate the entire mushroom but you use much more olive oil and it gets sort of greasy. One side is enough. Set oven to 'broil', and cook mushrooms and onions for 8 minutes or so. This is bit of a guess based on previous experiences. My cooking buddy did this on a grill and it took longer. You'll know when the mushrooms are done....stick a knife through it and will be super tender and may even look a little watery. The onions will be soft and golden.

While this is going on, slice the loaf ciabatta bread such that they become buns. My suggestion is to cut the loaf into 4 mini loaves and then slice length wise. Toast the bread. Slice some tomatoes and chop a little more basil but not too much more.

Putting together
On one slice of ciabatta, place mushroom. On top of mushroom, spread Brie to taste. On top of this, onions, a little basil, a tomato slice or two, and then a little spinach. On other slice of bread, squirt some Dijon mustard. Squish together slightly and then eat.

You're in for a treat. I so wish I had a picture of this, it's beautiful, but alas the camera is still down!