Thursday, June 29, 2006

Lemon Cucumber Salad

This side salad is perfect for hot summer days when you don't want to spend a lot of in the kitchen. It's simple and you'll have all the ingredients you need in your pantry. I didn't have a chance to chill it before serving but I bet it would enhance the flavor and provide that added coolness for those hot summer days. This recipe came with the Farm Fresh to You box we received on Wednesday.

Makes 4 servings
Time: 10 minutes

Ingredients
-
1 lb lemon cucumbers
-2 T olive oil
-1 tsp vinegar
-salt & pepper to taste

Preparation
Wash the cucumbers. There is no need to seed them. Simply slice the fruit very thinly crosswsie, removing tough ends. Add olive oil and vinegar. Add salt and pepper to taste.

Enjoy!

Wednesday, June 28, 2006

Blueberry-Brown Sugar Scottish Oatmeal Follow-Up

Sam, my college buddy, is so darn smart. She told me that she adds her frozen berries after she's microwaved her oatmeal as a way to cool her oatmeal before she digs in. I don't know why I didn't think of this but this would prevent the awful Grimace-like purple that occurs when the frozen berries pop while in the microwave! Who would have thought?

Tuesday, June 27, 2006

Fish Tacos with Guacamole Sauce


The weather is getting hotter and hotter which means I want to cook less and less or spend a lot less time doing it. When I went to the grocery store yesterday, all I knew is that I wanted fish tacos for dinner so I purchased some rock cod to get me going.

Prior to last night, I had never made a fish taco. I often eat them when I go out to eat but I find the fish is breaded, fried, over spiced, and/or over cooked so I wanted to see if I could make something healthier. I came home and I found a great fish taco recipe by Rachel Ray on the Food Network website. I was surprised at how low-fat this recipe is given that she puts cheese, butter, etc. on everything. It was quick, easy, and oh so tasty. I have provided a link to the original recipe but what I provide below is modified to make enough for two folks.

The guacamole sauce was excellent -- it was the first time I had seen yogurt called for in guac and it really adds some tanginess to offset the fattiness of the avocado. Yummy! And the fish was super tender, flaky, and flavorful.

This recipe really does take 30 minutes or less. Super fun and super easy. If you don't cook, you could do this.

Makes 2 servings (3 tacos per person)
Time: 30 minutes or less

Ingredients
Fish
-3/4 lb. rock cod or some white fish that will flake
-extra virgin olive oil
-salt and pepper to taste
-Juice of 1/2 lime

Guacamole Sauce
-1 medium sized avocado
-Juice of 1/2 lemon
-1/4 teaspoon cayenne pepper
-1/4-1/2 cup plain yogurt
-Coarse salt
-1/2 vine ripe tomato seeded

Other
-Baby spinach
-Corn tortillas

Preparation
3/4 lb. Rock cod was 2 good sized filets. Sprinkle each side with salt and pepper and drizzle with a little olive oil and rub in thoroughly with hands. On medium heat, drizzle a bit of olive oil onto a large non-stick skillet. When hot, place fish and cook for 3-4 minutes, then flip. You should see the edges of the fish become white and translucent. Flip, and cook other side for 3-4 minutes. When done, squeeze lime juice onto fish, remove from heat and flake with fork.

While fish is cooking, combine avocado, lemon juice, cayenne pepper, yogurt and salt. Mash together with fork or use food processor or blender. I used the fork method. Stir in diced tomatoes. The recipe calls for plain yogurt and when I was at the grocery store, the smallest container of yogurt I could find was plain Greek yogurt. It's rich and creamy and I highly recommend using it in this recipe. The guacamole sauce is creamy and some what thick.

In looking at the sauce this morning, it has still retained it's good color unlike regular guacamole that begins to turn that awful brown-green color.

After fish is done, heat up some corn tortillas on the stove or microwave. Put chunks of fish onto tortilla. Top with guacamole sauce and baby spinach.

I purchased some nice cheddar cheese to make a pinto bean and cheese side but totally forgot about it in the excitement of making something new. If you wanted, you could add this as a side.

Monday, June 26, 2006


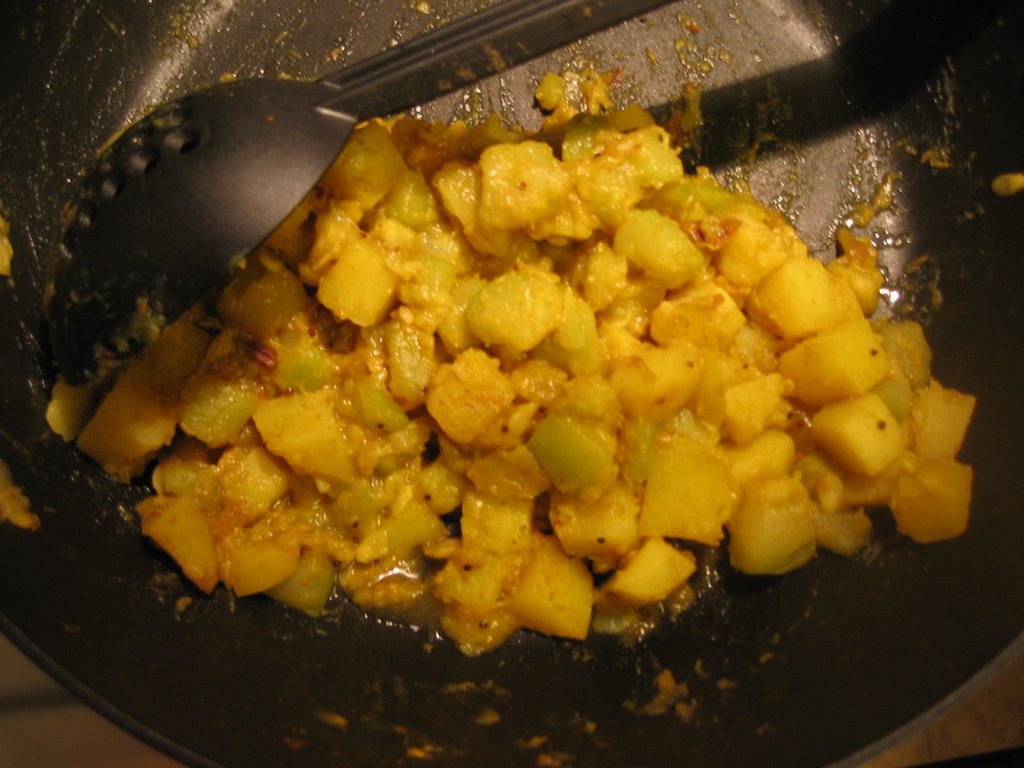
My cooking buddy made this for dinner on Friday. I wasn't too present in the kitchen to observe details about spices used and in what proportions so I can't share the recipe with you. Eeks. It was his best Indian dish to date. The flat bread was also home made and delicious, without a doubt!

Monday, June 19, 2006

Green Dumplings


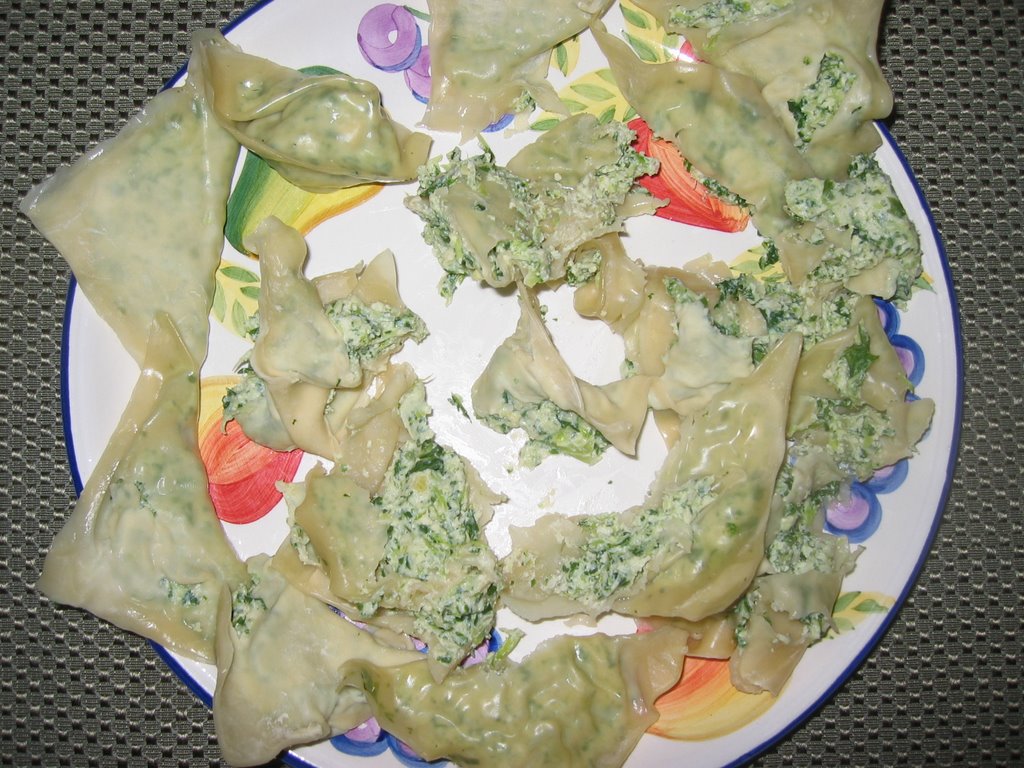
From the picture above, you must think that this is a failure but it isn't! They look horrible but taste really good which is much better than something looking great and not tasting great, I think. More on this later.

We received a pound of bok choy in our box last week. We were sick and tired of stir-fries and hard pressed to find a non-stir fry recipe. My cooking buddy being the master recipe researcher that he is found this recipe! I can't tell you how proud I am that we didn't make a stir-fry out of of this.

This recipe was exciting for me. I love Asian dumplings in all forms and never thought about making them at home until we found this simple recipe. It's a little bit intensive but fun! It's worth the effort and can be made in a group setting.

Makes 6 to 8 servings
Time: 1 "so worth it" hour

Ingredients
-1 1/2 pounds bok choy
-1/2 cake firm tofu
-2 egg whites
-4 scallions, minced
-2 tsp soy sauce
-1 tsp garlic, minced
-1 tsp ginger, minced
-1/4 tsp sesame oil
-2 dozen gyoza or wonton wrappers

My modifications
I only had a 1 pound of boy choy and 2 scallions. I kept everything else the same.

Preparation
Press tofu. Please see cabbage roll recipe on pressing.

Steam bok choy until wilted, about 5 minutes or so. Let cool and drain. Then chop finely, pressing out any excess water.

In a food processor or blender, puree tofu with egg whites. Add bok choy and scallions, and all other ingredients except wrappers!

Place about 2 tsp of filling into wrapper and fold into triangle. Arrange on a heatproof plate or steamer tray and steam over boiling water until cooked through, about 4 minutes.

This is where the recipe fell apart for us. As you can see from the picture above, many of our dumplings were torn open. During the steaming process, the dumplings stuck to each other and were difficult to separate without being torn.

This is what I suggest. The back of the wonton wrappers packaging suggests taking the triangle one step further to make a true dumpling by making the two bottom corners touch (look at the package). They don't explicitly say why but I recommend you do take this step because there will be less surface area which means that there are fewer points of contact between dumplings. Hence less sticking! I also think that boiling them in batches (instead of steaming) for the same amount of time would reduce the sticking to each other issue. I don't have a large steamer tray so stacking and stickiness was inevitable.

If you serve these as is, you may find that the dumplings lack salt but if you serve with soy sauce, this isn't a problem!

If you can get these right, you could really impress some folks.

Friday, June 16, 2006

Roasted Eggplant Puree

The funniest thing happened to my cooking buddy when he came home from the grocery store the other day. He ended up with 3 items that weren't his, including eggplant, string cheese, and a Ready Pac of iceberg lettuce. After coming up with shopping list together, I asked what his inspiration for these items were, at which point he said that he hadn't purchased those items. The baggers must have accidentally given him someone else's stuff. Whoops!

So what were we to do with these extra items that we had not planned on having? We decided to roast it having found a recipe in my favorite cookbook of all time, Vegetarian Cooking for Everyone by Deborah Madison. This book is the authority on all vegetables and vegetarian cooking in general. I adore this book because it is extremely comprehensive but not dense in that boring overwhelming way. I also love that this book has tips on "what to look for", "how to store", and "how to use" every type of veggie out there which has helped me immensely.

Makes 1 1/2 cups
Time: 30-40 minutes

Ingredients
-1 pound eggplant (the fat kind, not the skinny kind)
-2 tbsp olive oil (when I say olive oil, I'm always referring to extra virgin)
-2 garlic cloves, put through a press or pounded with salt
-salt and pepper to taste
-chopped parsley

Preparation
Preheat oven to 425 F. Slash the eggplant in several places so it won't explode. Put it in a pan and bake until it's soft to the point of collapsing, 30 to 40 minutes. Let cool for 15 minutes or so. Discard any bitter juices that may collect. Peel off the skin and remove seeds, then finely chop the flesh. Stir in the olive oil, garlic, and season to taste. Garnish with parsley, and serve with crackers or pita bread. I pureed the eggplant with a hand blender so that it would be less chunky and more smooth.

This recipe is so simple and most of the time is due to the baking of the eggplant which is a low maintenance activity. Just be sure to set the timer so you don't forget about it.

We ate this with yogurt sauce with cayenne and dill. I will be writing about this recipe tomorrow which is also comes from this cookbook.

I adore this recipe because it is so simple and allows you to really enjoy this veggie undoctored.

Thursday, June 15, 2006

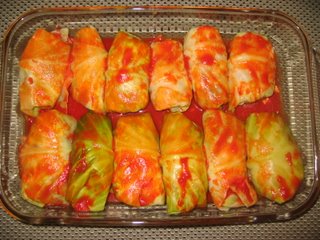
Low-Fat Favorite: Cabbage Rolls

We got our Farm Fresh to You box yesterday and much to our surprise it provided us with two of the ingredients necessary for this recipe, a head of cabbage and carrots. I like the box since it provides us with seasonal fruits and veggies that I wouldn't otherwise have the guts to purchase. The only thing that gets me is that we usually have to run to the grocery store to get other veggies to go with whatever we get in the box. I was hoping the box would minimize those trips. A box that's recipe based would be awesome!.

Anyway, with a box of tofu already in the fridge, the only items that we had to purposely get were mushrooms, 1 lemon, and 2 onions (which we normally have around but didn't!).

I've never made a roll in my life but my cooking buddy expressed interest in making these last week with the head of cabbage we bought at the farmer's market last weekend but since we didn't have any of the other necessary ingredients or time, we passed. Hence the Indian cabbage and potato recipe.

This recipe comes from none other than Moosewood Restaurant's Low-Fat Favorites. Did I mention that it's my cooking buddy's goal to make every recipe in this book? I would love do this on a set day every week (the organization freak coming out of me big time) but that wouldn't work with my buddy's schedule or style.

These cabbage rolls were amazing. Think baked steamy spring roll. So tasty and flavorful. I didn't notice the lack of fat at all and you can eat them guiltlessly because they are so healthful. You could get all your required daily veggies with this meal.

The other thing I really enjoyed about this recipe was how fun it was. I've never used mashed tofu in anything before. If you're having a bad day, it's a great way to get some aggression out.

Makes 6 to 8 servings
Time: 50 minutes

Ingredients
-1 large head green cabbage
-2 medium onions (2 cups), chopped
-2 tsp olive oil
-3 1/2 cups chopped mushrooms (FYI, one 8 oz container of presliced mushrooms is about 3 c)
-1 cup grated carrots
-6 garlic cloves, minced or pressed
-1/4 tsp dried thyme
-1/2 tsp dried dill
-1/4 minced fresh parsley (left out)
-1 tbsp fresh lemon juice
-2 tbsp soy sauce
-1 tbsp miso
-12-ounce cake tofu, (pressed and mashed)
-1 c tomato juice (we used about 1 1/2 c)

Preparation
First things first, pressing the tofu. Place tofu cake between two plates. Place a weight, a heavy can or book, on top of the plate for 30 minutes or so. I used, with success, a 32 ounce jar of tomato juice as my weight. Then remove the weight and top cover and drain the water from the bottom of the plate. I know that after a long day this is probably a nuisance so I would suggest doing it the night before or over the weekend and then returning it to the fridge. After pressed, mash.

Bring a large pot of water to boil. The book recommends coring the cabbage and placing the whole head into the pot of boiling water for 5 minutes or until leaves pull away easily from the head. I foresaw too many trouble spots with this method that I recommend the method I used. Peel of 12-14 cabbage leaves before cooking the whole head. Slice leaf at the base and gently peel off. You'll find that some tear and some don't which I think would be true if you cooked the whole head to begin with. This method prevents you from having to take out a hot head of cabbage and potentially burning yourself. Cook for 5 minutes until tender, drain, and run under cold water to stop the cooking.

In a large skillet, saute the onions in the oiled for about 10 minutes, until translucent (in reading the recipe now, I realized that I uses 2 TBSP not 2 tsp, whoops!). I think I even commented too my cooking buddy that I was surprised that this book called for so much when it generally calls for so little! Add the mushrooms, carrots, thyme, dill, and parsley and continue to cook until the mushrooms become soft and juicy. Add the lemon juice, soy sauce, miso, and mashed tofu and mix well. When the tofu is heated through, remove from heat and set aside.

Preheat oven to 350.

Assemble the rolls. Put about 1/2 cup of filling at the broad end of each leaf, fold the side edges towards the center over the filling, and then roll lengthwise. Place rolls, seam side down, in an unoiled 9x12-inch baking pan and poor the tomato juice over them. Cover pan tightly with foil and bake for 20 minute, or until hot and steaming. We place pan on second shelf from top.

The cookbook recommends serving with rice but we ate as is! They reheat well too!

Bon ap!!

Falafel Footnotes

Forgot to mention a few things in my last post. For me, I cooked each side for 8 minutes on medium-low heat. This allows the sides to brown nice and are ultimately, easier to flip. You could probably let them go for another 2 minutes if you want an even deeper but not burned brown.

Deep fried falafel are very crispy on the outside but because these are not deep fried, the crispy outside and overall texture are different from restaurant falafel.

Tuesday, June 13, 2006

Baked Falafel


So last night, my cooking buddy was in the mood for falafel. He wasn't interested in the deep fried version, the kind that you often find at Mediterranean restaurants and is oh so good. I adore falafel and used it eat all the time in Chicago at this local restaurant where I could make a whole meal out of it for a mere $3, including a nice salad.

Anyway, he found a recipe for baked falafel and set my expectations correctly by saying that this was probably going to be nothing like what you get when you go out. With my expectations set, we gave the recipe a go. I didn't know falafel had peanut butter as an ingredient?! Perhaps it's just this recipe?

Makes 4 servings
Time: 50 minutes

Ingredients
-2 cups chickpeas, drained
-4 cloves garlic, peeled and sliced
-3 tbsp peanut butter
-1 green onion, chopped
-1 onion, cut into chunks
-1 egg
-1/4 tsp ground coriander
-1/4 tsp ground cumin
-1/4 tsp cayenne pepper
-1 tbsp soy sauce
-1 tbsp vegetable oil

Preparation
Well, don't do what I did. The oil is for the frying part -- it is not an ingredient for the falafels themselves. Even if you do add it, no worries.

In a food processor or blender, puree chickpeas. To the chickpeas, add garlic, peanut butter, green onion, onion, egg, coriander, cumin, cayenne, and soy sauce. Process until well mixed. Truthfully, we added all these ingredients to the chickpeas before pureeing the chickpeas. Why wait when those suckers have to be pureed to begin with.

The original recipe calls for shaping the mix into balls (about a tbsp for each ball) but since these aren't being deep fried, I think it's a poor suggestion. Instead, use a tbsp of batter to make a little pancake. This will allow the falafel took cook evenly, inside and out.

The recipe also suggests cooking on medium-high heat but I found that doing that made the outsides cook too quickly before the batter heated through in the middle. Instead, use medium-low so that it cooks slowly, allows the outside to brown nicely and cooks through on the inside. You may add oil to the frying pan but we didn't and they turned out just fine. I would definitely recommend a non-stick skillet.

Much to my surprise, the falafel were easy to make and tasty. But he was right, it doesn't taste or look like what you would get in a restaurant but it is reminiscent and a lot healthier. It was a touch heavy on the peanut butter but still good. We ate these with pita, lettuce, and some raita which mitigated the peanut butter. It was really wholesome and satisfying. I'm looking forward to leftovers tonight.

Friday, June 09, 2006

Spiced Cabbage & Potatoes

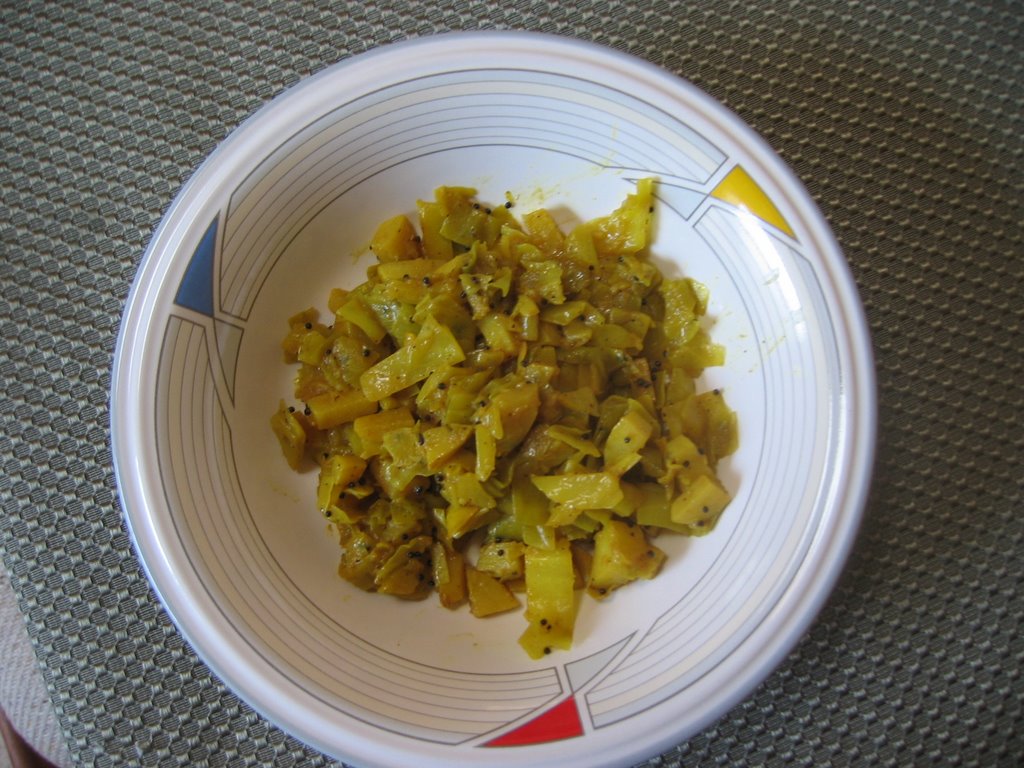
I didn't know it until last night but cabbage and potatoes go so very well together. I had a head of cabbage that absolutely needed to be used for fear of waste. My cooking buddy shared his mom's recipe with me which apparently turned out to be so darned good. I was too tuckered out after cooking (not from the cooking so much as my day) to eat any.

I used all the suggested ingredients (minus red chili pepper flakes) and modified the amount of spice.

Makes 3 servings
Time: 45 minutes

Ingredients
-4 cups chopped green cabbage
-4 small yellow creamer potatoes
-1/2 c onion, diced
-2-3 cloves garlic, diced
-1/4 tsp asofoetida
-1 tsp mustard seeds
-1/2 tsp ground cumin
-1/2 tsp ground coriander
-1/2 tsp ground turmeric
-1/2 tsp ground red chili pepper
-1 tbsp vegetable oil
-salt to taste

Preparation
Heat oil in non-stick skillet on medium heat. Add mustard seed, asofoetida, and ground red chili pepper. Don't forget the asofoetida during this step. It needs the oil to release it's wonderful scent and flavor. If you add it later in the cooking process, it's too late. Cover until you hear the mustard seeds pop. Add onions and garlic, saute until onions are translucent and soft. Add potatoes first because they take longer to cook. Suateed for 5-8 minutes until they start to get a bit tender. Add cabbage and salt. Saute for another 5-8 minutes, still cooking on medium heat. Do a taste test for salt. Add more if necessary. Add a bit of water (1/4 c) if pan is a bit dry, lower heat, and cover skillet. Lower heat and cook for 10 minutes until potatoes are tender.

The cabbage tastes amazing as do the potatoes. This dish has the right amount of kick and could be served with a variety of Indian breads or corn tortillas.

Monday, June 05, 2006

Chili Burgers Revisted

Here's a picture of the veggie chili burgers I wrote about on 4.23.2006. I gave them a go this evening. This is my 3rd time making them. The first time, I used drained kidney beans. I found that draining the kidney beans was not enough and found the mixture a bit soupy. The second time, it was drained and rinsed pinto beans, and the patties firmed up but weren't juicy. For this go, I went back to kidney beans, both rinsed and drained. This time I cut the oats a bit from 1 1/2 cups to 1 cup to see if this would increase the juiciness. It didn't exactly increase the juiciness but did make the burger more tender.

The only other difference is that I added 2 tsp cumin (the original calls for 1 tsp) to kick up the flavor a bit. That extra 1 tsp did the trick -- the flavor improved greatly. In my first entry about this entree, I said that I preferred the pinto beans to the kidney beans. I take it back -- I like the kidney bean burgers much much better. The flavor is fuller and richer and it enhanced my eating experience this evening.

I like serving these with Beckmann's Francese Rolls. They're nice and light, and they toast well.

Sunday, June 04, 2006

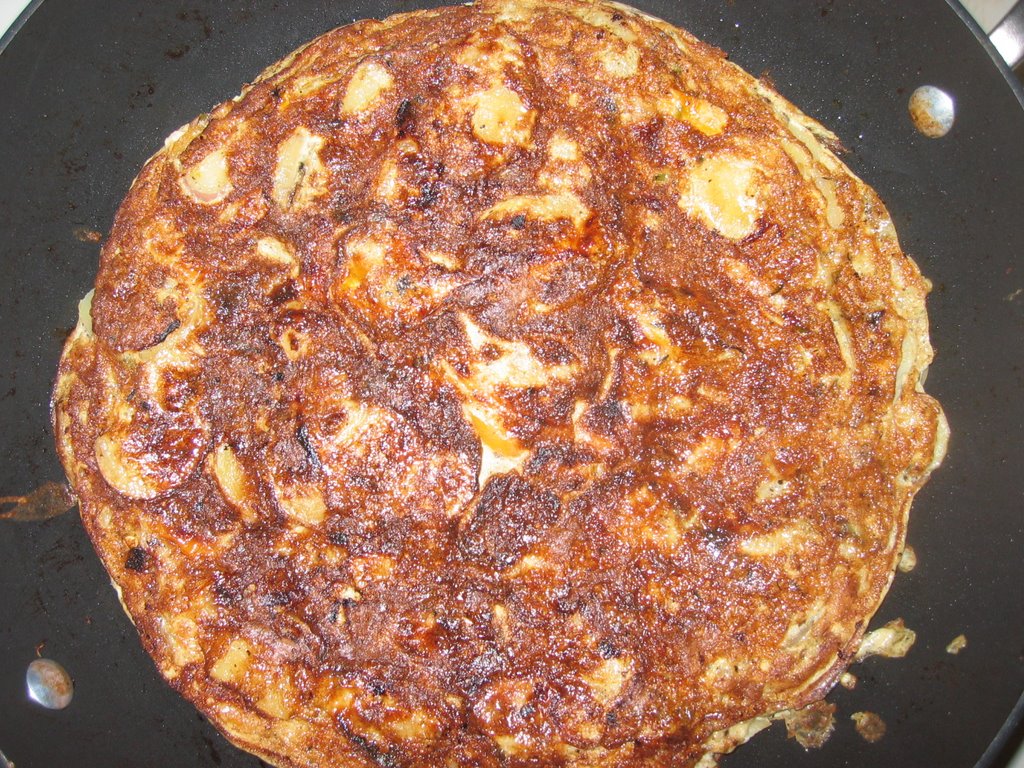
Spanish Potato Pepper Frittata


Prior to today, I've never made a frittata. I love them but since I don't have a skillet that can go into the oven, I haven't tried to make this dish. Then I was perusing Moosewood Restaurant's Low-Fat Favorites which discusses a relatively easy stove top method that I decided to try out.

My cooking buddy and I discovered this recipe in a round about way. We first found a recipe for Citrus-Dressed Asparagus which the book said could accompany the frittata so we decided to make both for a dinner time meal. The asparagus were over-cooked unfortunately but the frittata was amazing.

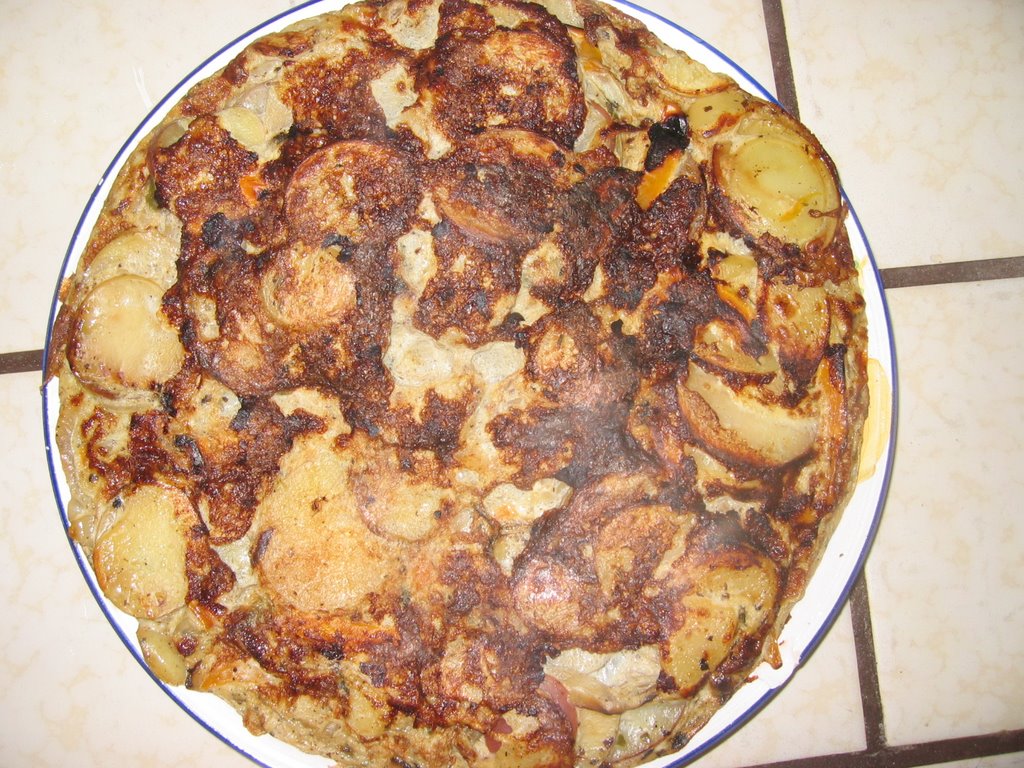
The eggs just barely hold all the veggies together but provides enough to allow for the beautiful golden brown color and a wonderful flavor when you do get a bit of egg! The final product is a light delicious frittata that can be eaten for breakfast, brunch, lunch or dinner and isn't too egg-y like some frittata's may be.

Makes 4-6 servings
Time: 45 minutes

Ingredients
-2 c sliced onions (thin strips)
-2 bell peppers, 1 red and 1 green (We used 1 orange pepper)
-1 cubanelle or other mild fresh chile
-1 pound potato (about 3 medium), scrubbed
-2 tsp olive oil
-1/2 tsp dried thyme
-1/2 tsp salt
-2 whole eggs
-6 egg whites
-2 tbsp water
-1/2 tsp ground black pepper

Preparation
Cut onions thinly and potatoes into 1/8 inch slices.

In an 11 or 12-inch non-stick skillet, heat 1 tsp olive oil. Add the onions and potatoes for 5 minutes. Add the bell peppers, cubanelle, thyme, and 1/4 tsp of the salt. Cover and cook on medium heat, stirring occasionally, for about 15 minutes, until the potatoes are tender. Remove the skillet from the heat.

In a large bowl, whisk together the eggs, egg whites, water, remaining 1/4 tsp of salt, and black pepper until blended. Stir the potatoes, onions, and peppers into the eggs.

Coat the bottom of the skillet with the remaining tsp of oil and return it to medium heat. When the skillet is hot, pour in the potato-egg mixture and distribute the vegetables evenly. Cover and cook for 5-8 minutes (for me it was 5 minutes), until the edges are firm and the bottom has browned. For me, this took 5 minutes and when I moved the side of the frittata away from the edge of the pan I could see that it was firm and brown.

Place a large, flat plate or pizza pan over the skillet and carefully flip the skillet over so that the frittata falls onto the plate. Slide the frittata back into the skillet and cook for about 5 minutes more, until the eggs are fully cooked. For me this, was about 3 minutes.

The trickiest part of this recipe is negotiating the flip. I used a dinner plate because I could place it into the skillet such that it was lightly pressing against the frittata. I thought this would be be better (than the pizza pan method) because the during the flip, the frittata would not move around and lose it's great shape. I placed one hand on the plate, applying gentle pressure to keep the plate in place, and flipped. The pizza pan, being larger in diameter than the pan, would have to be placed on top of the skillet such that there would be about 2.5 inches between the pan and frittata. Too much room for the frittata to jiggle around in.

This recipe takes about 45 minutes or so but it's so good, it's worth the extra effort. The cookbook suggest eating as is which is what I did but also says sour cream and salsa are good accompaniments which I think would be awesome! I had some sour cream in the fridge and over looked it!

I have pictures but Blogger won't post them even when it says that it has completed the upload.

Saturday, June 03, 2006


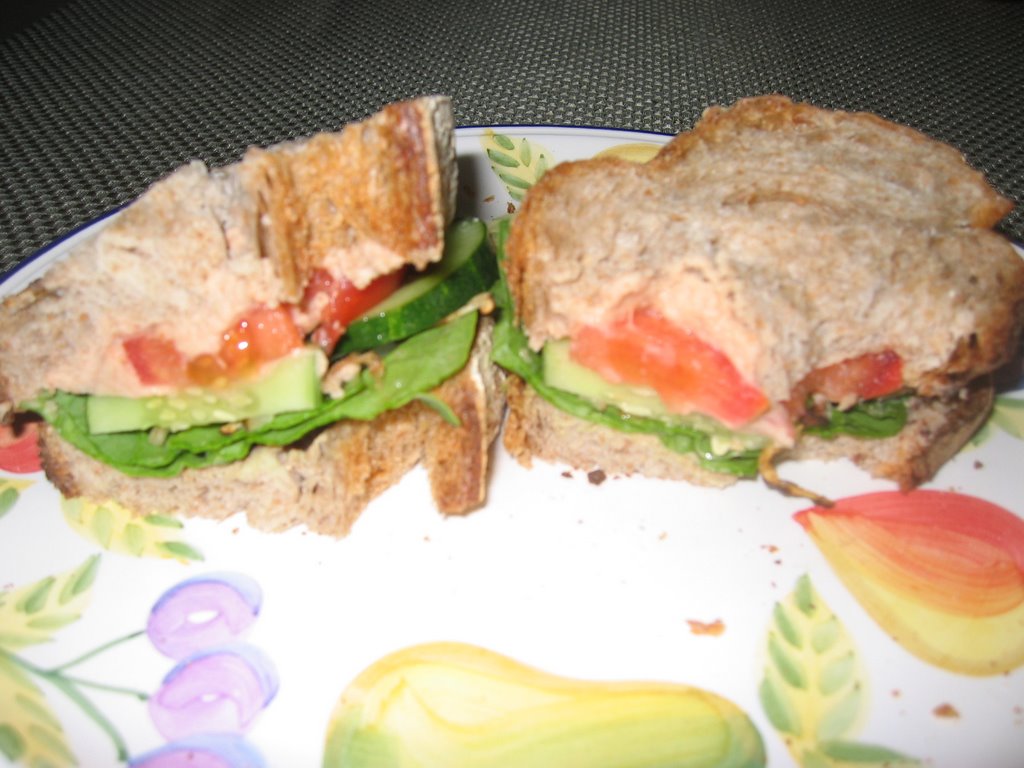
I don't know what to call these sandwiches. They are so darn good. Sandwiches are overrated yet underrated. I can't tell you how many times I've ordered a sandwich all excited and then am utterly disappointed. Too much mayo, or too much mustard, or not enough of something else. Bad tomatoes, you name it. It's terrible because sandwiches are simple enough but restaurants and delis sometimes try a little too hard with a food item that really doesn't need all that much effort. I could go on...

Anyway, all the veggies that you see came from our most amazing local farmers' market in San Mateo. The cucumber was 25 cents, the tomato 90 cents, the spinach a 1.50, and the bread was $4. The onions (which you can't see) came from Trader Joe's. I have generally purchased my produce from Whole Food's which I think is pretty good until I came to the farmers' market. There is such a huge difference in appearance, quality, and price. Everything I've purchased at the farmers' market is so much better.

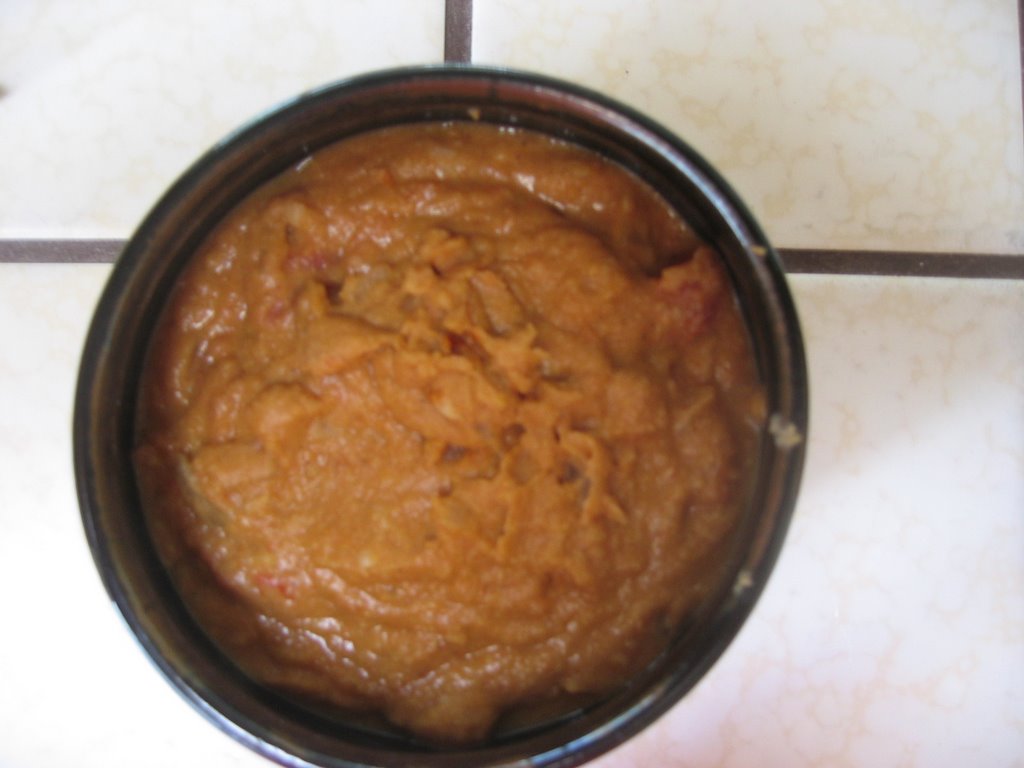
Anyway, these sandwiches are really simple. Remember the white bean dip from 5.21.2006? We spread a good amount on one slice of toasted bread and Dijon mustard on the other slice. The mustard adds a nice little kick that I'm always looking for. Place veggies in between which can be whatever you want. I sauteed the onions in a non-stick skillet without oil until they became brown/blackened which brings out their innate sweetness. We forgot to add chopped black olives which also make a great addition to this sandwich.

In desperation, we used pinto beans to make the dip because we didn't have any white cannelini. Pinto beans are also good at absorbing flavors added to it. The only difference is that the dip came out thicker than it would have otherwise but was still great.

Yes, I did nibble on the sandwich before taking the picture. As I took the first bite, I realized that I had not yet taken a picture. I can't tell you how many times this has happened. Of the four, this is the best one. Being in a hurry to dig in, I let quality control slip in the pic department.

Tuesday, May 30, 2006

Portabella Mushrooms Revisted


Here's the picture of the burger I wrote about a few weeks ago. This time, the burgers were even better, if that was possible. My cooking buddy broiled the mushrooms in the oven for 10 minutes or so (until you could hear them sizzling and steam coming off of them). We used a different type of Brie, not triple cream, and it was even softer so that the cheese could be spread across the bread and melt! It looks a little big for the mouth but it has amazing squishing ability because of the ciabatta. It was just fabulosa!

Sunday, May 28, 2006

Curried Potatoes


I just adore potatoes in all forms so I came up with this recipe. It's Indian comfort food for the soul. I made it last night with success.

Makes 3 servings
Time: 30 minutes

Ingredients
-1 1/4 lbs (about 4 good sized) Yukon gold potatoes, diced
-1 tsp mustard seeds
-1/2 c diced onion
-1 tbsp vegetable oil (I use canola)
-1 1/2 tsp ground coriander
-1 1/2 tsp ground cumin
-1 1/2 tsp ground turmeric
-1/2 tsp chili powder

Preparation
Cut the potatoes in half length wise. Cut each halve in half again (as if you were scalping a head -- a terrible thought, yes - but the best way I could describe this action. Then cut these into 3 or 4 slices length wise, and then cut into 1/4 inch cubes/rectangles more or less. The smaller the potatoes the faster they will cook.

Heat oil on medium heat in non-stick pan. Throw in mustard seeds and cover until you hear them pop. Add onions and saute until soft. Throw in potatoes and stir until they are thoroughly covered in oil. Toss in all spices and mix until thoroughly absorbed by potatoes. Cover pan, lower heat, and let cook for 15 minutes until potatoes are nice and soft! Occasionally check on potatoes to makes sure they aren't burning and give a quick stir. The non-stick pan is recommended for this dish as it will eliminate burning and other cooking mishaps.

The nice thing about this recipe is that you can't really go wrong with the spices -- if you toss in a bit too much it's not going to make the recipe bad or anything. When I made this recipe last night, I only added 1/4 tsp red chili powder but didn't taste it at all hence the modification to 1/2 tsp. You can add more onions (or less) depending on your preference and taste. When they are in season, I sometimes I toss in a small tomato.

Serve with your favorite Indian bread or corn tortillas. This stuff is so darn good if I do say so myself. The picture doesn't do this dish justice and the yellow color is not food dye -- it's the turmeric.

Wednesday, May 24, 2006

Rant of the Week

When I work, I work. When I eat, I eat. It isn't too often that I work and eat simultaneously. I once commented to a former co-worker that when I eat, I really take the time to enjoy my food and that I make it a point not to work while eating or do activities that distract me from eating. Eating time is eating time. She laughed at me and said, "You must cook really interesting foods." She missed the point but to be fair, I couldn't articulate what I feel about food which is that it gives me such immense joy. I like the smells, flavors, and looks to name a few.

For example, in the mornings I like to eat oatmeal with milk, a little brown sugar, and flax meal. Sometimes I throw in a banana or blueberries. When I wake up, I can't wait to eat this breakfast. I try to motivate myself to get up, get my work out out of the way, in anticipation of the first bite. Sometimes I skip my work out.

The 2.5 minutes that it takes for my oats to cook in the microwave can't go by fast enough for me. I'm a like a cat waiting to pounce on a mouse but with infinitely less patience. I stir in my flax meal and brown sugar, and seat myself at the table. I close my eyes, place my hands around the bowl, taking in its warmth, while my face becomes little dewy from the steam of the milk. I open my eyes to see those nutty little oats poking through the frothy white surface. The mild scent of brown sugar tingles my nose while the hairs on the back of my neck stand as the the sun lightly beats down on my back. And then I dig in and I relish every moment. I scrape down my bowl and lick the last tender morsel off my spoon. I am immensely satisfied but a little sad when I see the bottom of my bowl.

Ok, so I really love eating but this breakfast experience I've described is a 15 minute endeavor (including microwave time!). These few precious minutes set the tone for my day and my frame of mind. I won't give them up.

I wouldn't give them up at work either. I would get so irritated (for those that know me, also imagine lots of eye brow action) when co-workers brought their cell phones into the lunch room so that they could continue their work. I wanted to chuck those darn things out the window, not to mention the wall phone (in a kitchen?)! Do people talk while they're in the shower? When is work so important that you can't take 15-20 minutes to just sit, eat, and not talk shop?

I was so excited when I came across a passage (p. 8) in Natural Health, Natural Medicine that articulates my feelings toward eating. Andrew Weil says that our state of mind while eating dictates how well our bodies digest food. But he also talks about giving eating the attention it deserves, just as we do with any other activity.

Thoughts on this?

I'm a bit miffed at myself as I just realized that tomorrow morning I will not be having my delightful breakfast -- I ran out of milk today!

Indian Chickpea Spread


I have to say that I'm now mildly offended by any sort of store bought dip. Companies add so much bad stuff that you can longer taste the primary ingredients. A few weeks back, I commented on the Athenos brand hummus which tastes sweet because of high fructose corn syrup. It masks the taste of the chickpeas themselves which aren't naturally sweet.

Having made two dips this week that are both tasty and so quick and easy to whip up there's really no need to buy them. I know people get a bit intimidated but the white bean dip I wrote about a few days back is seriously a 5 minute endeavor with ingredients you most likely have in your pantry. It would take longer to go to the grocery store to buy a ready made dip, no?

Anyway, I was cruising Moosewood Restaurant Low-Fat Favorites and found this aromatic and flavorful dip that I tried out on my book club last night. You won't find this in any grocery store.

Makes 2 cups
Time: 20 minutes

Ingredients
-1/2 c minced onions
-1 tsp canola oil
-2 garlic cloves, minced or pressed (I prefer minced)
-1 tsp ground coriander
-1/2 tsp ground cumin
-1/2 tsp garam masala
-1/8 to 1/4 tsp cayenne (I used 1/4)
-1 cup diced tomatoes
-1 1/2 c cooked chickpeas (16 ounce can)
-2 tsp fresh lime juice
-1 tbsp chopped fresh cilantro
-salt to taste

Preparation
In a non-stick pan, saute onions in the oil on low heat for about 5 minutes, until softened. I think this step is really important that some folks over look -- a nicely sauteed onion makes a big difference in flavor. Add the garlic, coriander, cumin, garam masala, and cayenne and saute for another minute, stirring constantly to prevent sticking (and burning). Stir in the tomatoes, cover, and gently simmer for about 5 minutes.

While this is going on, drain the chickpeas, reserving the liquid. In a food processor, grind the chickpeas with just enough reserved liquid to make a smooth puree. Stir in the puree into the simmering tomato mixture, add the lime juice and cilantro, and cook on low heat for about 5 minutes. Salt to taste.

Serve hot or cold. I served this with crackers, tortilla chips, and baby carrots.

I used 1/4 tsp cayenne and when the spread is hot, you can feel the heat more but not in bad overwhelming way. When the dip cools down, it's much more tempered but the cayenne still makes itself known. I cheated and used canned diced tomatoes (salted) because tomatoes are not in season. Plus, canned tomatoes provide the necessary juices for good simmering that store bought tomatoes sometimes lack.

By the time I realized I didn't have a good shot of the dip, it was all gone! The picture does not do it justice.

This dip is addicting.

Tuesday, May 23, 2006

Oatmeal Chocolate Chip Cookies


I haven't been a fan of oatmeal cookies because the one's that I have eaten have come from a store bought package. These cookies are filled with who knows what. Have you noticed that oatmeal cookies in stores sometimes tend to lack oatmeal? These cookies should be called something like "X Cookie with a Bit of Oatmeal." But since that's such a ridiculous name that wouldn't sell squat, companies end up deceiving their customers by misnaming their cookies. Enough of that I say.

I have now decided that nothing from a store can beat what can be made at home with a little care and some time. I found this recipe on cakerecipe.com a while ago which rated this recipe 5-stars. I've probably made this recipe 3-4 times now and it's been a favorite at our home.

This is a substantial oatmeal cookie.....not just a few flecks of oatmeal here and there. It has 3 cups of oatmeal -- now that's what I'm talking about! I love the way these taste -- perfectly sweet with an occasional bite into a chocolate chip. It's a little piece of mouth heaven.

Makes 27 cookies

Ingredients
-1 cup (unsalted) butter, softened
-1 cup packed light brown sugar
-1/2 cup white sugar
-2 eggs
-2 tsp vanilla extract
-1 1/4 cups all-purpose flour
-1/2 tsp baking SODA
-1 tsp salt
-3 cups quick-cooking oats
-1 cup chopped walnuts (I left these out)
-1 cup semisweet chocolate chips

Preparation
Preheat oven 325 degrees F.

In a large bowl, cream together butter, brown sugar, and white sugar until smooth. Beat in eggs one at a time, then stir in vanilla. Combine the flour, baking soda, and salt in a separate bowl; stir into the creamed mixture until just blended. Mix in the quick oats, walnuts, and chocolate chips. Drop by heaping spoonfuls onto ungreased baking sheets.

Bake for 12 minutes in the preheated oven. Allow cookies to cool on baking sheet for 5 minutes before transferring to a wire rack to cool completely.

Comments and Tricks
1. First, this recipe did not make 42 cookies. It made 26 plus one small hardly cookie. I don't think I made unusually large heaping spoonfuls or anything.

2. At 12 minutes, the cookies looked like they weren't done. In fact, they may even look a little 'wet' on top but that's just the butter! This is the way the cookies are supposed to look. This is keeps the cookies moist and chewy. They will continue to cook in their own heat. So don't cook them for longer or you may dry out your cookie (and that's worse than under baking).

3. In general, and not just for this recipe, one should use unsalted butter so that you may control your salt intake and the flavoring of your food. If you use salted butter, you may want to halve the salt amount or eliminate it altogether (so I've read in the reviews).

4. My first batch looked awesome -- the cookies spread out so nicely. The next batches did not spread out as much. This did not diminish the taste just the 'look.' In reading some of the reviews, it says that if this happens it's because the dough has become warm so between batches the dough should be kept in the fridge! I'll have to try that the next time and report back.

5. Add 1 cup of oatmeal at a time -- it will make it easier to blend it into the dough. As you add more, you may need to use your hands to blend everything well. This is what I do.

The critics
I read a few harsh reviews of this recipe. I poo-poo those folks a bit. Lots of comments commented on the low flour to high oatmeal ratio. Well, this is an oatmeal cookie! Some commented that this ratio made it difficult to blend the dough. Yeah it may be a little tough but if you dig in with your hands, you should be fine. It's only in the last 50 years that we've developed all these kitchen gadgets. Some times they work and some times what we're given at birth works better. Don't get me wrong. I love gadgets and have some. But think back to the good old days when such gadgets were unavailable. When something went wrong in the kitchen one could really only look at themself for the error -- there wasn't a gadget to blame. So I leave this entry with that thought.

Monday, May 22, 2006

Roasted Broccoli Revisited


Well, here's a picture of the roasted broccoli I wrote about a week ago or so. This time, I peeled it in the hope that this would make the stems a little less tough. Sadly, the extra effort did not help as much as I thought it would. Nevertheless, still tasty! The first time I made this (without peeling the stems), the stems didn't really turn brown, only the florets. This time the stems turned a bit brown. The brown parts are more flavorful. You can see that the florets are bit a brown though they do not taste burned at all.

Though I used slimmer florets, the broccoli still needed the full 20 minutes to soften. I didn't have to extend the cooking time to 25-30 minutes like the first time. So I guess the general rule of thumb is that the thicker the stem, the more cooking time is needed.

I should have mentioned this in my first entry but didn't. Roasted broccoli does not taste anything like steamed broccoli at all. Roasting broccoli brings out its sweetness (quite a surprise) which is a flavor you don't get when it's steamed. For those that don't care for steamed broccoli, may want to try it this way!

Sunday, May 21, 2006

White Bean Dip


I was cruising the Food network website when I came across this 5 minute bean dip by Ellie Krieger. I think she's great. She's makes tasty, healthy food. When I saw a video clip of this, I thought this would be such a great snack to make.

Makes 6 to 8 servings
Time: 5 minutes

Ingredients
-2 14 oz cans of white cannelini beans (rinsed and drained)
-2 tbsp roasted garlic
-3 tbsp extra virgin olive oil
-3 tbsp fresh squeezed lemon juice
-salt and pepper to taste
-1/4 c parsley leaves

In a food processor, combine all ingredients (except parsley). Process until smooth. Season to taste with salt and pepper. Garnish with parsley. Serve with your favorite chips, crackers, and/or veggies.

This stuff is so good. Once you eat this, you will find that any store bought dip is salty, or so I've been told.