Saturday, February 24, 2007

Roasted Vegetables

I love roasted vegetables. They are quick and simple to make and full of flavor. Just chop up lots of your favorite vegetables, including carrots, zucchini, mushrooms, onion, eggplant, bell peppers etc. into equal sizes, toss in a bit of olive oil and broil until tender and brown. You could also throw in an herb. Depending on thickness of pieces, this could take as little as 10 minutes.

Enjoy!

Wednesday, February 14, 2007

Braised Collards

I had never tried collard greens until this dish was made for me. My cooking buddy made this for me, and he pieced together the recipe from two cook books to get the recipe, one for cooking to the collards and the other for the pepper sauce. They have amazing flavor and are must try with this simple recipe that comes from Deborah Madison's Vegetarian Cooking for Everyone. My cooking buddy made a few modifications because Madison's recipe calls for brown butter which takes at least an hour to make.

Makes 4 to 6 servings

-4 C collards, long stems and tough ribs removed
-1/4 cup butter
-1 onion, diced
-2 garlic cloves, thinly sliced
-1/2 tsp red pepper flakes
-salt

Preparation
Plunge green into large pot of boiling salted water, cook them for 10 minutes, then remove to a bowl. Reserve 1/2 cup of the cooking water. Heat the butter with the onion, garlic, and pepper flakes in a wide skillet over medium heat, stirring occasionally, until the garlic is lightly colored and the onion is soft. Add the greens, their reserved cooking water, and 1 tsp salt. Cook for 30 minutes and taste again for salt. Serve sauce on the side. I don't think we actually cooked this dish for 30 minutes. I think we cooked the collards until the water was absorbed.

Hot Pepper Vinegar
Yields 1 Cup

Ingredients
-1 c apple cider vinegar
-1/4 tsp - 1 T Tabasco or other hot sauce (or 1/8 to 1 tsp cayenne)

In glass jar, combine the vinegar and hot pepper sauce or cayenne. Shake before using. Hot pepper vinegar keeps indefinitely, refrigerated or not!

I actually like the dish with and without the sauce. If you want to save a few minutes, skip the sauce.

Monday, February 05, 2007

Leek Pie with Potato Crust

We received leeks in our box and didn't know what to do with it until we came across this recipe in Vegetariana. It's savory, healthful comfort food for a cold winter's night. It is bit time consuming but using a food processor to grate the potatoes and slice the mushrooms (or purchasing sliced mushrooms) speeds things up greatly.

Serves 4 to 6
Cooking Time: 1 hour+

Ingredients
- 2 medium potatoes, peeled and grated
- 2 large leeks, white and palest green parts only
- 2 T butter
- 1 1/2 c sliced mushrooms
- 3 T dry white wine
- 1/4 c bread crumbs
- 1/2 c part-skim ricotta cheese or 1/2 c finely crumbled tofu
- 1 tsp dried dill
- 1/2 tsp dried oregano
- 1/4 tsp dry mustard
-1/4 c grated Parmesan cheese
Salt and pepper to taste

Preparation
Preheat oven to 375 degrees.

Place grated potatoes in a colander. Let drain for 10 minutes, then squeeze out some of the moisture.

Chop the leeks and wash carefully in a colander, removing all grit.

Heat butter in a skillet until it begins to foam. Add the leeks and saute over moderately low heat for 5 minutes, stirring frequently. Add the mushrooms and the wine (we used red since we had a bottle already open) and saute until the mushrooms are just tender. Transfer to a mixing bowl.

In the same skillet, heat oil and 2 T of water and cook the grated potatoes over moderate heat until nearly tender; do not brown. Add water as needed to keep it from sticking.

In the meantime, combine the leeks and mushrooms with the bread crumbs (I used fresh), ricotta cheese or tofu, and seasonings. When the potatoes are ready, stir the Parmesan cheese into them and add a little salt and pepper.

Oil a 9-inch round or square baking dish and pat half the potato mixture into the bottom. Pour the entire leek mixture over it, smooth it over, and top with the remaining potatoes. Bake for 35 to 4o minutes or until the potatoes are golden brown and crusty. Let stand for 5 to 10 minutes, then cut into squares or wedges and serve.

Sunday, February 04, 2007

Roasted Sweet Potato Salad

I purchased 3 lbs of sweet potatoes, the smallest quantity I could buy at Trader Joe's last weekend and was trying figure out how to use the remaining 1.5 pound I did not use in the roasted carrot and sweet potato soup. I came across a recipe I had flagged many many months ago. I loved the recipe because it was simple, easy, tasty and only requires 5 ingredients.

This recipe is so tasty and flavorful, and has the added bonus of being healthful! It comes from the Eating for IBS cookbook.

Makes 4 servings
Cooking Time: 40 minutes (oven time), 10 minutes of prep

Ingredients
- 1 1/2 lbs sweet potatoes, peeled and quartered length wise
- 1 T olive oil, plus 1 tsp, divided
- 3 T apple cider vinegar
- 1/8 tsp salt
-2 T scallions, chopped

Preparation
Preheat oven to 400 degrees F. Place quartered sweet potatoes in baking dish, drizzle with 1 T olive oiled, cover with aluminum foil, and bake for 20 minutes. Remove foil, turn potatoes, and continue to bake for another 15-20 minutes until lightly brown. Remove from oven, let cool. While potatoes are roasting, stir together vinegar, salt, and 1 tsp olive oil together. Set aside. Once potatoes have cooled, chop into bite size pieces and place into serving bowl. Toss together vinegar dressing and scallions, and gently toss together. Serve.

I did not have scallions, so I used onion instead and it was just great! So light, so tasty, so amazing.

Wednesday, January 31, 2007

Boston Black-Eyed Peas

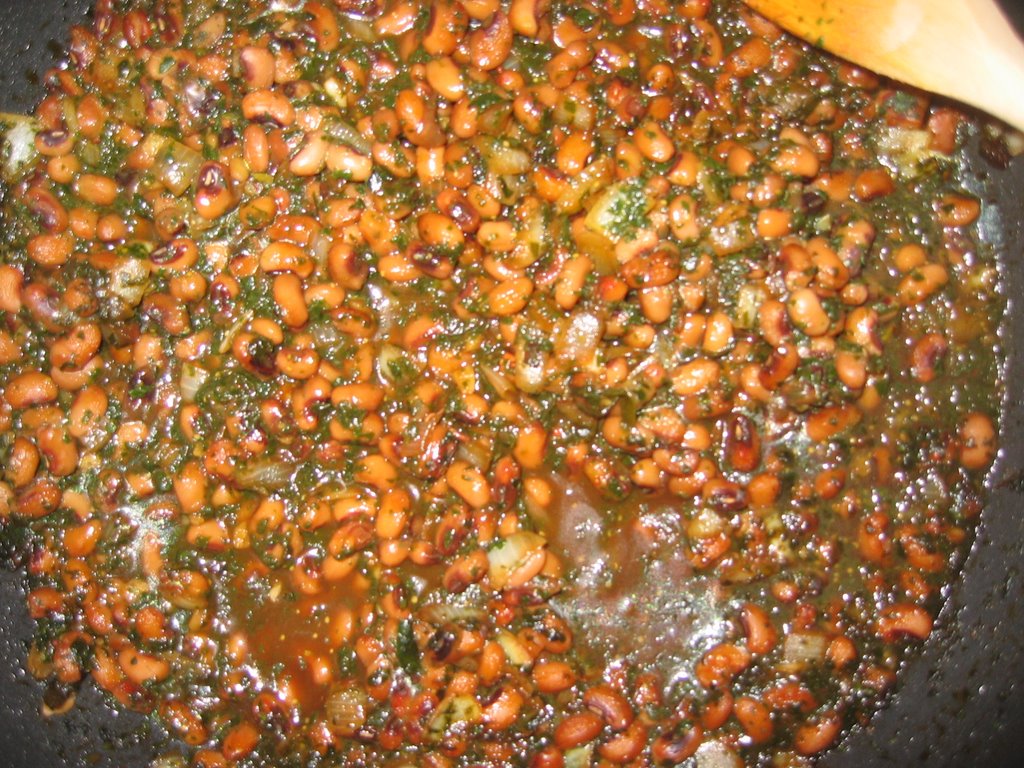
I love the taste of black-eyed peas but rarely ever use or eat them until I found this quick and easy recipe from New Recipes from Moosewood Restaurant. This dish is packed with flavor and stands well all on it's own. I ate it with French bread, which was fine, but could really use something heartier like whole wheat or rye. Using canned beans will save you about 15 minutes.

Makes 4 servings
Cooking Time: 25 minutes

Ingredients
-4 cups canned black-eyed peas, drained and saving the black-eye pea juice
-1 T butter or vegetable oil
-2 garlic cloves, minced or pressed
-1 cup chopped onions
-1 cup chopped fresh beet greens, collards, chard or spinach (optional, but definitely use!)
-1/4 c Tamari soy sauce
-1/3 c molasses
-1 tsp dried mustard or a good quality prepared mustard

Preparation
Saute garlic and onions in the butter or oil until the onions are just translucent. If you choose to add the greens, mix them into the onions and continue to saute until the greens wilt. Mix together soy sauce, molasses, and mustard and set aside. Drain the black-eyed Peas, saving a cup of liquid.

Add drained peas to sauteed onion mixture and the molasses-soy sauce. Cover and simmer on very low heat for 10 to 15 minutes, stirring frequently. During this simmer there is some danger of sticking or scorching, so watch closely. I, for some reason, never had this problem. Maybe because I used a non-stick pan?

Notes
I think it's really important to use a high quality soy sauce because it is one of the main flavoring agents for this dish, so don' t use the cheap stuff that is high fructose corn syrup based. Also, I really chopped up the spinach. I think the recipe called for bigger pieces, hence watching for the wilting action, but I personally liked it really chopped up.

Saturday, January 27, 2007

Roasted Garlic and Green Pea Dip

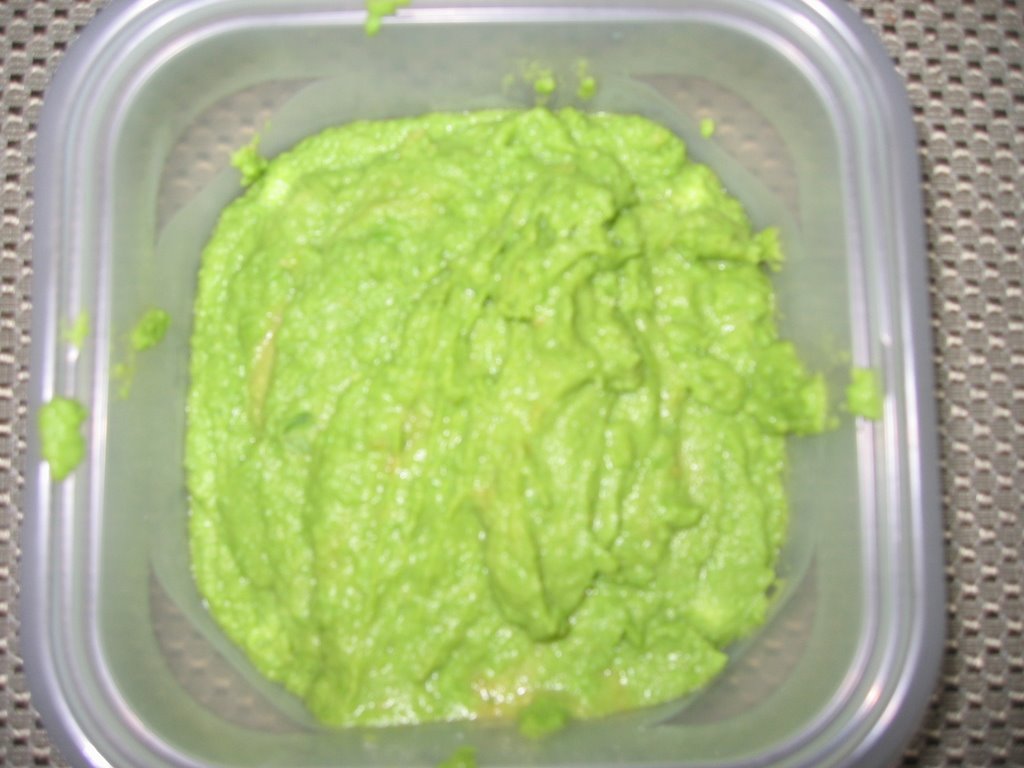
It looks like guacamole but it isn't! I wanted to make this dish for months but without a food processor I couldn't. So I was super excited about this dish because it is bright green, healthy, and different than other dips, but I was disappointed. Yes, the picture is sorely lacking. The dip was definitely edible, particularly with a good cracker, but even with a whole head of roasted garlic, it still had that pea taste. This dish tastes better chilled than when it is warm. Perhaps the next time, I need to add even more garlic than I did.

This recipe comes from Eating for IBS.

Makes 4 servings
Cooking Time: 15 minutes

Ingredients
-1 large head garlic, unpeeled
-1 tsp olive oil
-1 tsp white vinegar or white wine vinegar
-1/8 tsp salt
-3 T water
-10 oz- package frozen green peas, about 2 cups

Bread, preferably baguettes, halved horizontally, toasted

Preparation
Preheat oven to 400 degrees F. Remove outer paper skins from garlic head, but do not separate cloves or peel. Wrap tightly in foil and bake until soft, about 45 minutes. Cool. Squeeze cloves out of garlic head and into a food processor. Add remaining ingredients and puree until very smooth, scraping down sides with a rubber spatula as necessary. Serve dip with toasted baguettes.

Sunday, January 21, 2007

"Better than My Pumpkin Pie," Pumpkin Pie

It was my mom's birthday on Friday, so I decided to surprise her with pumpkin pie, her favorite. So I searched online for a good filling, since I already have a great crust recipe. The recipe I found online, was not as nearly as original as I thought. I won't out the person but the pie filling recipe that I found, except for 1 ingredient, was identical to the recipe on the Libby's 100% Pure Pumpkin can. The recipe on the can is excellent. It is not so sweet that it masks the taste of pumpkin and the spice ratio is just right. The only thing I did differently was that I used fresh ginger to ground ginger. In fact, I probably could have added a bit more fresh ginger than what I added.

My mom, who has really high cooking standards, said that my pie was better than even hers, which is quite the compliment.

Makes 8 servings
Cooking Time: 10 minutes

Ingredients
-3/4 c sugar
-1/2 tsp salt
-1 tsp ground cinnamon
-1/2 tsp fresh ginger
-1/4 tsp ground cloves
-2 large eggs
-1 can (15 oz.) Pumpkin
-1 can (12 fl. oz.) evaporated milk
-1 pie crust recipe

Preparation
Mix sugar, salt, cinnamon, ginger, and cloves in small bowl. Beat eggs in large bowl. Stir in pumpkin and sugar-spice mixture. Gradually stir in evaporated milk. Pour into pie shell. Bake in pre-heated 425 degree oven for 15 minutes. Reduce temp. to 350 F and bake 40-50 minutes or until knife inserted near center comes out clean. Cool on wire rack for 2 hours. Serve immediately or refrigerate.

I baked the pie on the second shelf from the bottom (similar to how I baked the blueberry pie), but never moved it to the top shelf. After the 15 minutes, I covered the edge of the pie crust with foil to prevent further browning.

Monday, January 15, 2007

Carrot and Sweet Potato Soup

Sam, my good college friend, is a really great cook. When we lived in the same building, I definitely enjoyed the meals she shared with me. In our senior year of college, some us decided to get together to cook Thanksgiving dinner. It was so impressive to see Sam make rolls from scratch, without the aid of a food processor or mixer. She is kitchen goddess, eats healthy, experiments, and is not afraid of butter. My kind of cook.

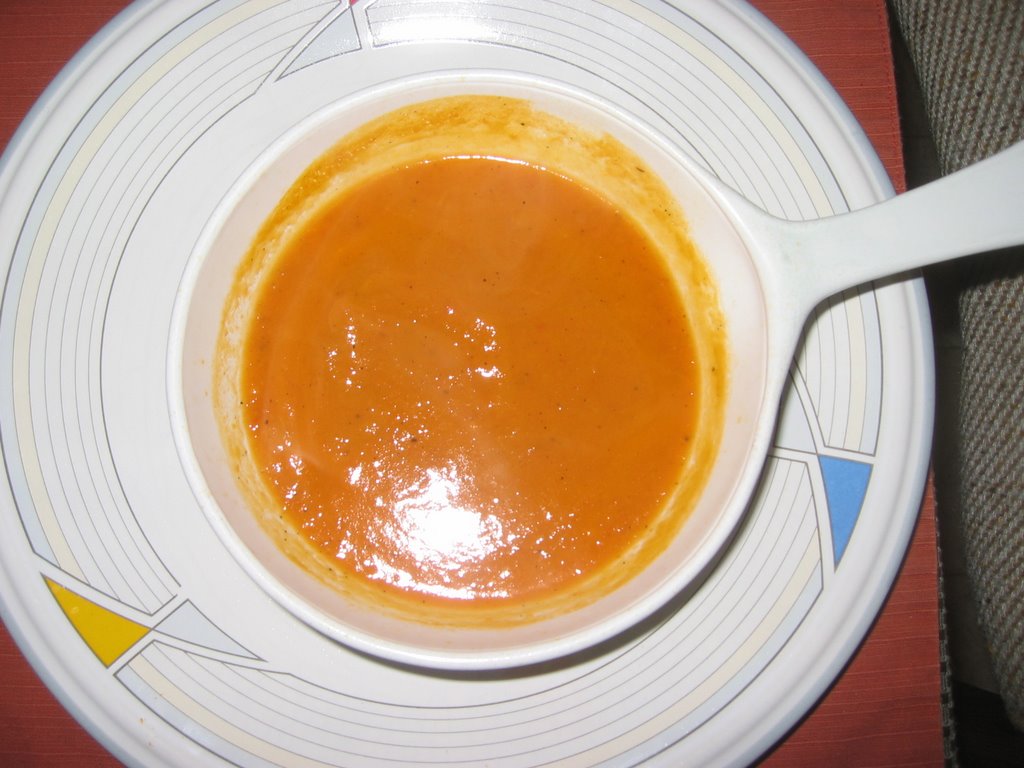
We were talking and she shared with me this great soup recipe, perfect for a cold winter's night. It is so simple and delicious. The soup was awesome and during this process, I discovered that roasted sweet potatoes are absolutely divine. Roasted sweet potatoes are what healthy candy should be. They taste amazing and I'm going to include them in my diet more often.

Makes 4 servings
Cooking Time: 30 minutes (oven time), 20 minutes stove

Ingredients
- 2 large carrots, peeled and cut into 2-inch pieces
- 3/4 lb sweet potato, peeled and cut into 2-inch pieces
- 1 small onion, cut into 8 wedges
- 1 T olive oil
- 4 cups water
- 1 tsp finely grated fresh ginger
- 3/4 tsp salt
- 1/4 tsp freshly ground black pepper

Preparation
Preheat oven to 400 degree.

Toss carrots, sweet potato, and onion in olive oil and place on cookie sheet. Bake for 30 minutes or until vegetables are tender and just beginning to brown, stirring after 15 minutes.

Place vegetables, water, and ginger in large pot over medium-high heat; bring to a boil. Cover, reduce heat, and simmer for 20 minutes.

Use immersion blender to puree soup, otherwise use a blender.

Sam's Suggestions
The original recipe called for stock but Sam omitted it, as did I, and used water instead, making it much healthier by significantly reducing the salt content. Without the stock, this recipe has more than enough flavor probably because the vegetables cook in the water for a bit. I ended up using 3/4 tsp salt, using 1/4 tsp increments to get it right. You may find that you need more or less. I was a bit shocked to find that the original recipe called for 1/4 tsp salt. I generally find that most recipes that use stock don't need additional salt.

She also omitted the cranberry relish, which I did as well. It tastes darn good without it and reduces another cooking step, which is always a winner for me!

I bet this soup would go so well with corn muffins.

Thanks for sharing.

Saturday, January 13, 2007

Beet Risotto with Greens

We've wanted to make this for some time and now that beets are in season, we could. It was also a great way to use up the kale that came in our veggie box from Capay Farms. The recipe calls for the red beets but we used golden ones. I was really looking forward to a jewel colored risotto especially posting a picture on the blog but in the end I was glad that the store did not have red beets because they stain terribly. This delicious recipe comes from Deborah Madison's Vegetarian Cooking for Everyone.

As much as I love risotto, if you work, it's definitely a weekend recipe because of the time involved to chop up the veggies and cook every thing. Even with a food processor to take care of the chopping, etc. it probably took over an hour. I was so glad to have a food processor on hand -- it grated the beets and finely chopped the kale in seconds. Crack open a bottle of wine and enjoy while cooking, it makes the time pass more pleasantly if you're cooking alone.

Makes 4 Servings

Ingredients
-5 1/2 to 6 1/2 cups stock
-3 T butter or mixture of butter and olive oil
-1/2 cup finely diced onion
-1 1/2 c Arborio rice
-1/2 c dry white wine
-2 T chopped parsley
-2 T chopped basil or 1 T dried
-2 to 3 medium beets, peeled and grated, about 2 c
-2 to 3 cups greens -- beet, chard, kale, or spinach -- stems removed, finely chopped
-salt and fresh milled pepper
-Grated zest and juice of 1 lemon
-1/2 c freshly grated Parmesan

Preparation

Simmer the stock on the stove. Heat the butter in a wide pot, add the onion, and cook over medium heat for 3 minutes, stirring often. Add the rice, stir to coat it well, and cook for 1 minute. Add the wine and simmer until it's absorbed, then stir in half the parsley, the basil, grated beets, and the chard or kale. Add 2 cups stock, cover, and cook at a lively simmer until the stock is absorbed. Begin adding the remaining stock in 1/2 cup increments, stirring constantly until each addition is absorbed before adding the next. When you have 1 cup left of stock, add the beet greens or spinach. Taste for salt, season with pepper, then stir in the lemon zest and juice to taste. Serve dusted with the cheese and remaining parsley.

Notes:
I didn't have parsley so I left it out.
The lemon, I think, is an important ingredient in this recipe. It tempers the root-y taste of beets and adds freshness.

Sunday, January 07, 2007

Homemade Hummus

There are some really great quality hummus' you can buy in your local grocery store but nothing beats making it yourself. It only takes a few minutes (with either a food processor or hand held) and the results are so much better than even the best brand. The recipe I found comes from none other than New Recipes from Moosewood Restaurant.

Makes 3 to 4 servings
Time: 5 minutes

Ingredients
-1 16 oz can of garbanzo beans (drained, and saving the liquid)
-1/4 cup tahini
-1/4 to 1/2 cup garbanzo liquid
-1 to 2 cloves of garlic
-2 to 3 T of fresh lemon juice
-1/8 tsp cayenne (optional)
-1/2 tsp salt

-chopped parsley

In a food processor, process garbanzo beans, ¼ cup garbanzo liquid, and lemon juice until it's roughly chopped. Then add tahini, garlic, cayenne, and salt and process until rough and creamy. You don't want to over do the processing of the hummus. Add reserve liquid to get the kind of consistency you want. Stir in chopped parsley.


Personally, all I needed was the 1/4 cup, especially if you go with an additional tablespoon of lemon. And I've tried the recipe with 2 T lemon juice and think it tastes better with 3. I like the freshness lemon brings. While the cayenne is optional, I also recommend it because it gives garbanzo beans a good quality zing.

I adore the results of this recipe.

Thursday, January 04, 2007

Blueberries

For the blueberry pie, I used frozen blueberries. I used 1 16 oz. bag of Trader Joe's Northwest blueberries which are fat. 16 0z. is approximately 3 1/4 cups of blueberries. For the remainder (3/4), I used Whole Foods 365 brand wild blueberries. I did not defrost, put them in frozen. I think the fat blueberries work well because they fill out the pie and hold their shape quite well.

Tuesday, January 02, 2007

New Year's Eve Blueberry Pie

I love pie, especially berry pie. I know, I over use the word 'love'. I use 'love' to describe all the foods and recipes I write about on this blog. But it's completely true. I love food and I absolutely love eating.

Over the holidays, I received the ultimate gift that will bring my cooking to the next level, I think. I now own the Cuisinart Custom Pro 11 and I'm loving it. I could never bring myself to make a pie crust from scratch because I just didn't know how to do it, but with the Cuisinart, it was so easy.

I received this amazing gift and decided that I need to make pie for the people that gifted it to me a week later for our New Year's eve celebration. A friend shared an all butter pie crust recipe and I did extensive research on the pie filling. After reading about 80 reviews or so, I made modifications accordingly. Below, I share the recipe for just the filling because everyone, as I've discovered, has their favorite crust recipe. The recipe was submitted by Beth on allrecipes.com.

Having never made a pie crust from scratch before, I loved the recipe that I used. It was simple, easy, and came with specific instructions on how many pulses should be used at each step. Of course I was anxious the whole time, saying "I have concerns," whenever my curious and supportive cooking buddy entered the kitchen to see how things were going. It is from Cook's Illustrated and is all butter (no shortening). It flaked absolutely beautifully (even the bottom crust!). In fact, the whole pie came out fabulously, much to my happiness and complete surprise! I'm definitely making pie again. If you're interested in the pie crust recipe, I will share, along with tips.

Serves 8
Cooking Time: As a beginner, way too long, but so worth it!

Ingredients
-
3/4 c white sugar
-4 T cornstarch
-1/4 tsp salt
-1/2 tsp ground cinnamon
-1 T fresh lemon juice
-4 c blueberries
-1 recipe for 9-inch double crust pie

Preparation
Stir all dry ingredients together (sugar, cornstarch, salt, and cinnamon). Add blueberries and lemon juice, and toss gently until blueberries are lightly dusted with dry ingredients. Scoop out blueberries into your pie shell. Evenly sprinkle top of blueberries with excess dry ingredients. Cover with pie crust. Make slits on top to allow moisture to escape.

Every oven is different but for me, I baked the pie in a pre-heated oven at 375 degree for about 60 minutes. At this point, the pie edges will be starting to brown, so cover crust edges with foil, and bake for an additional 15 minutes or so until top is brown. Remove pie and let cool for an hour or two to help the filling solidify a bit.


A lot of recipes call for a 425 oven which I think is way too hot, and the pie crust will brown before the pie has a chance to cook through. I think it's better to cook at a lower heat for a longer period of time. At 30 minutes, my pie was still pale, which was better than it being brown at 25 minutes!

My oven has 4 slots where the racks can fit. I was debating between the 2nd and 3rd rack from the top. I thought the 2nd shelf was a bit to close to the burners while the 3rd one was too far. So I turned a cookie sheet upside down and placed it on the 3rd shelf, and placed the pie on top of that. The cookie sheet was in the oven while it was pre-heating. Pizza tiles would also accomplish the same thing.

Sunday, December 31, 2006

Pescado Veracruz


The picture does not do this recipe justice at all. I love this recipe -- it's not like any fish dish I've seen or had in a restaurant. It really does come to life when it's baking in the oven and you can smell the fragrance of the dish. Your mouth will dance the salsa with one bite. This dish is a must try -- it's simple, easy, and you can't mess it up.

Makes 4 to 6 servings
Cooking Time: 50 minutes

Ingredients
-2 pounds fish fillets (I recommend rock cod, catfish, snapper)
-1/4 cup fresh lemon juice
-3 T olive oil
-1 cup chopped onion
-1 large garlic clove, minced or pressed
-1 T chili powder (if you using the real deal, I would halve the amount)
-1/4 tsp ground cloves
-1/4 tsp ground cumin
-1/4 tsp ground coriander
-3 cups diced tomatoes
-1 T honey
-1 cup pitted olives, chopped

Preparation
Arrange fish in an oiled baking dish. Where the fish gets skinny, you can tuck under and make a thicker piece for even cooking. Salt it slightly and sprinkle with a few teaspoons of the lemon juice. Chill.

Saute onions, garlic, chili powder, ground cloves, cumin, and coriander in the olive oil until the onions are translucent, taking care not to burn the spices. Add the tomatoes, honey, olives, and the remaining lemon juice and simmer for 15 to 20 minutes.

Pour the sauce over the fish, top it with chopped parsley, and bake at 350 degree until it's tender, 20 to 30 minutes, depending on the thickness of the fillets.


Roasted Brussel Sprouts

I generally don't like brussel sprouts. Growing up, I dreaded seeing things come on to the kitchen table. My cooking buddy has a way with these things, using them in Indian cooking. We needed a vegetable supplement for our fish dish and thought the baby brussel sprouts we purchased would be a nice touch. The recipe comes from Ina Garten on the Food Network, and is so quick and easy to put together, though it does take about 35 minutes to roast in the oven.

Ingredients
-1 1/2 pounds Brussels sprouts
-3 tablespoons good olive oil
-3/4 teaspoon kosher salt
-1/2 teaspoon freshly ground black pepper
Preheat oven to 400 degrees F.

Preparation

Cut off the brown ends of the Brussels sprouts and pull off any yellow outer leaves. Mix them in a bowl with the olive oil, salt and pepper. Pour them on a sheet pan and roast for 35 to 40 minutes, until crisp on the outside and tender on the inside. Shake the pan from time to time to brown the sprouts evenly. Sprinkle with more kosher salt, and serve immediately.


Saturday, December 30, 2006

Basic Sweet Buttercream Frosting


Ingredients

-1/2 cup unsalted butter, at room temperature

-2 cups sifted powdered sugar

-2 tablespoons milk

-1 teaspoon vanilla

Preparation

Beat butter until creamy, about 30 seconds. Add powdered sugar, milk and vanilla, and beat on high until light and fluffy, about 5 minutes.

Note: To make the frosting chocolate, substitute 1/4 cup cocoa powder for 1/4 cup of the sugar.

Yields enough to frost 12 cupcakes generously. Leftover frosting will keep for up to a week in the refrigerator.

*The key to a quality buttercream frosting is to beat the living day lights out of all the ingredients. The recipe calls for 5 minutes, and I would do it for more. And don't freak out like I did when you taste the frosting. A few hours after preparing it, the vanilla had infused the butter, and it tasted just great on the cupcake.

Tuesday, December 26, 2006

Vanilla Cupcake with Buttercream Frosting


I love cupcakes, just love them. Adore them, in fact. They are the perfect size and shape, and are fun to eat! When using wholesome and natural ingredients, they come to life in your mouth because they are less sickly sweet than what comes from the store or box.

I've been inspired to make cupcakes because our local newspaper has done a feature of cupcakes every year for the last two years. The recipes the wrote about were simple and easy, I thought let's give it a whirl. It is so worth it -- these cupcakes taste amazing.

So I bought two amazing Wilton Ultra-Bake muffin pans, which I highly recommend for their incredible baking ability and non-stick feature without being Teflon and got to baking. I decided to go for a simple cupcake that everyone could enjoy so I went with Vanilla cupcakes and a buttercream frosting. Buttercream frostings are so out of style, mainly because I think people do not know how to make them appropriately. Instead of being light and fluffy (as fluffy as butter can get that is) they're heavy and dense but a few tips will straighten that out.

The recipes below are great because you get a wonderful, light cupcake that is not too sweet. The buttercream frosting and cake go together and melt in your mouth as they should.

Cupcake Basics by Amanda Gold (applies to all cupcakes)

Here are a few basic steps for making cupcakes. If you can make one kind, you can make 'em all.

Plan ahead. It's important to let the butter and eggs come to room temperature before you begin.

Sift together or combine all of the dry ingredients in the recipe. Set aside.

Measure and combine liquids, like milk, buttermilk or water, and vanilla extract. Set aside.

Beat the butter for about 30 seconds until creamy. Then add the sugar, and beat until light and fluffy, about 3-4 minutes. The lighter the batter, the lighter the cupcake.

Add the eggs one at a time, and continue to beat until they're fully incorporated and the batter is creamy.

Add dry ingredients alternately with wet ingredients. This usually takes 3 to 4 additions. It's important to begin and end with flour, which prevents the batter from getting lumpy.

Add any final flavorings, like citrus zest or mashed banana.

Scoop into cupcake liners and bake, keeping an eye on them. Cupcakes dry out easily, and some will bake faster than others, depending on the temperature of your oven and whether the cupcakes are in the front or back.

Basic Vanilla Cupcakes

From Chronicle columnist Flo Braker.

Ingredients
-2 cups all-purpose flour
-2 teaspoons baking powder
-1/2 teaspoon salt

-2 teaspoons vanilla

-1/2 cup whole milk

-1/2 cup unsalted butter, at room temperature

-1 cup sugar
-2 large eggs at room temperature

Preparation:

Adjust rack to lower third of oven; preheat the oven to 375°. Place paper cupcake liners in a 12-cup muffin pan.

Sift the flour, baking powder and salt onto a piece of waxed paper. Stir the vanilla into the milk.

Using an electric mixer, cream the butter until smooth, about 30 seconds. Add the sugar in a slow, steady stream, beating until light and fluffy, about 3-4 minutes.

Add the eggs, one at a time, mixing until the batter is light and creamy, and scraping down the sides of the mixing bowl after each addition. Add the dry ingredients alternating with the liquid ingredients in 4 additions, beginning and ending with the dry ingredients.

Spoon the batter into the muffin cups, filling each about three-quarters full. Bake for about 20-25 minutes, or until the top of the muffins springs back when lightly touched, and a wooden toothpick inserted in the cakes comes out free of uncooked batter.

Let the cupcakes cool in the pan for 5-10 minutes before transferring them to wire racks to cool completely.

Yields 12 cupcakes

Monday, December 11, 2006

Kale with Olives

This recipe is so simple yet so very tasty. I got a bunch of kale in our bi-weekly vegetable fruit box and made this as a side dish to my cooking buddy's tortilla Espanola dish (which was quite tasty as well).

Makes 2 to 3 servings
Time: 20 minutes, most of which is passive

Ingredients
- 1 bunch of kale
- 1/4 tsp red chili flakes
- 2 to 4 tbsp olive olive
- 1/3 cup pitted Kalamata olives, roughly chopped
- 1 lemon quartered
- salt to taste

Preparation
- Bring a large pot of water to a boil and add salt (1/4 tsp for every quart is what the recipe says; I just dump some in). Place kale in pot, lower heat to simmer, and cook kale uncovered for 12-15 minutes. Drain kale and press out excess water with the back of spoon. While is doing it's thing in the water, in a large bowl, add oil, olive oil, and olives. When finished draining kale, add to bowl, mix together and serve with a lemon wedge, which is supposed to enhance the flavor.

I used 2 tbsp olive oil and found that even the lower amount, was too much. Start with less, and add more as necessary. Slightly oily but still very good.

This recipe comes from Deborah Madison's Vegetarian Cooking for Everyone.

Saturday, November 04, 2006

Portland, OR: Violet's Cafe

Greetings from Portland, OR. I have not done restaurant reviews on my blog but decided that I had to write about this place because I aspire to make food like they do. Tasty, flavorful, and just inspiring.

Violet's Cafe is a local neighborhood eatery that serves the most amazing breakfast food. On Friday morning, we decided to leave our hotel in search of breakfast. We didn't do any research a head of time. We figured this is Portland and we'll eventually run into something. Not being familiar with the area at all but having a very general sense of downtown and neighborhoods, we drove around aimlessly for nearly 45 minutes before stumbling across Violet's. Twenty minutes into the search for breakfast, I suggested we go to the Starbucks just so we could get something which met with a "When I travel, I don't like to eat at chains" conversation. For those that know me, when hunger sets in, I have a one track mind and it's all set on eating ASAP.

So we were driving around when we ran across a sign that said "Violet's Cafe Open." Of course, we saw the sign and restaurant as we drove right by them and then had to back track. Let me tell you, this was the best 45 minutes I have traveled to find such great food.

I'm not sure where to begin because everything about this place is good. When you walk in, there's a little case that displays all their amazing scones bursting with a variety of berries and fruit. They also make homemade cinnamon rolls. On this day, we did not eat scones or cinnamon rolls but ordered from their main menu. While not exclusively vegetarian, there are many choices for those that do not eat meat. With so many choices, I was finally able to settle on the roasted veggie scramble, which comes with crispy home fries, and your choice of made from scratch buttermilk pancakes or toast. My travel buddy seemed keen on a vegetarian version of egg's Benedict but was conflicted about those blueberry pancakes. So I ordered pancakes so he could have the best of both worlds, and the waitress offered to throw in blueberries. And so that we wouldn't have so many home fries, my travel buddy ordered fresh fruit.

While we waited for our food, we got hot chocolate which had the sweetest little touch. On top of the foam, they wrote Violet in chocolate syrup. Oddly enough, and I'm not sure this is an Oregonian thing, the hot chocolate wasn't very sweet at all. It was a nice change from the overly sweet drink you get elsewhere.

And then our food came and the portions were huge! Both of our meals were amazing. I really liked that nothing was greasy, not even the home fries, yet everything was completely flavorful. The egg's Benedict were just delightful! A nice crispy muffin, topped with roasted veggies, an nice sized egg, and hollandaise sauce. It was a to die for. For a moment there, I mistakenly thought (and much to my delight) part of the muffin was a piece of bacon/ham. Sadly, it wasn't! I just adored my scramble -- it was full of fresh roasted vegetables and oh so filling. And the fresh fruit was not your typical fresh fruit bowl -- it had apples, pears, plums, pineapple, blueberries, strawberries, kiwi, grapes, and more. Last but definitely not least were the blueberry pancakes were amazing. The pancake and syrup were definitely authentic -- nothing tasted like it was from a box.

On top of this, are the crazy reasonable prices. Our two meals, including hot chocolate and herbal tea was $20 (not including tip). And remember there is no tax! I forgot, they don't rus you out of the place at all -- it's definitely a good place to have a relaxing meal.

As you can imagine, this is my new favorite breakfast place and I'm utterly dismayed and sad to say that I haven't eaten at any place equivalent in California. During our dining experience, we decided immediately that we were returning the next day just to try their scones and cinnamon rolls. We made it there before 9 AM (the weekend is crazy busy apparently) and only had to wait 10 minutes or so.

The scone, oh the scone. I'm still thinking about the scone and will most likely go again tomorrow morning just so I can relish another one. I find myself day dreaming about my next visit....It's not like any scone I've ever had. Before I forget, we had a marionberry scone. It was light and buttery and buttery and light. The outside was crisp and the inside was soft and moist. It went perfectly with my cup of coffee. The cinnamon buns were very good too but I felt that I could get an equal or similar quality roll elsewhere. Go for the scones. One scone is just $1.50. A cinnamon roll is just $2.50.

I aspire to make scones like the one I had here today while my travel buddy wants to make great egg's Benedict and cinnamon rolls. When we make these items, I will most certainly write about the experience.

In any case, if you are ever in Portland, OR, you must eat at Violet's.

Sunday, October 29, 2006

Flat Leaf Parsley


I love parsley and decided to grow some from seed so that I would never have to purchase it again. Unfortunately, I decided to start growing an herb garden rather late in the season. In any case, I've learned a lot about growing parsley. Apparently, it is very difficult to grow parsley from seed but after some extensive research I decided to give it a try.

It helps to soak the seeds in warm water for 24 hours. I then planted the soaked seeds in 6 egg crates, that is 1 egg crate that holds 6 eggs. In each egg holder, I place a bit of soil, then generously sprinkled at least 8 seeds over the soil, and the lightly covered the seeds with a 1/4 inch of soil. Parsley likes to germinate in the dark. I then watered the soil, and hoped beyond hope that they would germinate. In week three, 3 of the 6 egg holders showed growth! In each of the 3 egg holders, exactly one seed had germinated. A little weird.

Once the seeds had germinated, they needed sun. So during the day, I would place the egg crates outside on chair where the parsley would get full sun. And at night, I brought them inside because they were too young and fragile to withstand the cool evenings. After a week or so, I noticed that they were no longer really growing so I decided to transplant them into larger containers yesterday. The picture depicts 1 of 2 parsley plants (I drowned the 3rd one!). I planted them in tofu containers in which I made drainage holes.

As you can tell, they are still rather small so I'm still bringing them in at night until they are much more developed. One of the parsley plants has just developed its third leaf which I find rather exciting!

Saturday, October 28, 2006

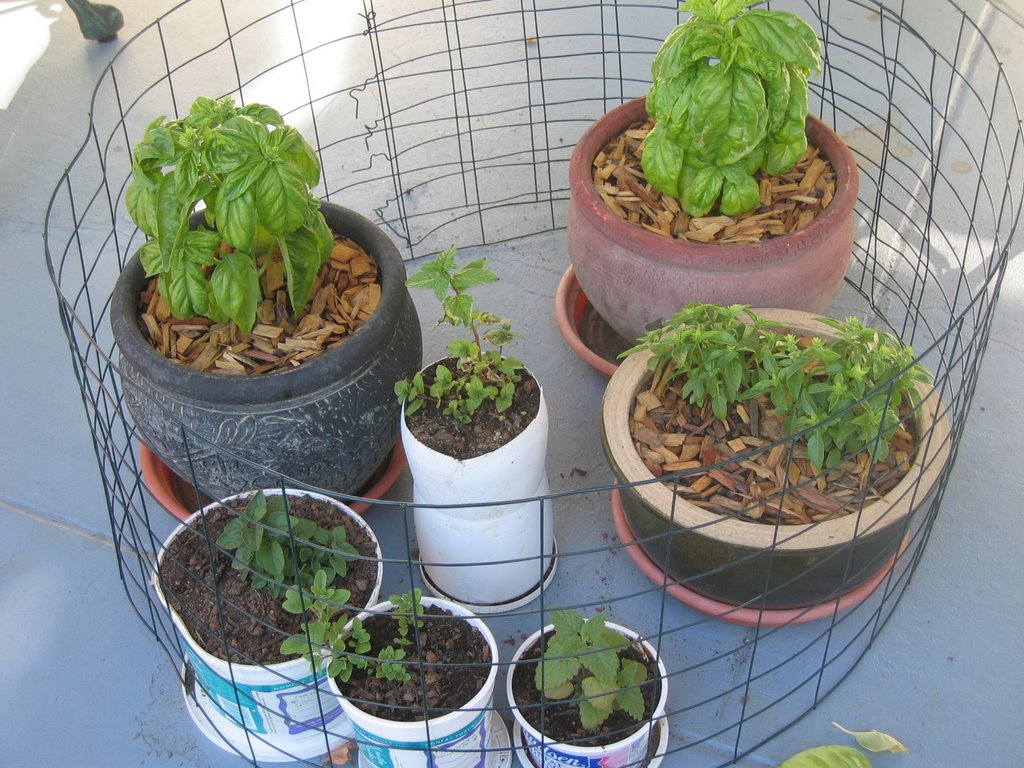
My Herb Garden


So about 2 months ago, a friend gave me a variety of little seedlings including basil, mini basil, oregano, marjoram, spearmint and catnip. She had started them from seed in paper egg crates (so clever I think!). Since I don't really have an yard, I repotted the seedlings in pots , and a variety of containers including yogurt, milk, and tofu in which I made drainage holes.

I love using fresh herbs but resent having to purchase a whole bunch of it only to use 1-2 tbsp and then toss the rest because I have no other use for it. It has been nice to go out and pick fresh basil for some of the Italian dishes I've made recently. The basil grew quickly and will most likely wither soon since they don't particularly like cold weather, not even the mild winters we have in California. So I'll have to harvest soon and make pesto.

I've really learned a lot about gardening since last summer when I failed to grow anything successfully. Last year, I tried to grow basil and other vegetables from seed but didn't have any success. I probably should have planted the seeds in really small containers as opposed to the gallon containers I used. Apparently growing seeds in large pots is a waste of soil, and causes rot because there's a lot of soil that isn't being put to use immediately.

A successful way to germinate seeds is to plant them in very small containers (like egg crates). Let the seeds germinate inside where it's nice and warm, sprout, and establish themselves. Then repot in containers that are size and height proportionate. You don't want to place a newly sprouted seedling into 1-gallon pot, more like a half pint container (think small cottage cheese container). As the seedlings grow and develop, you repot them in bigger containers. I think this is why I had some success this year, outside of my friend helping me out.

As you can see from the pictures above, I have a little fence around my pots. I have an unidentified critter that digs the soil of my basil and mini basil plants but leaves the plants in tact! Initially I thought it was a squirrel because I hear they love basil but none of the leaves were touched. Than I thought it was a cat. In any case, I moved them to a 2.5 foot high table thinking that would stop the critter, but it still attacked! Then I built the fence you see and attached it to the table. Still the critter came! I have no idea what it could be!

The critter took a two week hiatus and decided to attach my vulnerable flat leaf parsley plant this afternoon while I was out! I still have no idea what it is and wish I could capture it on camera.