Wednesday, December 01, 2010

Cook's Illustrated Pumpkin Pie

I hope everyone had a wonderful Thanksgiving. I was gluttonous and not unhappy about it in the least. I also got a lot of rest and spent time with my "brother" Toby, the rat terrier mix, who is clearly now top dog in our family. His first Thanksgiving with my family and he's plated and served first; fed twice! Unbelievable what happens during the empty nest phase -- the spoiling is much worse than I imagined.

Anyway, I'm in charge of making pumpkin pie at Thanksgiving and I'm happy to do so. I LOVE LOVE LOVE pumpkin pie. It's an understatement. I could eat it all year long and not lose interest. I have made pumpkin pie for the last five years since my family. How come my sister is the only one that comes away with not bringing anything?!!

I decided to try the Cook's Illustrated Pumpkin Pie as I read it was the be all, end all of pumpkin pies. It has wonderful ingredients like heavy cream, whole milk, eggs and egg yolks, cinnamon and fresh ginger all things that come right to my heart. So I made it and as you can see, it is really gorgeous, isn't? But I didn't like it as much as the recipe off the Libby's can. To be fair, the texture of this pie is silky smooth because you have to strain the pumpkin and the secret ingredient but you can't taste the spices that make pumpkin pie pumpkin pie, you know?

It was more pumpkin-y than I expected. I couldn't taste any cinnamon or ginger or any of the other spices that usually shine through. It was good but not the be all of pies AND it took way more time than the Libby recipe. I'm going back to the version I love best which I think I will make again at Christmas.

Enjoy!

I'm not going to re write the recipe as a quick google search will promptly bring up oodles and oodles of recipes and pictures. Can you tell I have blogger burnout?

Monday, November 15, 2010

Roasted Sweet Potato Salad with Black Beans and Chili Dressing

Oh my gosh, I haven't blogged in 10 days, and it has been the most freeing experience. I'm some times surprised at how much time it takes to cook, shoot pictures AND blog. It is a bit time consuming especially when you have so many other things to do. A lot more than I would like to admit. Truth be told, I've been really pooped, wiped out, in fact. It all started last weekend when to save money, I decided to dig out a trench 25' long x 1 ' wide x 6" deep. I probably saved $300. It wasn't nearly as bad as I thought it would be. In fact, it was fun and I surprised myself at how relatively quickly I did it. And I impressed the contractor, no small feat given his perfectionist qualities. So impressed, I helped make and pour concrete. It was fun but also wiped me out. I wish I could say I slept better but I was so tired I couldn't sleep. I didn't hurt myself or anything, and I wasn't particularly sore, but I just haven't been feeling like myself.

So that project took me out. I've been napping throughout the day and eating a lot. I'm now convinced that I can do all sorts of other yard projects, including digging up and putting down pavers. I can't wait.

This hearty savory salad will fill you up and make you wish for more cool fall days.

Time: 45 minutes

4 Servings

Ingredients
- 4 medium sweet potatoes (about 1.5 pounds), peeled and cut into 1-inch chunks
- 1 large onion, preferably red, chopped
- 1/2 cup extra virgin olive oil
- Salt and freshly ground pepper to taste
- 1 to 2 T minced fresh hot chili, like jalapeno
- 1 clove garlic, peeled
- Juice of 2 limes
- 2 cups cooked black beans, drained (canned are great!)
- 1 red or yellow bell pepper, seed and finely chopped
- 1 cup chopped fresh cilantro

Preparation

1. Heat oven to 400 degrees. Put sweet potatoes and onions on a large baking sheet, drizzle with 2 T olive oil, toss to coat and spread out in a single layer. Sprinkle with salt and pepper. Roast, turning occasionally, until potatoes being to brown on corners and are just tender inside, 30 to 40 minutes. Remove from oven keep on pan until ready to mix with dressing.

2. Put chilies in blender or mini food processor along with the garlic, like juice, remaining olive oil and sprinkle of slat and pepper. Process until blended.

3 . Put warm vegetables in a large bowl with beans and bell pepper; toss with dressing and cilantro. Taste and adjust seasoning if necessary. Serve warm or at room temperature, or refrigerate for up to date .

bon app!

And real quick. I need ideas, big time. Friend getting married Dec. 11. She's asking friends to make appetizers for 15 people. The parameters are 50 pieces, on our own plates, limited prep area, no fridge or oven, finger foods only. Plates, no forks. I have an ice chest to potentially carry food. Food will be traveling 50 miles and will be on the from road and not "fridged" from 1 PM to 4PM when it will be served.

What the heck do I make?


Thursday, November 04, 2010

Banana Bread | Healthy Snack

I usually poo-poo anything low-fat. I don't believe in no-fat or low-fat foods. I'm fortunate not have to worry about calories or where they come from (please don't hate me). The doctor recently suggested that I would be in better shape if I gained a few pounds. Outside of this, I eat whole fat everything including milk, yogurt, cheese, ice cream because it is much more gratifying. Plus, I actually eat less of the item than say they're lower fat/cal version. My craving is fulfilled and I haven't eaten something with substitutes and additives.

Given this, I was surprised that I wanted to try this low- fat version of banana bread. I tried it only because it came out of Cook's Illustrated and if they like it, it must be pretty good. Plus, did you know that a slice of banana bread has 220 calories and 6 grams of fat?! This is actually not horrible considering the alternatives but Cook's was challenged to come up with something leaner, moist and full of banana flavor.

Their secret ingredients, fat-free cream cheese (I know, fat-free!) and roasted bananas which makes them sweeter, hence less sugar is required. Have you ever roasted bananas? It was my first time, and it really made the bread pop. My guinea pigs devoured the bread -- it was gone in two days. Given the low-fat content, I'm not sure this version would freeze well. Eat pronto!

Makes one 8-inch loaf

Ingredients
- 4 large ripe bananas
- 2 large eggs
- 2 tsp vanilla extract
- 1 3/4 c unbleached all-purpose flour
- 1/2 c sugar
- 2 tsp baking powder
- 3/4 tsp baking powder
- 1/4 tsp salt
- 1 T canola oil
- 2 ounces fat-free cream cheese, cut into 4 pieces and chilled

Preparation
1. Adjust an oven rack to the middle position and heat the oven to 325 degrees. Lightly coat and 8 1/2 by 4 1/2-inch loaf pan with the vegetable oil spray and set aside.

2. Bake the bananas (skins on) on a rimmed baking sheet until the skins are completely black, about 20 minutes. (Do not turn off the oven.) Set the bananas aside to cool at room temperature.

3. Peel the bananas, then mash them with a potato masher in a small bowl until smooth. Measure out and reserve 1 1/2 cups of the mashed bananas, discarding any excess.

4. Whisk the eggs and vanilla together in a small bowl and set aside. In a large bowl, mix the flour, sugar, baking powder, baking soda, and salt together with a handheld mixer on medium-low speed until combined. Add the oil and cream cheese, 1 piece at a time, and mix until only -ea-size pieces of the cream cheese remain, about 1 minute. Slowly beat in the egg mixture, then add the mashed bananas and beat until incorporate, about 30 seconds.

5. Scrape the batter into the prepared pan and smooth top. Bake until golden brown and a toothpick inserted into the center comes out with just a few crumbs attached, 50 to 60 minutes, rotating the pan halfway through.

6. Let the loaf cool in the pan for 10 minutes, then turn it out onto a wire rack and let cool for 1 hour before serving. (The bread can be wrapped tightly in plastic wrap and store at room temperature for up toe 3 days.)

I found that I need an additional 10 minutes though I have an oven thermometer that helps me gets the temperature just right.

Saturday, October 30, 2010

Potato Curry with Tomatoes

I hope everyone is getting ready for the first major holiday of 2010. Yes, Halloween counts. I'm actually going to an evening group meditation sit tomorrow so I won't get to see the cute neighborhood kids dressed up. What are you all up to?

The Indian cooking continues with oohs and aahs from the family. I'm hearing that my bread and Indian food are causing weight gain. I think it's because they are over eating. I just cook. I don't provide portion control services. That's extra!

I've been making recipes from my little Indian cook book on a weekly basis with lots of success. So far, all the recipes I've tried (all three of the 1001) have been great! Easy, tasty and complete within 45 minutes. This one too. I love the potatoes and tomatoes together. The spices are amazing together in this combination. You could use this spice combo and vary the vegetables (and the cooking times accordingly). Thus, far this has become the family and friends favorite.

Serve with your favorite Indian bread or whole wheat tortillas, like I did. I promise you yumminess.

Ingredients
- 1 lb potatoes
- 4 T oil (I use half the amount called for in recipes, otherwise it is too much!)
- 2.5 tsp mustard seeds
- 2.5 tsp cumin seeds
- 1/2 tsp garam masala
- 2.5 tsp ground red chili
- 1/2 tsp ground turmeric
- salt to taste
- 14 ounce canned diced tomatoes
- 2/3 c water
- 2 T lemon juice
- 1 T chopped fresh cilantro, for garnish

Preparation
1. Boil the potatoes in their skins then drain, peel and cut in 1/4 inch diameter. I would boil until a knife can pierce the potato easily, about 10-15 minutes.

2. Heat oil in a heavy-based pan and fry mustard seeds over medium heat until the start crackling. Add the cumin seeds and fry for a few seconds until lightly browned. Stir in the potato pieces and fry until lightly browned. Stir in the coriander, cumin, garam masala, chili, turmeric and salt.

3. Stir in tomatoes and cook until the water has been absorbed. Pour in the water, bring to the boil then reduce the heat to low and simmer for 2 minutes. Add the lemon juice. Sprinkle with cilantro.

Note: I took the pictures after I followed the above recipe to a T. I found that the sauce was rather thick and a little chalky so I thinned it out with additional water, making it as saucy as I wanted, sort of medium thick. Add water to your desired consistency.

Happy Halloween!

Monday, October 25, 2010

Walnut Bread

My baking kick continues and now that the weather has definitively cooled, I have more to bake. Plus with a hungry brood of appreciative soles to feed, I feel nothing but desire to please those that eat my fare day in and day out without complaint.

After trying out a few no knead breads and not being as satisfied as I would like, I decided to go back to kneaded breads. I'm REALLY glad I did. I made this very easy walnut bread from Deborah Madison's Vegetarian Cooking for Everyone. It's dense, hearty, nutritious and scrumptious!. It also has the added bonus of making two loaves for all your efforts. A very deal for the work put in. Freeze one for later!

I love this bread untoasted with butter and cheese. I loved it toasted, with butter again, and sardines and avocado. I've been eating a slice or two a day of the high fiber content. No guilt here.

Try it out and tell me what you think.

Ingredients
- 2 1/2 c warm water
- 2 1/4 tsp active dry yeast (1 envelope)
- 1/4 cup roasted walnut oil (I used regular walnut oil)
- 1 T honey or malt syrup
- 1/ 2 c nonfat dry milk
- 2 tsp salt
- 1 cup wheat bran if whole-wheat flour is smooth
- 3 to 4 c whole-wheat flour (I used white whole wheat)
- About 2 cups all-purpose flour
- 1 1/2 cups chopped walnuts, preferably blanched and roasted
- Melter butter for top

Preparation
1. Stir yeast into 1/4 cup warm water in a small bowl and set it aside while you gather your ingredients

2. Put 2 1/4 c warm water in a mixing bowl and stir in the oil, honey, dry milk, and salt. Add bran and whole wheat flour (If you add 1 cup bran, then reduce wheat flour to 2 to 3 cups). Beat well until batter is smooth. Add enough all-purpose flour to make a heavy dough that pulls away from the sides of the bowl, then add walnuts. Turn the dough out onto a counter and knead until smooth (won't be perfectly smooth with the use of wheat flour), adding more white flour as needed to keep it from sticking. Put the dough in an oiled bowl, turn it once, cover with plastic wrap, and set aside to rise until doubled, about 1.5 hours.

3. Turn the dough out and cut it into two or three pieces (I did two). Shape each piece into a tight ball, cupping around the dough to give it a plump, round shape. Place each ball on an oiled baking sheet, cover, and set aside until doubled in bulk, about 45 minutes. During the last 15 minutes, preheat oven to 375 degrees F.

4. Slash breads, making three or four parallel cuts across the loaves, then brush with melted butter. Bake until a rich brown crust is formed and the bread is done, about 40 minutes.

Blanched and Roasted Walnuts
This simple process really improves the flavor of shelled walnuts that aren't freshly cracked. Bring a pan of water to a boil, add walnuts, and let them stand for a 1 minute. Drain and wick up the excess moisture with at towel. Spread them out on a sheet pan, then roast in a 300 degree F oven until they've dried out, about 20 minutes. Remove them as soon as they are dry.

Wednesday, October 20, 2010

Tortilla Espanola

I've been busy hosting dinner parties and it's been fun. I enjoy hosting friends and family; this week I've been doing it on a weekly basis. I like to cook foods that make people feel special which can some times be time consuming. But because I work full time and have a packed schedule of daily meditation, yoga, gardening, writing, blogging, cooking, cleaning house, etc. I like to cook food that is tasty, fuss free, and allows me to be an attentive host. Apologies for the less than ideal picture.

So easy and tasty, it's one of my favorite dishes to make on the fly. Supplement with a green salad with avocado, tomatoes and pomegranate, and a dense wheat bread with cheese, and you have the perfect quick dinner party meal. You probably the ingredients for all three of these dishes in your kitchen now. This meal is guaranteed to fly off the table; there were no leftovers.

I previously blogged about this dish back in 2006, using Deborah Madison's recipe. Mark Bittman was my chef this week. His recipe is more simple with fewer ingredients. I love this one too. The eggs were moist and the potato perfectly cooked through. Some of the potatoes on top were a little crunchy, like potato chips and they were yummy, really. Next time, I think I will add a dash of chili flakes for a little heat. I couldn't stop picking at it until the guests arrived.

Makes at least 4 servings

45 minutes or less
Ingredients
- 1/2 cup extra virgin olive oil
- 1 pound waxy red or white potatoes, peeled and cut into 1/8 inch slices (I didn't peel)
- Salt and freshly ground pepper to taste
- 1 large onion, sliced
- 1 red pepper, stemmed, peeled if desired, seeded and sliced
- 1 tsp minced garlic
- 6 eggs
- 1/2 cup minced fresh parsley leaves

Preparation
1. Place about half the olive oil in a large oven proof skillet, preferably non-stick, and turn the heat to medium. Add the potato slices and season liberally with salt and pepper. Cook, turning gently from time to time, until they soften, about 20 minutes. Remove with slotted spoon.

2. Add the remaining oil to the pan, followed by the onion and red pepper, and cook, stirring occassionally, until nice and soft, about 10 minutes. Add garlic and cook another 2 minutes. Preheat oven to 375 degrees F.

3. Return potatoes to the skillet, and turn the heat to medium low. Continue to cook, turning with spatula, for about 5 more minutes. Beat the eggs wiht parsley.

4. Turn the heat to low and pour the eggs over the potatoes, undisturbed, for about 5 minutes. Transfer from the oven and bake until the mixture is set, about 10 minutes more. Remove the pan and cool to room temperature before cutting into chunks wedges. Serve.

Bittman calls for first cooking the potatoes, and then the onions and red pepper separately. Not sure why. This takes more time than necessary but I followed his recipe exactly except that I had two skillets working simultaneously. Below I present easy modifications.

My modifications. I thought steps 1 and 2 could be combined to save time in one very large skillet. First cook potatoes and onions together, and then in the last 5 minutes add red pepper. Then continue with the garlic, and the remainder of the recipe. I felt that my potatoes were soft enough so I didn't cook the potatoes more in Step 3. Rather, I jumped right to adding the eggs. I think this will save you time. Something we can all use a little more of, no?!

Friday, October 15, 2010

Golden Beet and Greens Soup | Simple Soup

I don't know about you, I grocery shop with the weather in mind and only once a week. Last time I shopped it was cool fall day. The sun was out and the air was crisp perfect for fall foods like soups, curries and Indian food, and bread making. Then the weather did a 180 and it's been 80+ degrees this whole week -- beach weather calling for salads, melons, and less cooking! Don't get me wrong, I love the heat especially since it's unusual and short lived in this area but when the heat turns up, I like to cook less. You? Isn't it funny how that happens?

I've been playing catch up with a few Sunset magazine recipes. I recommend the Oct 2009 issue (yeah, I'm really behind) of Sunset for their roasted red pepper soup, fennel apple bisque, mushrooms in sherry shallot broth, and this lovely golden beet and beet greens soup. To be fair, I was not a huge fan as much as I love beets. I grew them from seed earlier this year and will be planting them again in a few weeks for a Spring harvest. I love the sweetness and how they look when they've been roasted or steamed. But in this soup, I didn't care for the sweetness with the savory. Friends really loved the soup and I don' think they were just being nice.

I do love how quickly this recipe comes together with very few ingredients that you probably have in your kitchen. It's even quicker if you cook the beets the night before, and it's pretty to look at too.

Serves 4-6

Ingredients
- 3 large golden beets
- 1 small, thinly sliced red onion
- 2 large garlic cloves, minced
- 1-2 T olive oil
- 4-5 C vegetable or chicken broth

Preparation
1. Trim stems from beets (leave 1 inch attached to beets) and cutting off leafy tops. Discard stems from tops; cut leaves crosswise into thin shreds. Note: Beet greens do not last long so if you don't plan on using greens the day you purchase beets, I recommend buying beets without the greens and substituting 4 ounces of another green like chard, spinach, kale, or your favorite green.

2. Simmer beets until tender, 35- 45 minutes, first bringing them to a boil. Drain and cool. Remove skins and stems, then cut beets thinly crosswise into circles.

3. Saute 1 small, thinly sliced red onion with minced garlic cloves in olive oil until slightly browned. Add beets and 4 cups vegetable or chicken broth. Bring to a boil. Stir in beet greens (or other greens) and cook until greens are wilted, about 1 minute. Add broth to soup to thin it, if you like, and season with salt and freshly ground pepper.

Monday, October 11, 2010

Spicy Cauliflower and Peas | Easy Indian

This past weekend I had friends over for dinner. The chocolate chip cookies made it to the dinner -- I exhibited a lot of will power! I cooked Indian to expand my repertoire from the motherland. It was also the easiest way to feed a friend who is both trying out a vegan and gluten free diet. Kind of tough but very doable. Plus, one of the three dishes was in the freezer which then required me to make only two dishes, one that I knew how to make and a new one! The starter course was the lentil sambar that I wrote about a few posts ago. I also made this absolutely scrumptious and easy cauliflower and pea dish which takes about 45 minutes max (probably less once you've made it at least once) including the chopping up of the cauliflower and grinding up of the cumin and coriander, unless you already have them in the ground form.

Personally, I now keep only the seeds because the potency of these spices lasts longer. Plus, I enjoy using the mortar and pestle to grind up spices. It's a relaxing to pound away the troubles of the day and simultaneously have mouth watering aromas waft up to your nose. It's a win-win. This dish is great for those that love cauliflower -- I've used all varieties including green, white, orange and purple -- and are vegetarian or vegan. It's fairly quick and can be served with dal, rice, raita, etc. The dish is also extremely attractive and tastes and looks great with short grain brown rice. It's a good blend of spices and is not too hot, not like the hot I've described with curry and sambar powders.

This recipe had a few errors that I correct for, like cooking the cauliflower for 40 minutes. The cauliflower will cook in approx. 15-20 minutes and the dish, if served alone, probably does not serve 4-6, more like 2-3.

Yes, the dish does appear fluorescent yellow. That's the turmeric in action!

Ingredients
- 6 T oil
- 1 tsp mustard seeds
- 1/2 tsp cumin seeds
- 1 inch ginger root, minced
- 1 medium cauliflower, cut into small florets
- 2 tsp ground coriander
- 1 tsp garam masala
- 1 tsp ground cumin
- 1/2 tsp ground red chili, (reduce to 1/4 tsp if you're sensitive to spice)
- 1/2 tsp ground turmeric
- salt to taste
- 2/3 c water
- 9 oz peas (frozen is fine!)

Garnish with chopped fresh cilantro

Preparation
1. Heat the oil in a heavy-base pan and fry the mustard seeds over medium heat until the start crackling (cover with lid so you don't get splattered).

2. Add the cumin seeds and fry until browned.

3. Add the ginger and cauliflower and fry for 10 minutes until lightly browned.

4. Stir in the coriander, garam masala, cumin, chili, turmeric, salt and water, bring to a boil, then cover and simmer for about 15-20 minutes or until the cauliflower is tender, stirring occasionally.

5. Stir in the peas and simmer for 5 minutes until tender. Sprinkle the cilantro and serve hot.

Thursday, October 07, 2010

Where the Cookie Crumbles

Everyone has their favorite chocolate chip cookie recipe. Who doesn't? Who didn't enjoy making the chocolate chip cookies from the back of the Toll-House package or some other recipe. Licking the leftover batter from the spatula was a highlight. Not one speck of batter was wasted, was it?! Raw eggs, who cared.

While Cook's Illustrated says this recipe is the best, and it might very well be, there are countless of wonderful mouth watering recipes. I haven't tried them all to say definitively if this the best but I love it. Cook's goal was to perfect the back-of-the-bag classic with a cookie that was crisp at the edges, chewy in the middle, and full of rich toffee flavor. I've been wanting to make these cookies forever! They made over 700 cookies to perfect this recipe! Given the butter content in these, their staff must have gained weight!

What did I love about this recipe? What's not to love. Butter is one of the main ingredients. Every cookie has almost 1 T of butter. If you believe butter makes everything better than you'll adore these cookies. The butter is melted and browned so that it can caramelize in the oven more which allows for crispy edges and toffee flavor. An added bonus is that you don't need a standing mixer to make these. I also love the nooks and crannies vs. the some times smooth texture that may occur.

I also enjoyed the technique of whisking and resting (read below in the recipe) which develops the deep toffeelike flavor without adding toffee. The high fat content allows these babies to freeze well. A lot are in the freezer now and will be shared with friends this weekend when they come over for an all Indian dinner. I can't wait. In the mean time, I'm trying to stay away from the freezer so there will be some left. We'll see! Can you see where I took a bite (around 10/11 o'clock)?!

Tell me, where does your cookie crumble?!

And before I forget, I want to thank Anu, at My Kitchen Skills, for giving me the Sunshine Award. It made my day brighter on our first fall day. Thank you! I need to pass the award and will do so in the next few weeks.

Perfect Chocolate Chip Cookies

Makes 16 cookies

Ingredients
- 1 3/4 cups unbleached all-purpose flour
- 1/2 tsp baking soda
- 14 T unsalted butter
- 1/2 cup granulated sugar
- 3/4 c packed dark brown sugar
- 1 tsp table salt
- 2 tsp vanilla extract
- 1 large egg
- 1 large egg yolk
- 1 1/4 c semisweet chocolate chips or chunks
- 3/4 cup chopped pecans or walnuts, toasted (optional)

1. Adjust oven rack to middle rack and heat oven to 375 degrees. Line 2 large baking sheets with parchment paper. Whisk flour and baking soda together in medium bowl; set aside.

2. Heat 10 T butter in 10 inch skillet over medium high-heat until melted, about 2 minutes. Continue cooking, swirling pan constantly until butter is dark golden brown and has nutty aroma, 1 to 3 minutes. Remove skillet from heat and, using heatproof spatula, transfer browned butter to large heatproof bowl. Stir in remaining 4 T butter into hot butter until completely melted.

3. Add both sugars, salt, and vanilla to bowl with butter and whisk until fully incorporated. Add egg and yolk and whisk until mixture is smooth with no sugar lumps remaining, about 30 seconds. Let mixture stand for 3 minutes, then whisk for 30 seconds. Repeat process of resting and whisking 2 more times until mixture is thick, smooth and shiny. Using rubber spatula or wooden spoon, stir in flour mixture until just combined, about 1 minute. Stir in chocolate chips and nuts (if using), giving dough final stir to ensure no flour pockets remain.

4. Divide dough into 16 portions, each about 3 T (or use #24 cookie scoop). Arrange 2 inches part on prepared baking sheets, 8 dough balls per sheet.

5. Bake cookies 1 tray at a time until cookies are golden brown and still puffy, and edges have begun to set but centers are still soft, 10 to 14 minutes, rotating baking sheets half way through. Transfer baking sheet to wire rack, cool cookies completely before serving.

Monday, October 04, 2010

Buttermilk Pot Style Bread

This is it, my final no knead bread before having to return the book to the library. I thought I was going to be sad about it. In fact, I had been searching to buy a used copy online because I think it would be a great reference. Plus, I wanted to continue my quest to make a new bread every week to 10 days, rather than shell out the $$ to buy a loaf at the store.

Initially, I thought it was me but after making three different loaves, I'm convinced the recipes are good, but not the best.

I started with Peasant Style Pot Bread, probably the best of the three I made from this book. It was like eye candy. Beautiful to look and the scent that filled my home was wonderful. It But like some eye candy, it lacked depth. It had good, if slightly salty flavor. Not as good as the almost no knead bread.

The second was the French walnut bread. Not sure what made it French but I loved the use of walnuts. This bread was good but still not great. In fact, it was not as good as some nut breads I've purchased at the store. A negative for me was the difficulty in stirring the nuts into the dough before the 2nd rise. The nuts were not evenly distributed, and ultimately I believe this affected the loaf.

For my final hurrah (3 week limit at the library) I chose the buttermilk pot style bread because the picture was stunning. Light colored bread flecked with coarse salt, it was perfection. That should have been my tip off. You see, the picture and the description of the recipe did not jive, namely, the recipe said to bake the bread until it was deep brown. The picture of it was not even close to deep brown, it was more like the color of corn bread but slightly lighter. Once again, I had difficulty stirring in the buttermilk powder after the 1st rise. In fact, I had to use my hands to knead it in. I thought this was no knead bread! It was nearly impossible to stir in the powder. I mostly got it in but where it didn't, after it was baked, there were small yellow chunks, almost like the consistency of yolk in the hard boiled egg, on the softer side.

The loaf was not as light and as airy as I thought it would be. It was a little dense and soft. I would skip the coarse salt. It makes the bread look great BUT where you get a bit of coarse salt, you also get a large dose of saltiness. Not good. So after a few days, I picked off all the salt and that helped. It makes really great toast.

I recommend checking out the book at your local library, and trying some of the recipes. Start with a simple one just to gain your confidence and to realize how little work is required to make bread. I learned a lot. I continue to make bread every 10 days or so. Until Cook's Illustrated makes another no knead or almost knead bread, I'll continue with their original recipe. Love it.

Thursday, September 30, 2010

Lentil Sambar

I'm Indian and I don't cook a lot of Indian. My friends ask if I cook Indian and I bashfully say I don't. I don't know why. I know plenty of people from you name it ethnicity that don't prepare the foods they grew up with.

I love eating Indian food. I love eating my mom's Indian food the best. I don't know why but I had it in my mind that it takes a long time to prepare Indian food. And I'm sure it does if you prepare everything from scratch like all the curries and various powders. Perhaps this was reinforced by having a stay at home mom that prepared the most amazing Indian and non-Indian meals at home. She was in the kitchen a lot; happily, I think. As much as I love to cook, I don't want to be in the kitchen too much. I want to eat well without fuss.

In graduate school my mom gifted me the classic 1000 indian recipes cookbook. It's not fancy at all. It's not written by some famous Indian cook with stories about his/her childhood and what the dish means to them blah blah blah. It's no frills with some but not a lot of pictures. Mom chose it because she said it describes the cooking and preparation the way she does it so she figured it had to be good. Well, it is! Every single recipe I've tried has been a success. This is not to say that I think it's perfect. I have found cooking times and the number the dish serves to be off.

This book has sat on my bookshelf without much use until recently when I decided it's time to get into preparing Indian food again. I've been blown away about how little time some dishes take including this one, which was done in under 45 minutes with the vegetable prep. You just have to all the ingredients which you can get at your local Indian or Asian food store. Once you have the main ingredients you can whip up anything in very little time.

Thick and fiery sambars are the first course (in my case, the only course!) in any south Indian meal. They are served steaming hot with plain cooked rice and a vegetable accompaniment. Almost any vegetable can be used. The tamarind has a cooling effect and has the unique property of preserving the vitamins of the vegetables cooked in it! Did you know this?

Serves 4

Ingredients
- 1/2 cup red lentils
- 1 T oil
- 1/2 tsp fenugreek
- 1 tsp mustard seeds
- 1/2 tsp asafoetida
- 1 dried red chili, halved
- 2-3 curry leaves (I skipped because I didn't have these)
- 8 oz mixed vegetables (radish, onion, potato, carrots, bell pepper are great)
- 1 T tamarind pulp (you can make your own, it's easy, recipe below; or you can buy the pulp in a container. Mom says the pre-made pulp makes the food look black but will taste fine).
- 1 cup water
- 1 tbsp sambar powder
- 1/2 tsp turmeric
- salt to taste
- 1 tbsp fresh cilantro

Preparation
1. Cook the lentils in boiling water for about 1 hour until tender then drain. (Note, red lentils do not take 1 hour to become tender, try 20 minutes; first book error)

2. Heat the oil and fry the mustard, fenugreek and cumin seeds, asafoetida, red chili and curry leaves until the mustard seeds start crackling.

3. Add the green chilies and vegetables and fry for 2 minutes. Add the tamarind pulp, water, sambar powder, turmeric and salt. Cover and simmer for 2 minutes. Stir in lentils, cover and simmer for 10 minutes. Sprinkle with cilantro and serve hot with rice.

Note -- to test for 'spicey' level of sambar powder, lick finger and dip into powder; taste; the powder will taste raw for sure but this will indicate how hot the powder is, and hence how much you should add. I guarantee you will need less than 1 T. I multiplied this recipe by 4 which means I should have used 4 T sambar power. I used 2 T and it was still hot. The primary ingredient in sambar powder is ground dried red chilies if this indicates how fiery this dish can be. My sambar powder came straight from the aunties back in India.

Tamarind pulp
- 11 oz dried tamarind
- 2 1/2 c hot water

1. Soak dried tamarind overnight in the hot water or boil it for 15 minutes over medium heat.

2. Rub tamarind through the fingers to reduce it to a pulp then rub through a sieve and collect pulp. Discard husks. Excess pulp can be frozen.

Sunday, September 26, 2010

French Walnut Bread

This is a super easy, sinfully simple bread to make. It comes straight from Kneadlessly Simple. In fact, I'm not sure I did make it. The bread makes itself! All I did was mix flour, sugar, salt, yeast, water and walnuts. A day and half later, I had bread. Amazing.

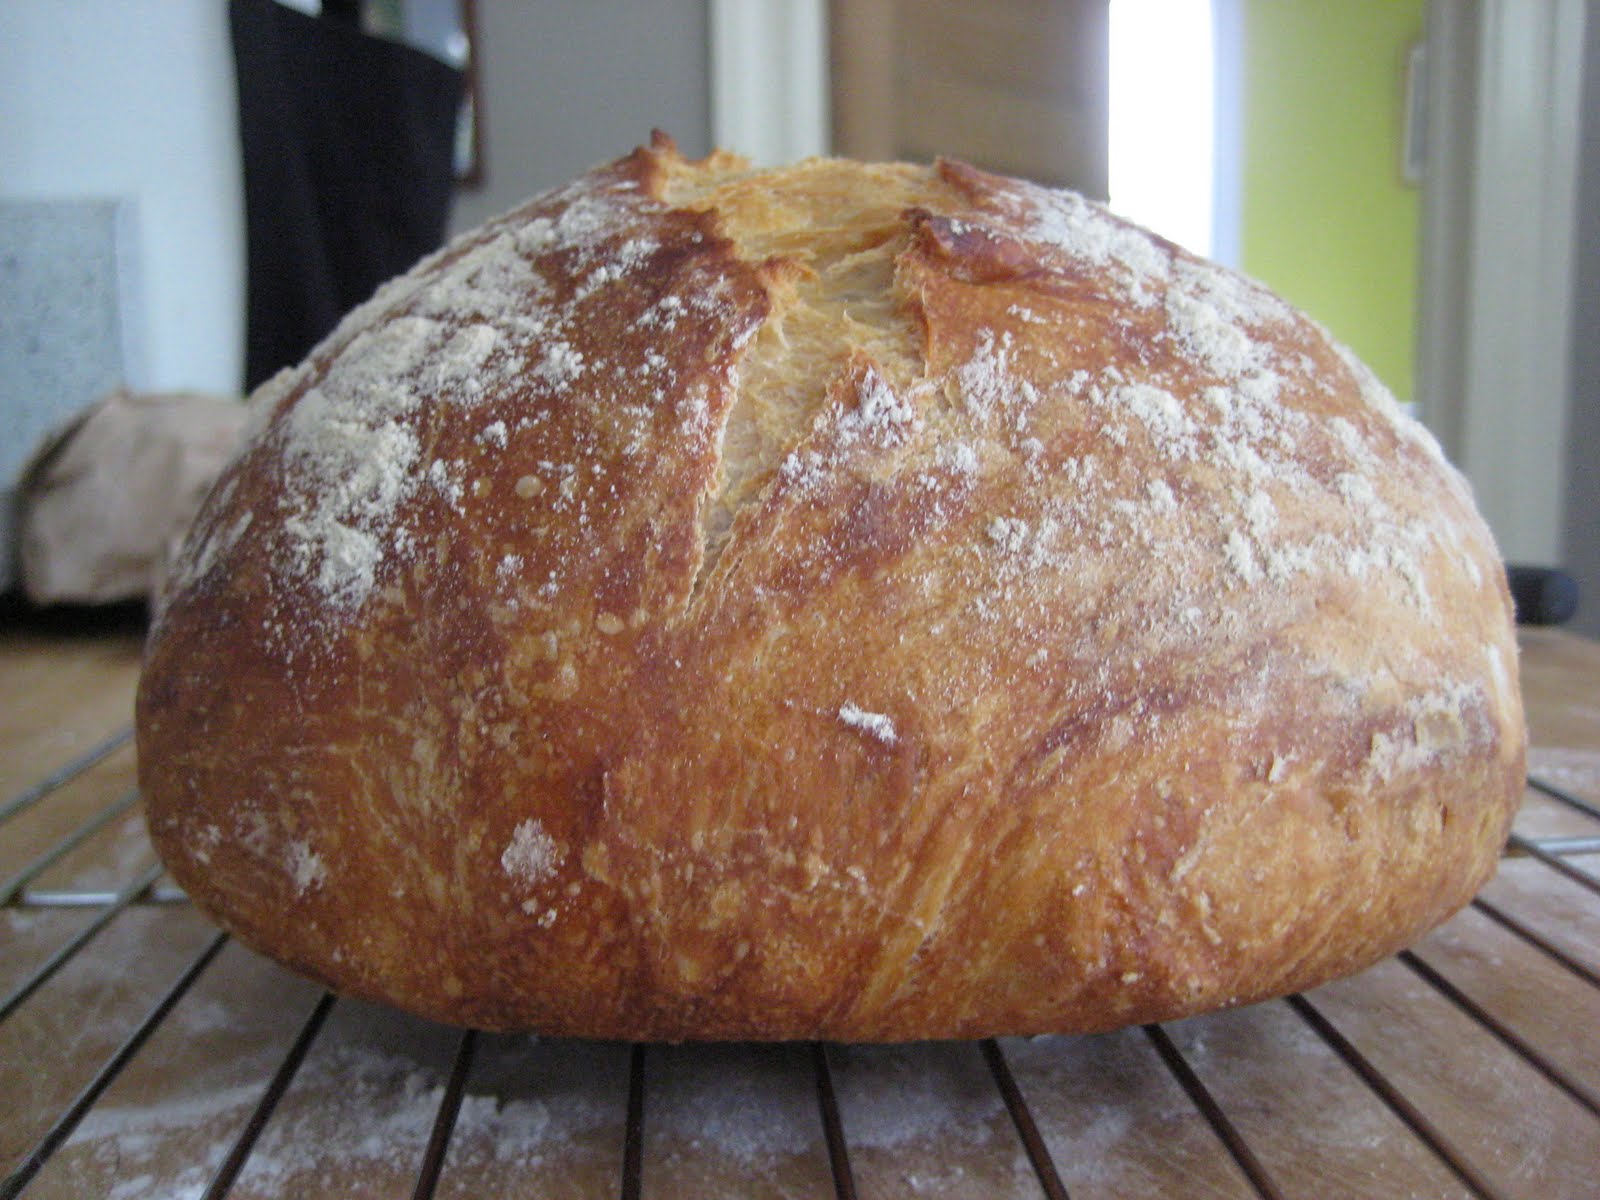
This bread is earthy, nutty-tasting, and is great with butter, goat cheese, any cheese really. Half the flower is whole wheat. The crust is crisp but not as crisp as the crust in the Peasant Style Pot bread or Almost No Knead bread. And it did not get the beautiful round dome shape that other breads get. I performed all the requisite steps. In fact, it rose but not as much, and it came out a little flat. Not deflated but flat. I suspect the crispiness and dome eluded me because this recipe did not require the Dutch oven (or other pot) to be preheated in the oven.

Anyone else make this bread with the same result?

This bread makes great toast and goes well with curried carrot soup. Perfect for cooler fall weather and sharing with friends. Break bread with your friends. They'll love you even more than they already do.

This is my second Kneadlessly Simple recipe and I have to say that I still prefer the almost no knead bread. I think it has better flavor and crust, and if you can believe it, is easier to make and takes less time.

Yield: 1 large loaf, 12 to 14 slices

Ingredients
- 2 c whole wheat flour, plus extra as needed
- 2 c unbleached all-purpose white flour or white bread flour
- 1 tsp granulated sugar
- 2 tsp table salt
- 3/4 tsp instant yeast, fast-rising, or bread machine yeast
- 2 c ice water, plus more if needed
- Walnut oil or flavorless vegetable oil for coating dough top and baking pot
- 1 1/2 c fresh, fine-quality walnut halves

First Rise: In a large bowl, thoroughly stir together the whole wheat and white flour, sugar, salt, and yeast. Vigorously stir in the water, scraping down the bowl and mixing until the dough is well blended and smooth. If the mixture is too dry to incorporate all the flour, a bit at a time, stir in just enough more water to blend the ingredients; don't over-moisten, as the dough should be very stiff (it's stiff if you find it difficult to stir). Brush or spray the top with oil. Tightly cover the bowl with plastic wrap. If desired, for best flavor or for convenience, you can refrigerate the dough for 3 to 10 hours. Then let rise at cool room temperature for 12 to 18 hours.

Meanwhile, reserve 4 perfect walnut halves for garnish. Spread the remainder on a baking sheet and lightly toast, stirring several times, in a preheated oven for 325 degrees F for 10 to 15 minutes, or until fragrant and just lightly browned. Let cool. Chop finely (in a food processor, if desired).

Second Rise: Vigorously stir the cooled walnuts into the dough. Note: This was extremely challenging; the nuts were not spread uniformly throughout the dough. If it is not stiff, stir in enough more whole wheat flour to make it hard to stir. Using an oiled rubber spatula, lift and fold the dough in towards the center, working all the way around the bowl. Invert it into a well-oiled, then flour-dusted, 3-quart (or larger) heavy metal pot (or use a flat-bottomed round casserole with a lid). Brush or spray the top with oil, then smooth out the surace with an oiled rubber spatula or fingertips. Cut 1/2-inch-deep slashes to from an X in the center top; well-oiled kitchen shears work best. Put the 4 untoasted walnut halves in the angles of the X for garnish; press down very firmly to imbed them. Cover the pot with its lid.

Let Rise Using Any of These Methods: For a 1 1/2- to 2 1/2-hour regular rise, let stand at warm room temperature; for a 1- to 2-hour accelerated rise, let stand in a turned-off microwave along with 1 cup of boiling-hot water; or for an extended rise, refrigerate 4 to 24 hours, then set out at room temperature. Continue until the dough doubles from its deflated size.

Baking Preliminaries: 15 minutes before baking time, place a rack in the lower third of the oven; preheat to 400 degrees F. Lightly dust the dough top with whole wheat flour.

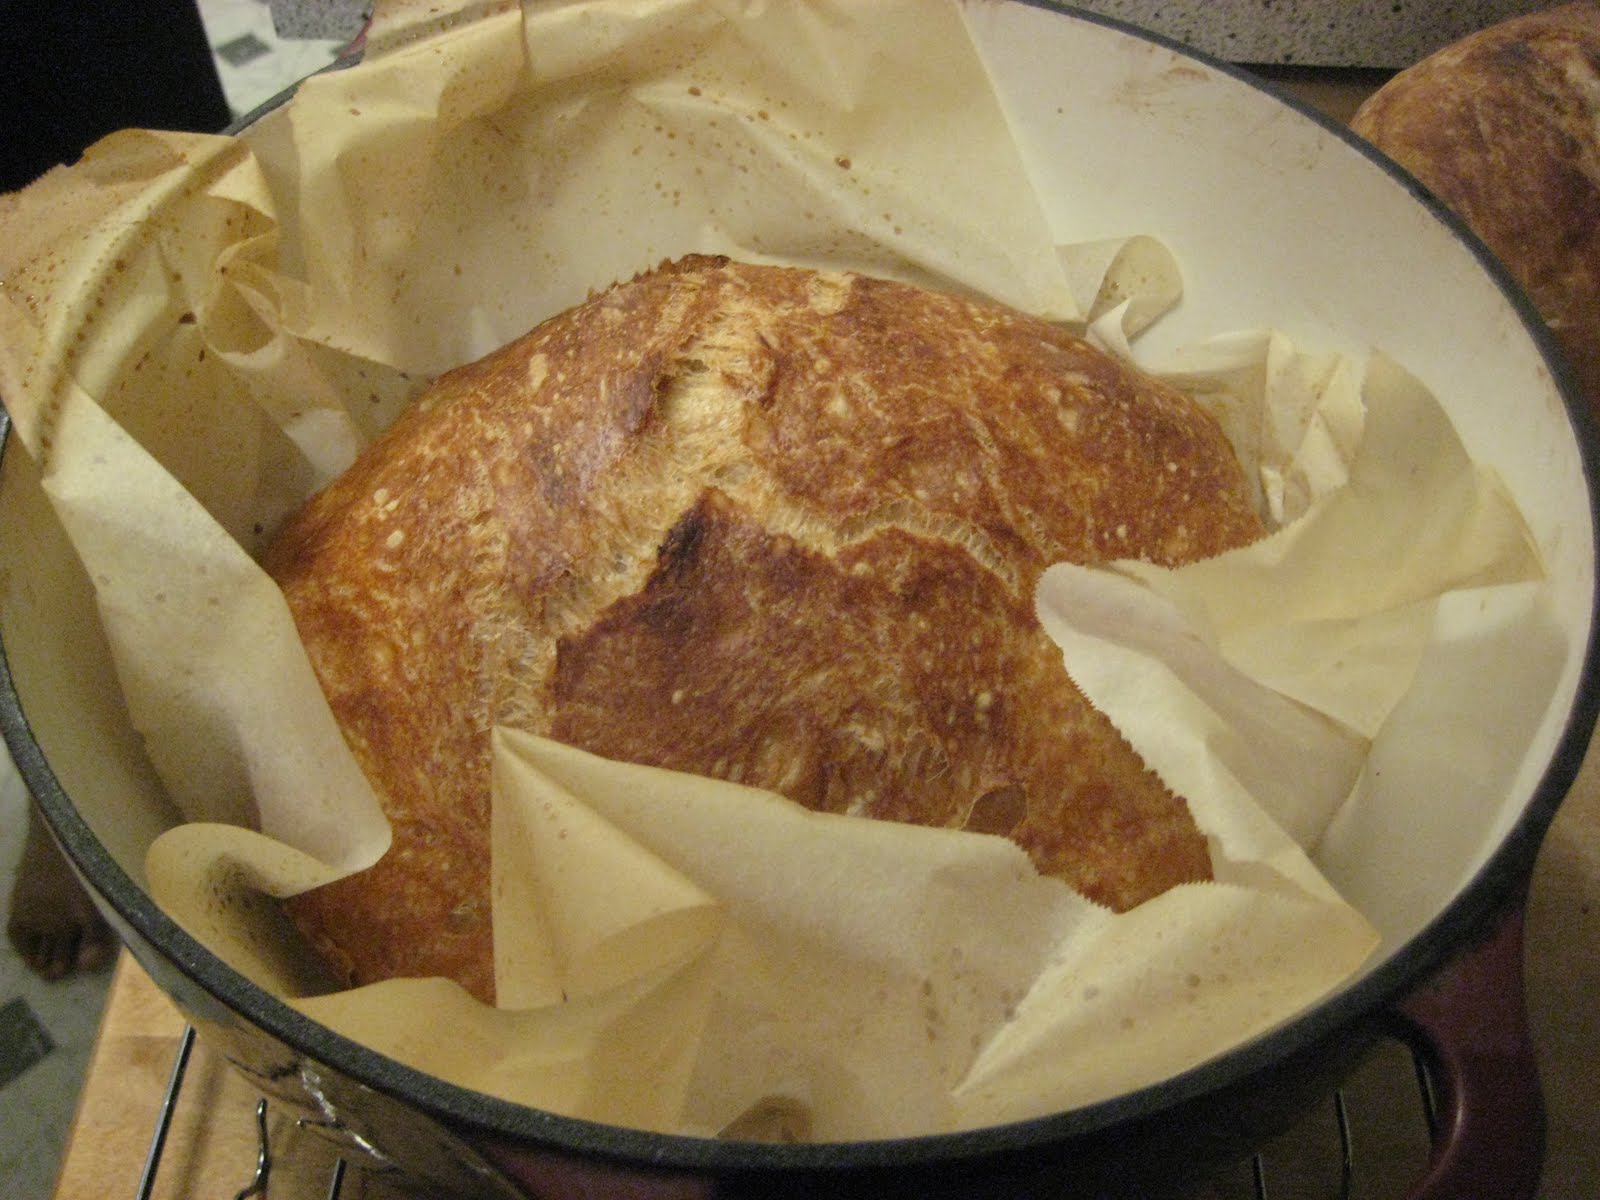
Baking: Bake on the lower rack, covered, for 45 minutes. Remove the lid and continue baking for 20 to 30 minutes, or until the top is well-browned and a skewer inserted in the thickest part comes out with just a few particles clinging to the bottom. Then bake for 5 to 10 minutes more to ensure the center is done (if the particles are moist then definitely bake longer). Cool in the pan on a wire rack for 10 minutes. Remove the loaf to the rack, running a knife around the edges to loosen if necessary (I used parchment instead of the oil and flour method -- this has typically not worked for me).

Serving and Storing: The loaf tastes and slices best at room temperature. Cool completely before storing airtight in plastic or foil. The bread will keep at room temperature for up to 3 days, and may be frozen, airtight, for up to 2 months.

Wednesday, September 22, 2010

Classic French Onion Soup

I'm not sure I can get through this post. This recipe took forever, really it did. Well, about 4 hours. We didn't eat dinner until after 9 PM, may be closer to 10, I can't remember. I was so tired, I had appetite suppression. Perhaps you know this feeling. You cook and cook and cook, and at the end you just don't want to eat. It was all a blur.

Hanging out with friends I hadn't seen in almost 6 months, we decided to cook up a storm. There were two birthdays to celebrate, one a newlywed, the other a parent for almost 2 years. Friends selected the recipes and kindly purchased all the ingredients for almost 5 dishes! All I brought was a frozen tiramisu since I was the out-of-towner with no kitchen or ingredients to prepare anything more exciting.

We had the whole day to prepare this soup but misreading the recipe through us for a loop. I thought the recipe would take about 60 minutes. NO NO NO NO! It was 60 minutes for STEP 2, and there are 5 steps! You got to love Cook's Illustrated. The soup was great, and devoured by all. Would I make it again? Probably not. It's a lot of fuss for a soup, and there are other soups I would much rather eat that don't take nearly as long. Nevertheless it was a lot of fun and I couldn't imagine spending a better way with friends and family.

Serves 6

Ingredients
Soup
- 3 T unsalted butter, cut into 3 pieces
- 4 lbs onions (about 6 large), halved pole to pole and sliced lengthwise 1/4 inch thick
- 2 c water, plus extra for deglazing
- 1/2 cup dry sherry
- 4 c low-sodium chicken broth
- 2 cup beef broth
- 6 sprigs fresh thyme, tied together with kitchen twine
- 1 bay leaf

Croutons
- 1 small baguette
- 8 ounces Gruyere cheese, shredded (about 2 cups)

1. FOR THE SOUP: Adjust an oven rack to the lower-middle position and heat the oven to 400 degrees. Generously spray the inside of a large (at least 7 quart) Dutch oven with vegetable oil spray. Add the butter, onions, and 1 tsp salt to the pot. Cook, covered, for 1 hour. (The onions will be most and slightly reduced in volume). Remove the pot from the oven and stir the onions, scraping the bottom and sides of the pot. Return the pot to the oven with the lid slightly ajar and continue to cook until the onions are very soft and golden brown, 1 1/2 to 1 3/4 hours longer, stirring the onions and scraping the bottom and sides after 1 hour.

Note: We used a metal stock pot and it was mostly fine. However, due to uneven heating, some of the onions burned onto the pan, and it was very very hard to remove. I think the enameled Dutch oven may work better for this reason.

2. Carefully remove pot from oven and place over medium-high heat. Cook the onions, stirring frequently and scraping the bottom and sides of the pot, until the liquid evaporates and the onions brown, 15 to 20 minutes, reducing the heat to medium if the onions are browning to quickly. Continue to cook, stirring frequently, until the pot bottom is coated with a dark crust, 6 to 8 minutes, adjusting the heat as necessary. (Scrape any browned bits that collect on the spoon back into the onions.) Stir in 1/4 cup water, scraping the pot bottom to loosen the crust, and cook until the water evaporates and the pot bottom has formed another dark crust, 6 to 8 minutes. Repeat the process of deglazing 2 or 3 more times, until the onions are very dark brown. Stir in the sherry and cook, stirring frequently, until the sherry evaporates, about 5 minutes.

3. Stir in 2 cups water, the chicken broth, beef broth, thyme, bay leaf, and 1/2 tsp salt, scraping up any final bits of browned crust on the bottom and sides of the pot. Increase the heat to high and bring to a simmer. Reduce the heat to low, cover, and simmer 30 minutes. Remove and discard thyme and bay leaf, then season with the salt and pepper to taste.

4. FOR THE CROUTONS: While the soup simmers, heat the oven to 400 degrees. Arrange the baguette slices in a single layer on a rimmed baking sheet and bake until dry, crisp and golden at the edges, about 10 minutes. Set aside.

5. Adjust an oven rack 6 inches from the broiler element and heat the broiler. Set individual broiler-safe crocks on the baking sheet and fill each with about 1 3/4 cups of the soup. Top each bowl with 1 or 2 baguette slices (do not overlap the slices) and sprinkle evenly with the Gruyere. Broil until the cheese is melted and bubbly around the edges, 3 to 5 minutes. Cool 5 minutes; serve.

Saturday, September 18, 2010

Curried Carrot Soup

My fridge was empty, very, very empty. I was not interested in my go to food, eggs. Too many of them had killed the taste for me. I was uninterested in running to the grocery store -- too crowded on Fridays; it takes the joy out of shopping when I have to fight through the maze of people to get produce.

What could I make? I had carrots, onions, broth, spices. Google saved the day again. Curried carrot soup. Amazing. Simple, easy, fast, AND tasty. Six ingredients total. Probably six ingredients you have on your shelf. Minimal prep, it's a win win.

I caution you on the curry. I used authentic curry straight from the Indian grocery store. It was spicy! Adding salt helps. A BIG dolop of Trader Joe's Whole Fat European Style Yogurt also helped. If you use curry powder from the regular grocery store, it's probably on the mild side and you will be fine.

This soup is great with grilled cheese or quesadillas or toasted french walnut bread.

Monday, September 13, 2010

Peasant Style Pot Bread

I checked out Kneadlessly Simple from the library. I had to wait several weeks because it is an extremely popular book and there were others waiting to get their hands on it too. I HIGHLY recommend the book. You'll want to make every recipe; these breads are enticing and you can practically smell the bread out of the book. I wish this book had a scratch 'n sniff feature. I've limited myself to making one loaf every week to ten days or so because otherwise I run around like a mad woman.

This recipe has a crispier crust than the Almost No Knead bread but I think the flavor of the Almost No Knead is better. Both have moist crumb and are definitely better than what you could buy at your local grocery store.

It's so easy I want to call these ridiculously simple recipes. You probably have all the ingredients in your kitchen. The beauty of these recipes is that you make them work to your schedule and not the other way around. There's time in the fridge which is any where from 3-10 hours. Then the rise at room temperature, any where from 12-18 hours or 18-24 hours; and then the second rise which can be done at either temp for 1.5 to 2.5 hours or the accelerated rise at 1-2 hours, or the extended rise of 4 hours in the fridge. It really works around your schedule, really it does.

My only modification would be to reduce the salt slightly. Some tasters found it slightly salty especially vs. the Almost No Knead Bread.

If you click on the title of this post the recipe is available on A Chow Life, a wonderful blog. She wrote the whole recipe out -- it's rather long -- so I would prefer not to rewrite it.

Tuesday, September 07, 2010

Tomato Curry Frittata

I know, it seems like all I blog about are eggs and bread. It seems to get boring but it doesn't. There are so many different ways to make eggs and it tastes different every time, really. My folks were visiting this weekend and they're kind of a tough crowd. Both like spicy food, deeming anything not spicey, blah. One is vegetarian +. By plus I mean low or no sugar, no fat, no egg yolks, no fruit, no this no that. At times I find these restrictions excruciating. I'm mostly vegetarian and know how to cook vegetarian very well but all these other complexities it makes me throw my hands in the air. Then I came to the grand conclusion that I would do my best. If they want to eat it, great and if not, then they're on their own. After all, my being mostly vegetarian (I eat seafood) doesn't stop my family from serving chicken when I visit. And I eat it, without complaint.

The inspiration for this dish came from my mom, who would use this filling to make omelets. The filling is extremely satisfying, exceptionally savory, and not overwhelmingly spicy. Rather than make individual omelets I decided to make a frittata so I wouldn't have to stand at the stove. It came out pretty well but the bottom burned a little. Not sure why since I made this a few weeks ago without the burning. Even with the burned bottom, it still tasted great. The mom was pleased with the results, and she's an exceptional cook.

Ingredients
- 2 T olive oil
- 6-12 eggs
- 1 1/2 pounds Roma tomatoes
- 1 medium or large onion
- 1 1/2 tsp cumin
- 1/2 tsp mustard seed
- 1/4 tsp chili powder
- chopped cilantro to taste
- 1/8 tsp asafoetida
-1/2 tsp

To make filling, see below. The filling can be made in advance and stored for 3 days in the fridge.

1. While heating 1-2 T olive oil in medium to large skillet over medium heat, roughly chop onion and tomato. Add mustard seeds, cover with lid until the popping sound subsides. Add asafoetida, cumin and chili powder. Let cook for 30 seconds to 1 minute, until fragrant.

2. Add onion and sautee until soft, about 7-10 minutes. Add chopped tomato. Simmer with lid on until tomatoes are really soft and skins come off, about 20 to 30 minutes (passive cooking). You don't really have to watch this too closely. Add salt to taste, approximately 1/2 tsp. Start with 1/4 tsp and increase in 1/4 tsp increments to find your appropriate salt level. If you like tomato chunks then you're done. My mom likes more of a puree so I mashed the tomatoes a bit. Add chopped cilantro to taste. Don't worry if the filling has kick. It will mellow out with the addition of eggs.

At this point you can use the puree to make either omelets or frittatas. For omelets, just beat 2-3 eggs (for 1 serving), add as much tomato filling as you like, beat some more, pour into heated skillet (kind of like an egg pancake), and then cook with a little oil. For omelets, I like having more filling to eggs so I may add as much as a 1/4 to 1/3 cup filling.

For frittata, read below.

3. Preheat oven to 350 degrees.

4. Place oil in 10-inch cast iron skillet, and turn heat to medium. While it's heating, beat together eggs, 2 cups tomato filling (1 cup for 5-6 egg frittata, 2 cups for 10-12 egg frittata), salt and pepper. When oil is hot, pour eggs into skillet and turn heat to medium low. Cook undisturbed for about 10 minutes, or until the bottom of the frittata is firm. FYI, I made a 10 egg omelet and it really filled up the 10-inch skillet.

5. Transfer the skillet to the oven. Bake for 20 minutes. Then check every 5-10 minutes or so, just until the top of the frittata is no longer runny. Garnish with more cilantro and serve hot or at room temperature. Total bake time is about 30 minutes.

Thursday, September 02, 2010

Best Quick Tomato Sauce

I've been feeling off for the last few months which mainly presents itself as lack of appetite and no cravings. I can go almost the whole day without feeling hunger. Not surprisingly, at the end of the day, pow, I'm starving. Those that know me well, know this is shocking. No appetite. No cravings. This is not a Nirmala they know. Needless to say, these days, when I crave something, I absolutely have to have it. For the past several weeks, I've had ice cream for lunch about 3 times a week. I indulge in high calorie treats without worry. I was slender to begin with; more slender now. I need the calories.

Last night, I wanted pasta with this quick tomato sauce. I don't know why. With all the tomatoes available, why would I make tomato sauce created from canned tomatoes?! Well, this tomato sauce is AMAZING. It's fresh, aromatic, buttery and simply divine. It's also low effort and done in about the time it takes to boil water and get the pasta cooked. It's perfect every time. Canned tomatoes offer consistency especially the Muir Glen and Tuttorosso brands. According to Cook's Illustrated, who created this recipe, these brands heat their tomatoes at lower temperatures to preserve the enzymes that can make a tomato taste fresh!

Anyway, last night the hunger really took over. In fact, I had to make everything in this recipe twice though I've made this recipe several times. First, I decided to try using crushed fire roasted tomatoes. BIG mistake. The smokey taste overwhelmed the whole dish. You know when you crave something you crave it exactly how you imagine it. This smokey version was not even close to what I imagined. It was the horrible very distant relative. I tossed it. I rarely toss food. I despise food waste. Then I over salted the pasta water; the pasta had to be tossed too. An hour later, everything was perfect. I dove right in and relished every single scrumptious bite, the sauce cascading into the little conch shells. It was magnificent. I had this for brunch today. I recommend this recipe regardless of whether tomatoes are in season.

My only comment about this recipe is that it says that the recipe makes about 3 cups of sauce, enough for 1 lb of pasta. I find that it's really only good for about 1/2 pound. My preference is more sauce than pasta so depending on your taste, you'll figure out what you need.

Time: 20 minutes

Ingredients
- 2 T unsalted butter
- 1/4 grated onion (using large holes on box grater -- be prepared for eye watering experience)
- 1/4 tsp dried oregano
- 2 medium garlic cloves, minced or pressed
- 1 (28 ounce) can crushed tomatoes (I couldn't find crushed; I used diced then pureed in food processor; hand held blender would work well too)
- 1/4 tsp sugar
- 2 T coarsely chopped fresh basil leaves
- 1 T extra virgin olive oil

Preparation
1. Heat butter in medium saucepan over medium heat until melted. Add onion, oregano, and 1/2 tsp salt; cook, stirring occasionally, until liquid has evaporated and onion is golden brown, about 5 minutes.

2. Add garlic and cook until fragrant, about 30 seconds. Stir in tomatoes and sugar; increase heat to high and bring to simmer. Lower heat to medium-low and simmer until thickened slightly, about 10 minutes. Off heat, stir in basil and oil; season with salt and pepper. Serve.

Don't forget the Parmesan on top!

Sunday, August 29, 2010

Cinnamon Raisin Bread

No doubt about it, I'm on a bread kick. I've been itching to bake bread. The unusual 90 degree weather, which I thoroughly enjoyed as did my tomatoes and squash, precluded me from turning on the oven. It was hot enough without the oven on, and I was not going to contribute more heat on a Spare the Air day. On the first cool day, I was ready to dive in again.

While I wait for Kneadlessy Simple to become available at the library, I have to make due with recipes from my existing cookbooks. Sigh. What to make?! So many choices not enough running to justify carb over load. I need to be judicious. I eat a lot of crusty cranberry nut bread. It's versatile, being good as both as a sweet and savory. I love it with both butter or peanut butter and sardines, not together, of course! Yummy.

I settled on Cinnamon Raisin which is not exactly the crusty cranberry nut bread but a great bread too. I found this recipe on Life's a batch and then you bake which she found on Allrecipes.com and modified. Here's my recipe so that you don't have to find two sources, like I did!

This baby rose like it was nobody's business. When I rolled it up, the dough filled out so I wasn't sure what it would be like waiting for it to "double" in 45 minutes. Perhaps I didn't needed to punch it out more?

This bread was moist and while not super sweet, I will omit the honey next time around. Friends loved it! Great with butter and a cup of tea in the morning!

Makes 1 large loaf

Ingredients
- 3/4 c warm water
- 2 1/4 tsp dry active yeast
- 3/4 c warm milk
- 4 T honey
- 2 T vegetable oil
- 1 tsp salt
- 1 1/2 c all purpose flour
- 2 c white whole wheat flour (the original called for whole wheat)
- 1 c raisins (the original recipe calls for 1/3 c raisins which I followed and found that there was 1 raisin every other slice)

Filling
- 2-3 T butter, melted
- 2 tsp cinnamon
- 1/4 c brown sugar

Preparation
1.
Place the warm water and honey in large bowl. Sprinkle in yeast, stir until dissolved and let stand until creamy.

2. Add the warm milk, salt, and 1 1/2 cups all-purpose flour; blend well. Stir in white whole wheat flour and mix well.


3. Turn the dough out onto a lightly floured surface and knead until smooth and elastic, about 6 to 8 minutes. Note: if you use white whole wheat or whole wheat, the surface may still be rough; this is normal!

4. Place in a lightly oiled bowl and turn the dough to grease the top. Cover the bowl with a damp cloth or plastic wrap and let rise in a warm place until doubled in volume, about 1 hour.


5. Lightly grease a 9x5 inch loaf pan. Punch the dough down and turn onto a lightly floured surface.

6. Roll out dough until about 1/2-1" thickness and spread melted butter, then top with brown sugar and cinnamon. Roll up the dough and tuck in the ends. Roll tightly so that you get more of a cinnamon swirl when you slice into your bread. Form into a loaf and place into the prepared pan.
Cover and let rise in a warm place until doubled in size, about 45 minutes. Preheat oven to 375 degrees F.

7. Bake at 375 degrees for 35 minutes or until top is golden brown and the bottom of the loaf sounds hollow when tapped. Remove loaf from the pan and cool on a wire rack.

Wednesday, August 25, 2010

Eggs, They're What's for Dinner.....and Lunch, Brunch

Eggs. You got to love them. Inexpensive, they make for quick meals and tasty meals. A few weeks ago I wrote about a kale frittata. It was great but on the thin side. I like thicker "meaty" frittatas. At a friend's suggestion, I decided to try my 10 inch cast iron skillet (as opposed to the 12 inch All Clad skillet), and it was definitely thicker though it took longer to cook, a trade off.

I followed the recipe I previous wrote about but used a 10 inch cast iron skillet. I also decided to spice up the kale. This sized skillet can hold up to 12 eggs (really full) plus filling. 10 eggs is probably better. You'll probably need 20 minutes in the oven but check after 10 minutes. It definitely made for a thicker hunkier slice which was thoroughly enjoyed by friends.

For about 2 cups of curried kale, use the following recipe:

Ingredients
- 1 bunch of kale
- 1 medium onion, chopped
- 1/2 tsp garam masala
- 1/2 tsp mustard seed
- 1/2 freshly ground cumin
- 1 tbs oil
- salt to taste

Heat oil over medium heat in a large skillet, add mustard seed and cover skillet with lid until you the popping finishes. Add onion, saute for 7 minutes until lightly golden. Add cumin and garam masala, and saute for another minute. Add kale, and cook until desired tenderness is reached. Add salt.

Sunday, August 22, 2010

Lemonade with Mint Syrup

Excuse the bread crumbs, please. They are from the bread below, and before I had a chance to clean up the counter, I was on to my next picture...

By the time 8-8:30 AM rolls around, I've usually meditated for 1 hour and run 3 to 5 miles. FYI, the meditation occurs almost every day but the running is a 3 day a week activity. I don't run every day! It's hard enough 3 times a week. Running is what allows me to eat bread every day so it's a must do activity.

Anyway, by the time I get home, I'm thirsty and water is not what I crave. Truthfully, some times I crave coke. I know, so BAD but you can't help what you crave sometimes. Fortunately I don't ever have any of it at home or I would be in trouble. Instead, I try to crave lemonade, and now with a minty twist, it's all I can think about during my run.

I despise food waste regardless of how little I may spend on a particular item. I bought mint for a recipe, and of course had a huge amount to use up. What to do? I decided to make mint syrup but then what? Mint juleps, mohitos, etc. At 8:30 AM it's probably not appropriate. Why not lemonade with a little mint syrup?! It's really refreshing on a hot or cool day, and really hits the spot without all the caffeine and high fructose sugar. Would also be fabulous with lime or sparkling water.

On my way in to the house, I grab a few lemons from my tree. Or on good days, I grab lemon juice cubes from the freezer. If you want to make a single serving, use 1 lemon juice cube (approx. 2 tbs), 1 cup of water, and 2 tbs mint syrup, and 1 tsp of sugar or to taste.

Approximately 4-6 serving

Ingredients
- 3/4 c lemon juice
- 3/4 c mint syrup (see recipe below)
- 6 cups water
- 1/4 cup sugar or to taste

Preparation
Place ingredients together in a pitcher, stir and serve with ice.

Mint Syrup
- 2 c water
- 2 c sugar
- 1 1/2 to 2 c chopped mint

Preparation
In a small sauce pan, place water, sugar and mint. Cook over medium heat, stirring until sugar dissolves, and let simmer for 5 minutes. Take off heat, and let steep over night. Strain mint, and store in air tight container in the fridge for approximately 3 weeks.

Tuesday, August 17, 2010

Almost No Knead Bread

Raise your hand if you love bread. My hand is raised. Raise your hand if you're tired of paying $$ for crusty bread. My hand is raised. I buy crusty bread on a weekly basis, probably about $4 for 12 to 16 ounces. The breads I choose are on the less expensive side too. I could easily spend $5 or $6 loaf.

Why not make my own bread, you may think? Who doesn't love the smell of freshly made bread. It's wonderful. What stops me? Not kneading. I find kneading therapeutic. I'm, however, NOT a fan of the first and second rise. Who has time? I guess there is time, sometimes, BUT then I feel stuck at home or if I'm out and about then I feel like I have to rush home to complete the requisite steps. I don't like feeling controlled by bread or bread making.

Last year, may be two years ago, I saw Mark Bittman's No Knead Bread in the New York Times A recipe in which I could be away for hours at a time and still make bread. A win-win. I worked backwards from when I wanted the bread to pop out of the oven and put together the dough. 20 hours later, I had a thin burnt loaf. The parts that weren't burnt were tasty but I was not impressed enough to try again until today.

As you may recall, I spent a ridiculous sum on a Cook's Illustrated magazine a few months ago. To make it pay off, I've slowly but surely going through the vegetarian recipes, one of which is this Almost No Knead Bread, which improves up on the Bittman recipe. The recipe was without problems but I was not. After picking up all the ingredients and making the dough, I realized within 30 minutes that I had made a critical error, I used active dry and NOT instant yeast. A quick on line search suggested my bread would not succeed. Was I irritated with myself? You better believe it. 2 hours later after running around to find instant yeast (stores should sell it larger quantities than those dinky packets!) I had my precious dough.

18 hours later at 8 AM I kneaded it. 2 hours later I popped my baby into the oven. 50 minutes later it came out, round gorgeous perfection if I do say so myself. Now I'm waiting for it to cool down so that I can eat it, another 2 hours. Will report back later on flavor.

Are there are almost no knead recipes that incorporate other types of flour and/or ingredients like nuts, olives etc.

Ingredients
-3 cups unbleached all-purpose flour, plus extra for work surface
-1/4 tsp INSTANT yeast
-1 1/2 tsp table salt
-3/4 c plus 2 T water, at room temp.
-1/4 c plus 2 T mild-flavored lager (Budweiser was recommended; stronger tasting beers will make the bread taste like beer)
-1 T white vinegar

1. Whisk flour, yeast and salt in large bowl. Add water, beer and vinegar. Using rubber spatula, fold mixture, scraping up dry flour from bottom of bowl until shaggy ball forms. Cover bowl with plastic wrap and let sit at room temp for 8 to 18 hours (I waited 18).

2. Lay 18 by 12-inch sheet of parchment inside 10-inch skillet and spray with nonstick cooking spray. Transfer dough to lightly floured work surface and knead 10 to 15 times. Shape dough into ball by pulling edges into middle. Transfer dough, seam side down, to parchment-lined skillet and spray surface of dough with nonstick cooking spray. cover loosely with plastic wrap and let rise at room temp until dough has doubled in size and does not readily spring back when poked with finger, about 2 hours.

3. About 30 minutes before baking, adjust oven rack to lowest position, place 6 to 8 quart heavy bottomed Dutch oven (with lid) on rack, and heat oven to 500 degrees. Lightly flour top of dough, and using sharp knife, make one 6-inch long, 1/2-inch deep slit a long top of dough. Carefully remove pot from oven and remove lid. Pick up dough by lifting parchment overhang and lower into pot. (Let excess parchment hang over pot edge.) Cover pot and place in oven. Reduce oven temp to 425 degrees and bake covered for 30 minutes. Remove lid and continue to bake until loaf is deep brown and instant-read thermometer inserted into center registers 210 degrees (I don't have this, so I didn't do this), 20 to 30 minutes longer. Carefully remove bread from pot; transfer to wire rack and cool to room temperature, about 2 hours.

4. To store, wrap bread tightly in plastic wrap, then in foil; freeze for up to 1 month.

5. To serve, remove foil and plastic wrap, rewrap with foil, and defrost at room temp for 2 hours. Adjust oven rack to middle position and heat oven to 375 degrees. Back foil-wrapped bread on baking sheet until heated through, about 15 minutes. Serve.