skip to main |
skip to sidebar
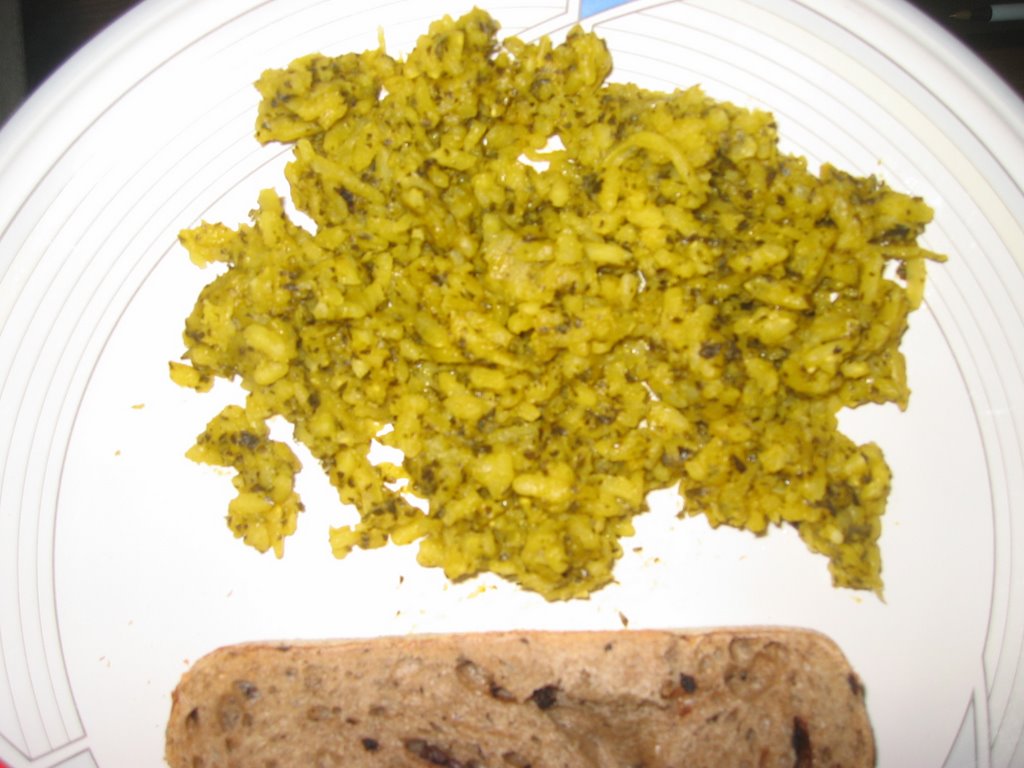
 I love the taste of black-eyed peas but rarely ever use or eat them until I found this quick and easy recipe from New Recipes from Moosewood Restaurant. This dish is packed with flavor and stands well all on it's own. I ate it with French bread, which was fine, but could really use something heartier like whole wheat or rye. Using canned beans will save you about 15 minutes.
Makes 4 servings
Cooking Time: 25 minutes
Ingredients
-4 cups canned black-eyed peas, drained and saving the black-eye pea juice
-1 T butter or vegetable oil
-2 garlic cloves, minced or pressed
-1 cup chopped onions
-1 cup chopped fresh beet greens, collards, chard or spinach (optional, but definitely use!)
-1/4 c Tamari soy sauce
-1/3 c molasses
-1 tsp dried mustard or a good quality prepared mustard
Preparation
Saute garlic and onions in the butter or oil until the onions are just translucent. If you choose to add the greens, mix them into the onions and continue to saute until the greens wilt. Mix together soy sauce, molasses, and mustard and set aside. Drain the black-eyed Peas, saving a cup of liquid.
Add drained peas to sauteed onion mixture and the molasses-soy sauce. Cover and simmer on very low heat for 10 to 15 minutes, stirring frequently. During this simmer there is some danger of sticking or scorching, so watch closely. I, for some reason, never had this problem. Maybe because I used a non-stick pan?
Notes
I think it's really important to use a high quality soy sauce because it is one of the main flavoring agents for this dish, so don' t use the cheap stuff that is high fructose corn syrup based. Also, I really chopped up the spinach. I think the recipe called for bigger pieces, hence watching for the wilting action, but I personally liked it really chopped up.
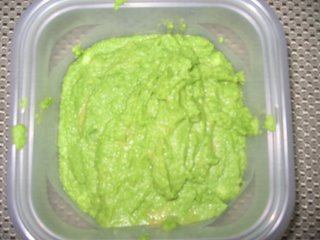 It looks like guacamole but it isn't! I wanted to make this dish for months but without a food processor I couldn't. So I was super excited about this dish because it is bright green, healthy, and different than other dips, but I was disappointed. Yes, the picture is sorely lacking. The dip was definitely edible, particularly with a good cracker, but even with a whole head of roasted garlic, it still had that pea taste. This dish tastes better chilled than when it is warm. Perhaps the next time, I need to add even more garlic than I did.
This recipe comes from Eating for IBS.
Makes 4 servings
Cooking Time: 15 minutes
Ingredients
-1 large head garlic, unpeeled
-1 tsp olive oil
-1 tsp white vinegar or white wine vinegar
-1/8 tsp salt
-3 T water
-10 oz- package frozen green peas, about 2 cups
Bread, preferably baguettes, halved horizontally, toasted
Preparation
Preheat oven to 400 degrees F. Remove outer paper skins from garlic head, but do not separate cloves or peel. Wrap tightly in foil and bake until soft, about 45 minutes. Cool. Squeeze cloves out of garlic head and into a food processor. Add remaining ingredients and puree until very smooth, scraping down sides with a rubber spatula as necessary. Serve dip with toasted baguettes.
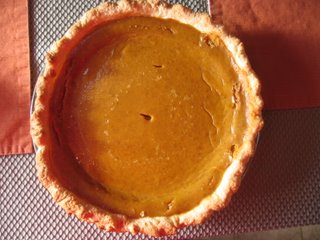 It was my mom's birthday on Friday, so I decided to surprise her with pumpkin pie, her favorite. So I searched online for a good filling, since I already have a great crust recipe. The recipe I found online, was not as nearly as original as I thought. I won't out the person but the pie filling recipe that I found, except for 1 ingredient, was identical to the recipe on the Libby's 100% Pure Pumpkin can. The recipe on the can is excellent. It is not so sweet that it masks the taste of pumpkin and the spice ratio is just right. The only thing I did differently was that I used fresh ginger to ground ginger. In fact, I probably could have added a bit more fresh ginger than what I added.
My mom, who has really high cooking standards, said that my pie was better than even hers, which is quite the compliment.
Makes 8 servings
Cooking Time: 10 minutes
Ingredients
-3/4 c sugar
-1/2 tsp salt
-1 tsp ground cinnamon
-1/2 tsp fresh ginger
-1/4 tsp ground cloves
-2 large eggs
-1 can (15 oz.) Pumpkin
-1 can (12 fl. oz.) evaporated milk
-1 pie crust recipe
Preparation
Mix sugar, salt, cinnamon, ginger, and cloves in small bowl. Beat eggs in large bowl. Stir in pumpkin and sugar-spice mixture. Gradually stir in evaporated milk. Pour into pie shell. Bake in pre-heated 425 degree oven for 15 minutes. Reduce temp. to 350 F and bake 40-50 minutes or until knife inserted near center comes out clean. Cool on wire rack for 2 hours. Serve immediately or refrigerate.
I baked the pie on the second shelf from the bottom (similar to how I baked the blueberry pie), but never moved it to the top shelf. After the 15 minutes, I covered the edge of the pie crust with foil to prevent further browning.
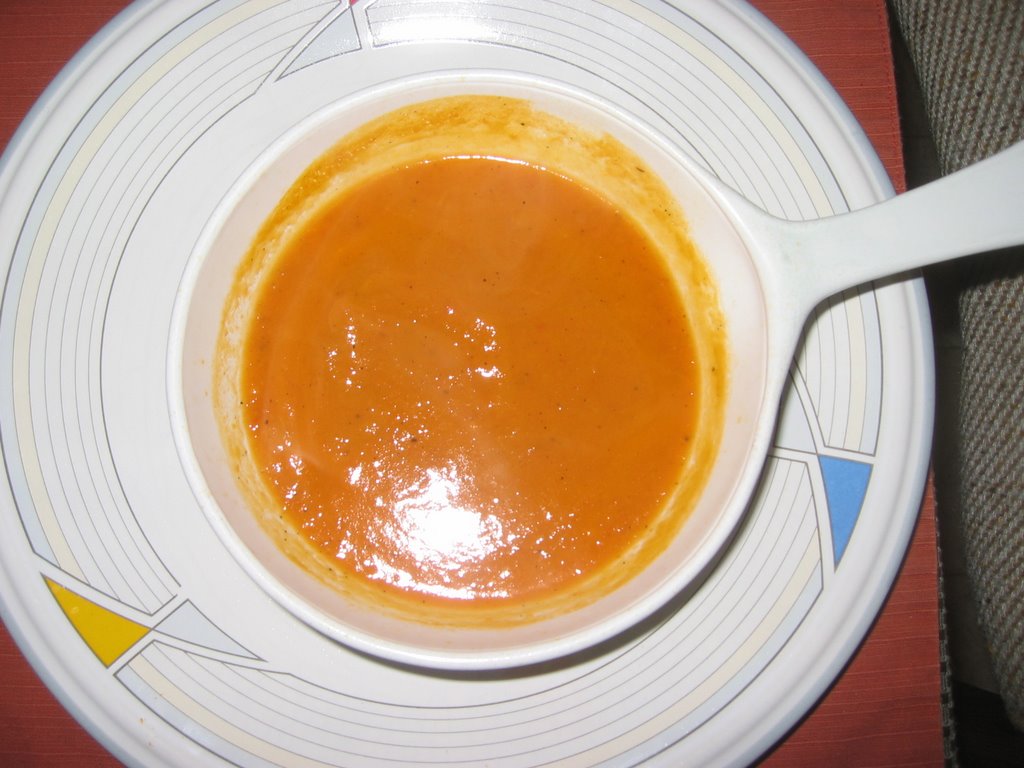
 Sam, my good college friend, is a really great cook. When we lived in the same building, I definitely enjoyed the meals she shared with me. In our senior year of college, some us decided to get together to cook Thanksgiving dinner. It was so impressive to see Sam make rolls from scratch, without the aid of a food processor or mixer. She is kitchen goddess, eats healthy, experiments, and is not afraid of butter. My kind of cook. We were talking and she shared with me this great soup recipe, perfect for a cold winter's night. It is so simple and delicious. The soup was awesome and during this process, I discovered that roasted sweet potatoes are absolutely divine. Roasted sweet potatoes are what healthy candy should be. They taste amazing and I'm going to include them in my diet more often.Makes 4 servingsCooking Time: 30 minutes (oven time), 20 minutes stoveIngredients- 2 large carrots, peeled and cut into 2-inch pieces- 3/4 lb sweet potato, peeled and cut into 2-inch pieces- 1 small onion, cut into 8 wedges- 1 T olive oil- 4 cups water- 1 tsp finely grated fresh ginger- 3/4 tsp salt- 1/4 tsp freshly ground black pepperPreparationPreheat oven to 400 degree.Toss carrots, sweet potato, and onion in olive oil and place on cookie sheet. Bake for 30 minutes or until vegetables are tender and just beginning to brown, stirring after 15 minutes.Place vegetables, water, and ginger in large pot over medium-high heat; bring to a boil. Cover, reduce heat, and simmer for 20 minutes.Use immersion blender to puree soup, otherwise use a blender.Sam's SuggestionsThe original recipe called for stock but Sam omitted it, as did I, and used water instead, making it much healthier by significantly reducing the salt content. Without the stock, this recipe has more than enough flavor probably because the vegetables cook in the water for a bit. I ended up using 3/4 tsp salt, using 1/4 tsp increments to get it right. You may find that you need more or less. I was a bit shocked to find that the original recipe called for 1/4 tsp salt. I generally find that most recipes that use stock don't need additional salt.She also omitted the cranberry relish, which I did as well. It tastes darn good without it and reduces another cooking step, which is always a winner for me!I bet this soup would go so well with corn muffins.
Thanks for sharing.
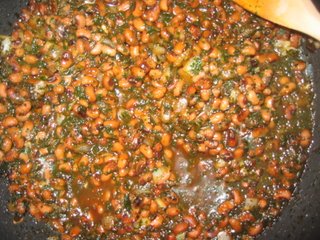
 We've wanted to make this for some time and now that beets are in season, we could. It was also a great way to use up the kale that came in our veggie box from Capay Farms. The recipe calls for the red beets but we used golden ones. I was really looking forward to a jewel colored risotto especially posting a picture on the blog but in the end I was glad that the store did not have red beets because they stain terribly. This delicious recipe comes from Deborah Madison's Vegetarian Cooking for Everyone.
As much as I love risotto, if you work, it's definitely a weekend recipe because of the time involved to chop up the veggies and cook every thing. Even with a food processor to take care of the chopping, etc. it probably took over an hour. I was so glad to have a food processor on hand -- it grated the beets and finely chopped the kale in seconds. Crack open a bottle of wine and enjoy while cooking, it makes the time pass more pleasantly if you're cooking alone.
Makes 4 Servings
Ingredients
-5 1/2 to 6 1/2 cups stock
-3 T butter or mixture of butter and olive oil
-1/2 cup finely diced onion
-1 1/2 c Arborio rice
-1/2 c dry white wine
-2 T chopped parsley
-2 T chopped basil or 1 T dried
-2 to 3 medium beets, peeled and grated, about 2 c
-2 to 3 cups greens -- beet, chard, kale, or spinach -- stems removed, finely chopped
-salt and fresh milled pepper
-Grated zest and juice of 1 lemon
-1/2 c freshly grated Parmesan
Preparation
Simmer the stock on the stove. Heat the butter in a wide pot, add the onion, and cook over medium heat for 3 minutes, stirring often. Add the rice, stir to coat it well, and cook for 1 minute. Add the wine and simmer until it's absorbed, then stir in half the parsley, the basil, grated beets, and the chard or kale. Add 2 cups stock, cover, and cook at a lively simmer until the stock is absorbed. Begin adding the remaining stock in 1/2 cup increments, stirring constantly until each addition is absorbed before adding the next. When you have 1 cup left of stock, add the beet greens or spinach. Taste for salt, season with pepper, then stir in the lemon zest and juice to taste. Serve dusted with the cheese and remaining parsley.
Notes:
I didn't have parsley so I left it out. The lemon, I think, is an important ingredient in this recipe. It tempers the root-y taste of beets and adds freshness.
There are some really great quality hummus' you can buy in your local grocery store but nothing beats making it yourself. It only takes a few minutes (with either a food processor or hand held) and the results are so much better than even the best brand. The recipe I found comes from none other than New Recipes from Moosewood Restaurant.
Makes 3 to 4 servings
Time: 5 minutes
Ingredients
-1 16 oz can of garbanzo beans (drained, and saving the liquid)
-1/4 cup tahini
-1/4 to 1/2 cup garbanzo liquid
-1 to 2 cloves of garlic
-2 to 3 T of fresh lemon juice
-1/8 tsp cayenne (optional)
-1/2 tsp salt -chopped parsley
In a food processor, process garbanzo beans, ¼ cup garbanzo liquid, and lemon juice until it's roughly chopped. Then add tahini, garlic, cayenne, and salt and process until rough and creamy. You don't want to over do the processing of the hummus. Add reserve liquid to get the kind of consistency you want. Stir in chopped parsley.Personally, all I needed was the 1/4 cup, especially if you go with an additional tablespoon of lemon. And I've tried the recipe with 2 T lemon juice and think it tastes better with 3. I like the freshness lemon brings. While the cayenne is optional, I also recommend it because it gives garbanzo beans a good quality zing.I adore the results of this recipe.
For the blueberry pie, I used frozen blueberries. I used 1 16 oz. bag of Trader Joe's Northwest blueberries which are fat. 16 0z. is approximately 3 1/4 cups of blueberries. For the remainder (3/4), I used Whole Foods 365 brand wild blueberries. I did not defrost, put them in frozen. I think the fat blueberries work well because they fill out the pie and hold their shape quite well.
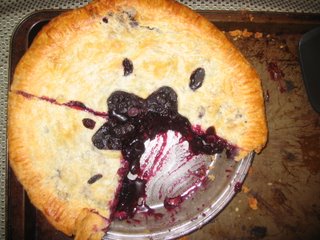 I love pie, especially berry pie. I know, I over use the word 'love'. I use 'love' to describe all the foods and recipes I write about on this blog. But it's completely true. I love food and I absolutely love eating.
Over the holidays, I received the ultimate gift that will bring my cooking to the next level, I think. I now own the Cuisinart Custom Pro 11 and I'm loving it. I could never bring myself to make a pie crust from scratch because I just didn't know how to do it, but with the Cuisinart, it was so easy.
I received this amazing gift and decided that I need to make pie for the people that gifted it to me a week later for our New Year's eve celebration. A friend shared an all butter pie crust recipe and I did extensive research on the pie filling. After reading about 80 reviews or so, I made modifications accordingly. Below, I share the recipe for just the filling because everyone, as I've discovered, has their favorite crust recipe. The recipe was submitted by Beth on allrecipes.com.
Having never made a pie crust from scratch before, I loved the recipe that I used. It was simple, easy, and came with specific instructions on how many pulses should be used at each step. Of course I was anxious the whole time, saying "I have concerns," whenever my curious and supportive cooking buddy entered the kitchen to see how things were going. It is from Cook's Illustrated and is all butter (no shortening). It flaked absolutely beautifully (even the bottom crust!). In fact, the whole pie came out fabulously, much to my happiness and complete surprise! I'm definitely making pie again. If you're interested in the pie crust recipe, I will share, along with tips.
Serves 8
Cooking Time: As a beginner, way too long, but so worth it!
Ingredients
-3/4 c white sugar
-4 T cornstarch
-1/4 tsp salt
-1/2 tsp ground cinnamon
-1 T fresh lemon juice
-4 c blueberries
-1 recipe for 9-inch double crust pie
Preparation
Stir all dry ingredients together (sugar, cornstarch, salt, and cinnamon). Add blueberries and lemon juice, and toss gently until blueberries are lightly dusted with dry ingredients. Scoop out blueberries into your pie shell. Evenly sprinkle top of blueberries with excess dry ingredients. Cover with pie crust. Make slits on top to allow moisture to escape.
Every oven is different but for me, I baked the pie in a pre-heated oven at 375 degree for about 60 minutes. At this point, the pie edges will be starting to brown, so cover crust edges with foil, and bake for an additional 15 minutes or so until top is brown. Remove pie and let cool for an hour or two to help the filling solidify a bit.
A lot of recipes call for a 425 oven which I think is way too hot, and the pie crust will brown before the pie has a chance to cook through. I think it's better to cook at a lower heat for a longer period of time. At 30 minutes, my pie was still pale, which was better than it being brown at 25 minutes!
My oven has 4 slots where the racks can fit. I was debating between the 2nd and 3rd rack from the top. I thought the 2nd shelf was a bit to close to the burners while the 3rd one was too far. So I turned a cookie sheet upside down and placed it on the 3rd shelf, and placed the pie on top of that. The cookie sheet was in the oven while it was pre-heating. Pizza tiles would also accomplish the same thing.
 I love the taste of black-eyed peas but rarely ever use or eat them until I found this quick and easy recipe from New Recipes from Moosewood Restaurant. This dish is packed with flavor and stands well all on it's own. I ate it with French bread, which was fine, but could really use something heartier like whole wheat or rye. Using canned beans will save you about 15 minutes.